
POST PRODUCTION
Exporting & Uploading
See Pre-Production.
NNN EDITING GUIDELINEs
Please follow these steps when editing to ensure that all of the stories are uploaded correctly and in the same format. If you have any questions, let the news directors or producers know.
Adobe Premiere Pro
**MAKE SURE TO SAVE EVERYTHING TO THE ONE FOLDER, STAY ORGANIZED, DO NOT MOVE FILES, BECAUSE PREMIERE GETS CONFUSED**
New project: yearmonthdate (150404) – STORY TOPIC – PKG or – VO or -SOT
Save to external hard drive
Ctrl N (new sequence)
AVCHD -> 1080i -> (60)
Save with same name
Import clips
A-roll: Quotes
B-roll: Reporter Voice-Over
Packages: 1:30
VOSOT (VoiceOver/Sound on Tape): 00:40 (:30 second b-roll, :10 quote)
Ctrl G – Increase or decrease gain (Don’t want it in the red zone). -12 db for audio, -6 B-roll
Render (Clip – Render – In and Out)
Ctrl M
H.264 (format)
HD 1080i 29.97 (preset)
Pick Folder
Export
VOSOT – Export VO and SOT separately
Put into Autocue on desktop (media, media49)
Make sure script is emailed to producer for the week
Website
If you need a login, you can email your superior who should email v-dewani@northwestern.edu.
To login, go to: https://nnn.medill.northwestern.edu/wp-admin
Enter the username and password you received in your email. If you’re creating a show post, hit Posts > Add New. Following the formatting tips of previously posts. Add a title, a category and paste the URL of the video into the visual area, not the text.
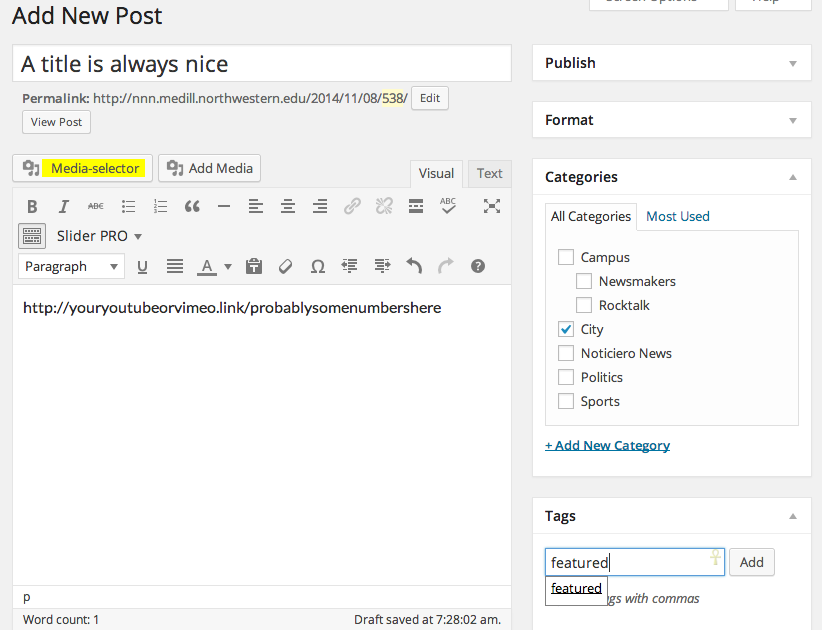
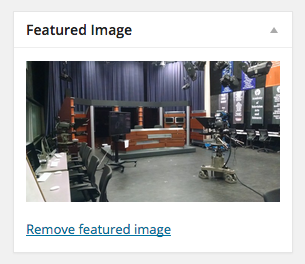
Be sure to add a featured image. That’s below Publish, Format, Categories, Tags. Also, add the featured tag if you want your post to be at the top of the front page on the carousel.
Naming
Each news report should be named Northwestern News Report (MM/DD/YY)
Northwestern News Network is the umbrella network for everything. Think of it like CNN. Ha. Hahahaha.
SportsNight is one word, with capitalization.
PRODUCTION
HELP
Medill IT Support: 847-467-7900
Call them. Especially about printing.
Graphics
Prepare graphics, put them in order in GenCG, advance during the show.
The technical crew is usually responsible for making graphics in Photoshop long before the show begins, but this is sometimes (read: usually) done by a producer. They go on the graphics computer.
If you’re making graphics, make sure you’re using images that aren’t copyrighted. If you’re making credits, you can find crew members’ names here.
After you’re done in Photoshop, export as a PNG (Save As). Keep all layers.
Graphics for NNN shows should be located in Desktop > compxcompx > My Docs > NNN Graphics > PNGS for show. You can delete old graphics from past shows if they’re in there. You can also drop random graphics anywhere but that’s not as organized, is it?
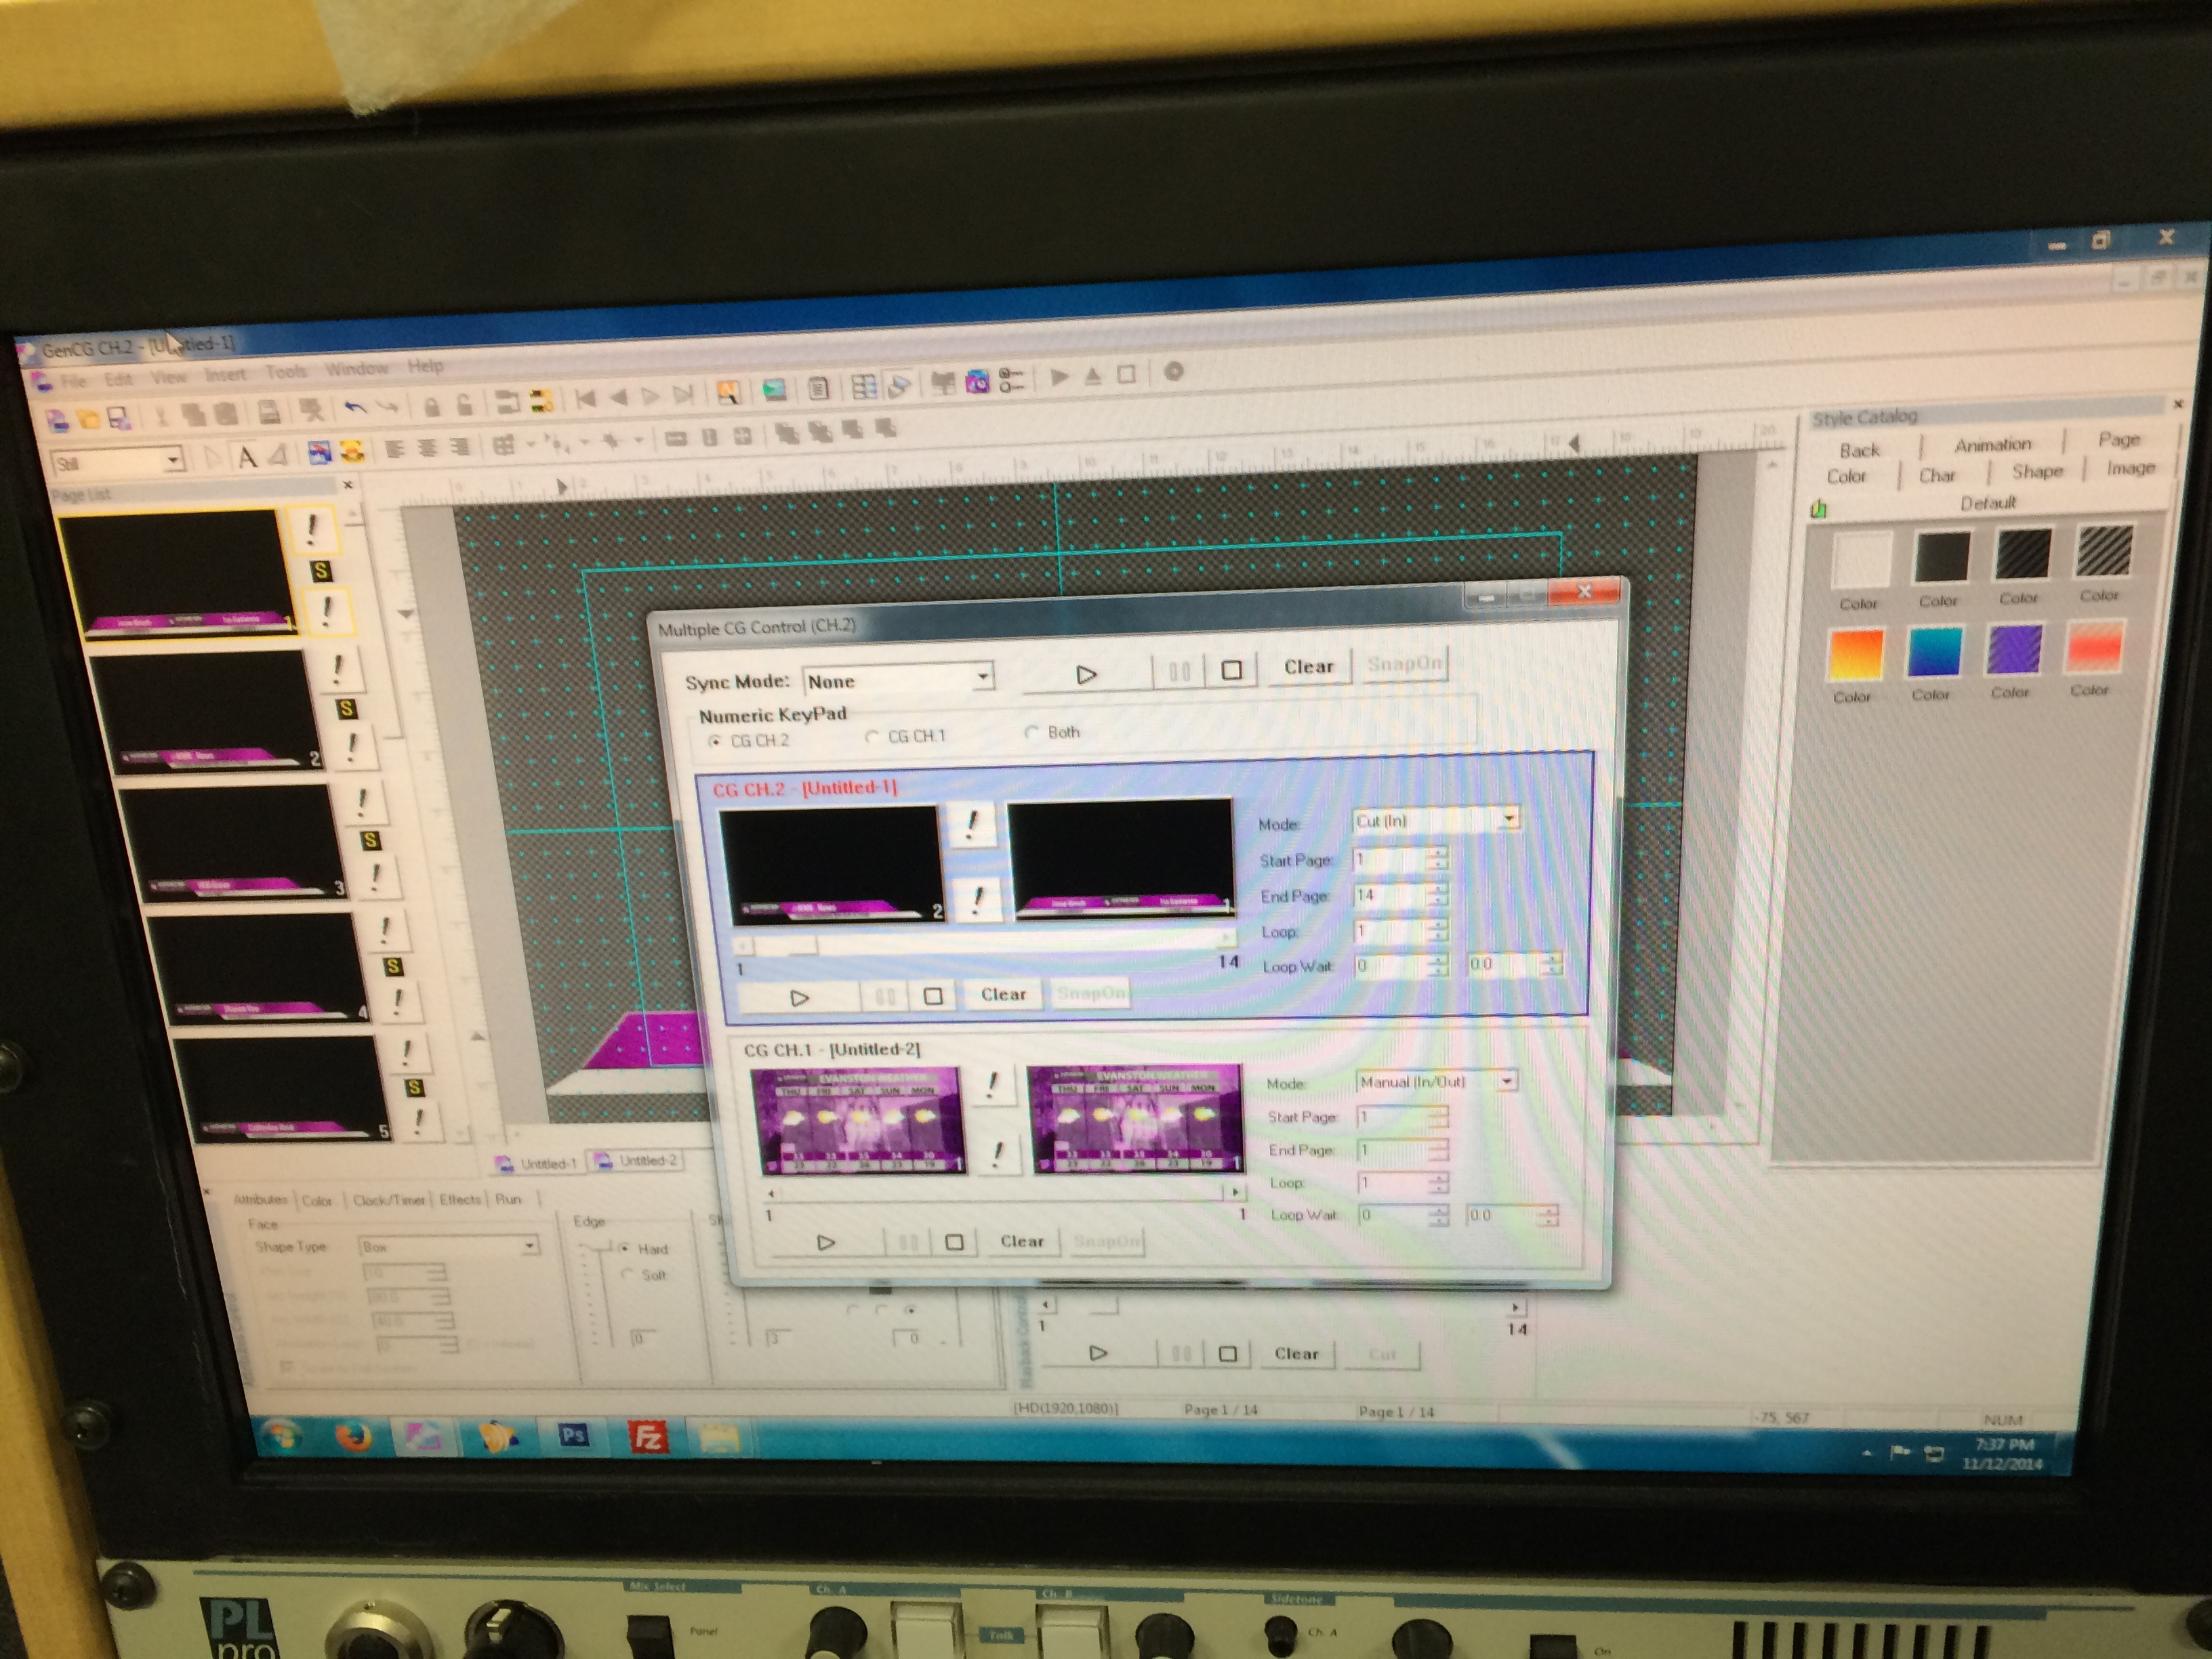
GenCG is the only program we use currently to display graphics. When you launch the program, open both channels.
If the show needs Double Boxes, that goes in CMPX1. Everything else (lower thirds, OTS, etc) goes in COMPX2. Sometimes people switch these. We don’t love them as much, but nothing will break.
To add a graphic, hit Insert image (control P). If all else fails, click randomly.
Hit play twice to advance. BUT…
We have a fancier way of doing things now. Go to Tools > Multiple CG Control. Make sure Cut In is selected.
Now you can press the stop button and then clear to begin again. You hit play to advance.

Lighting
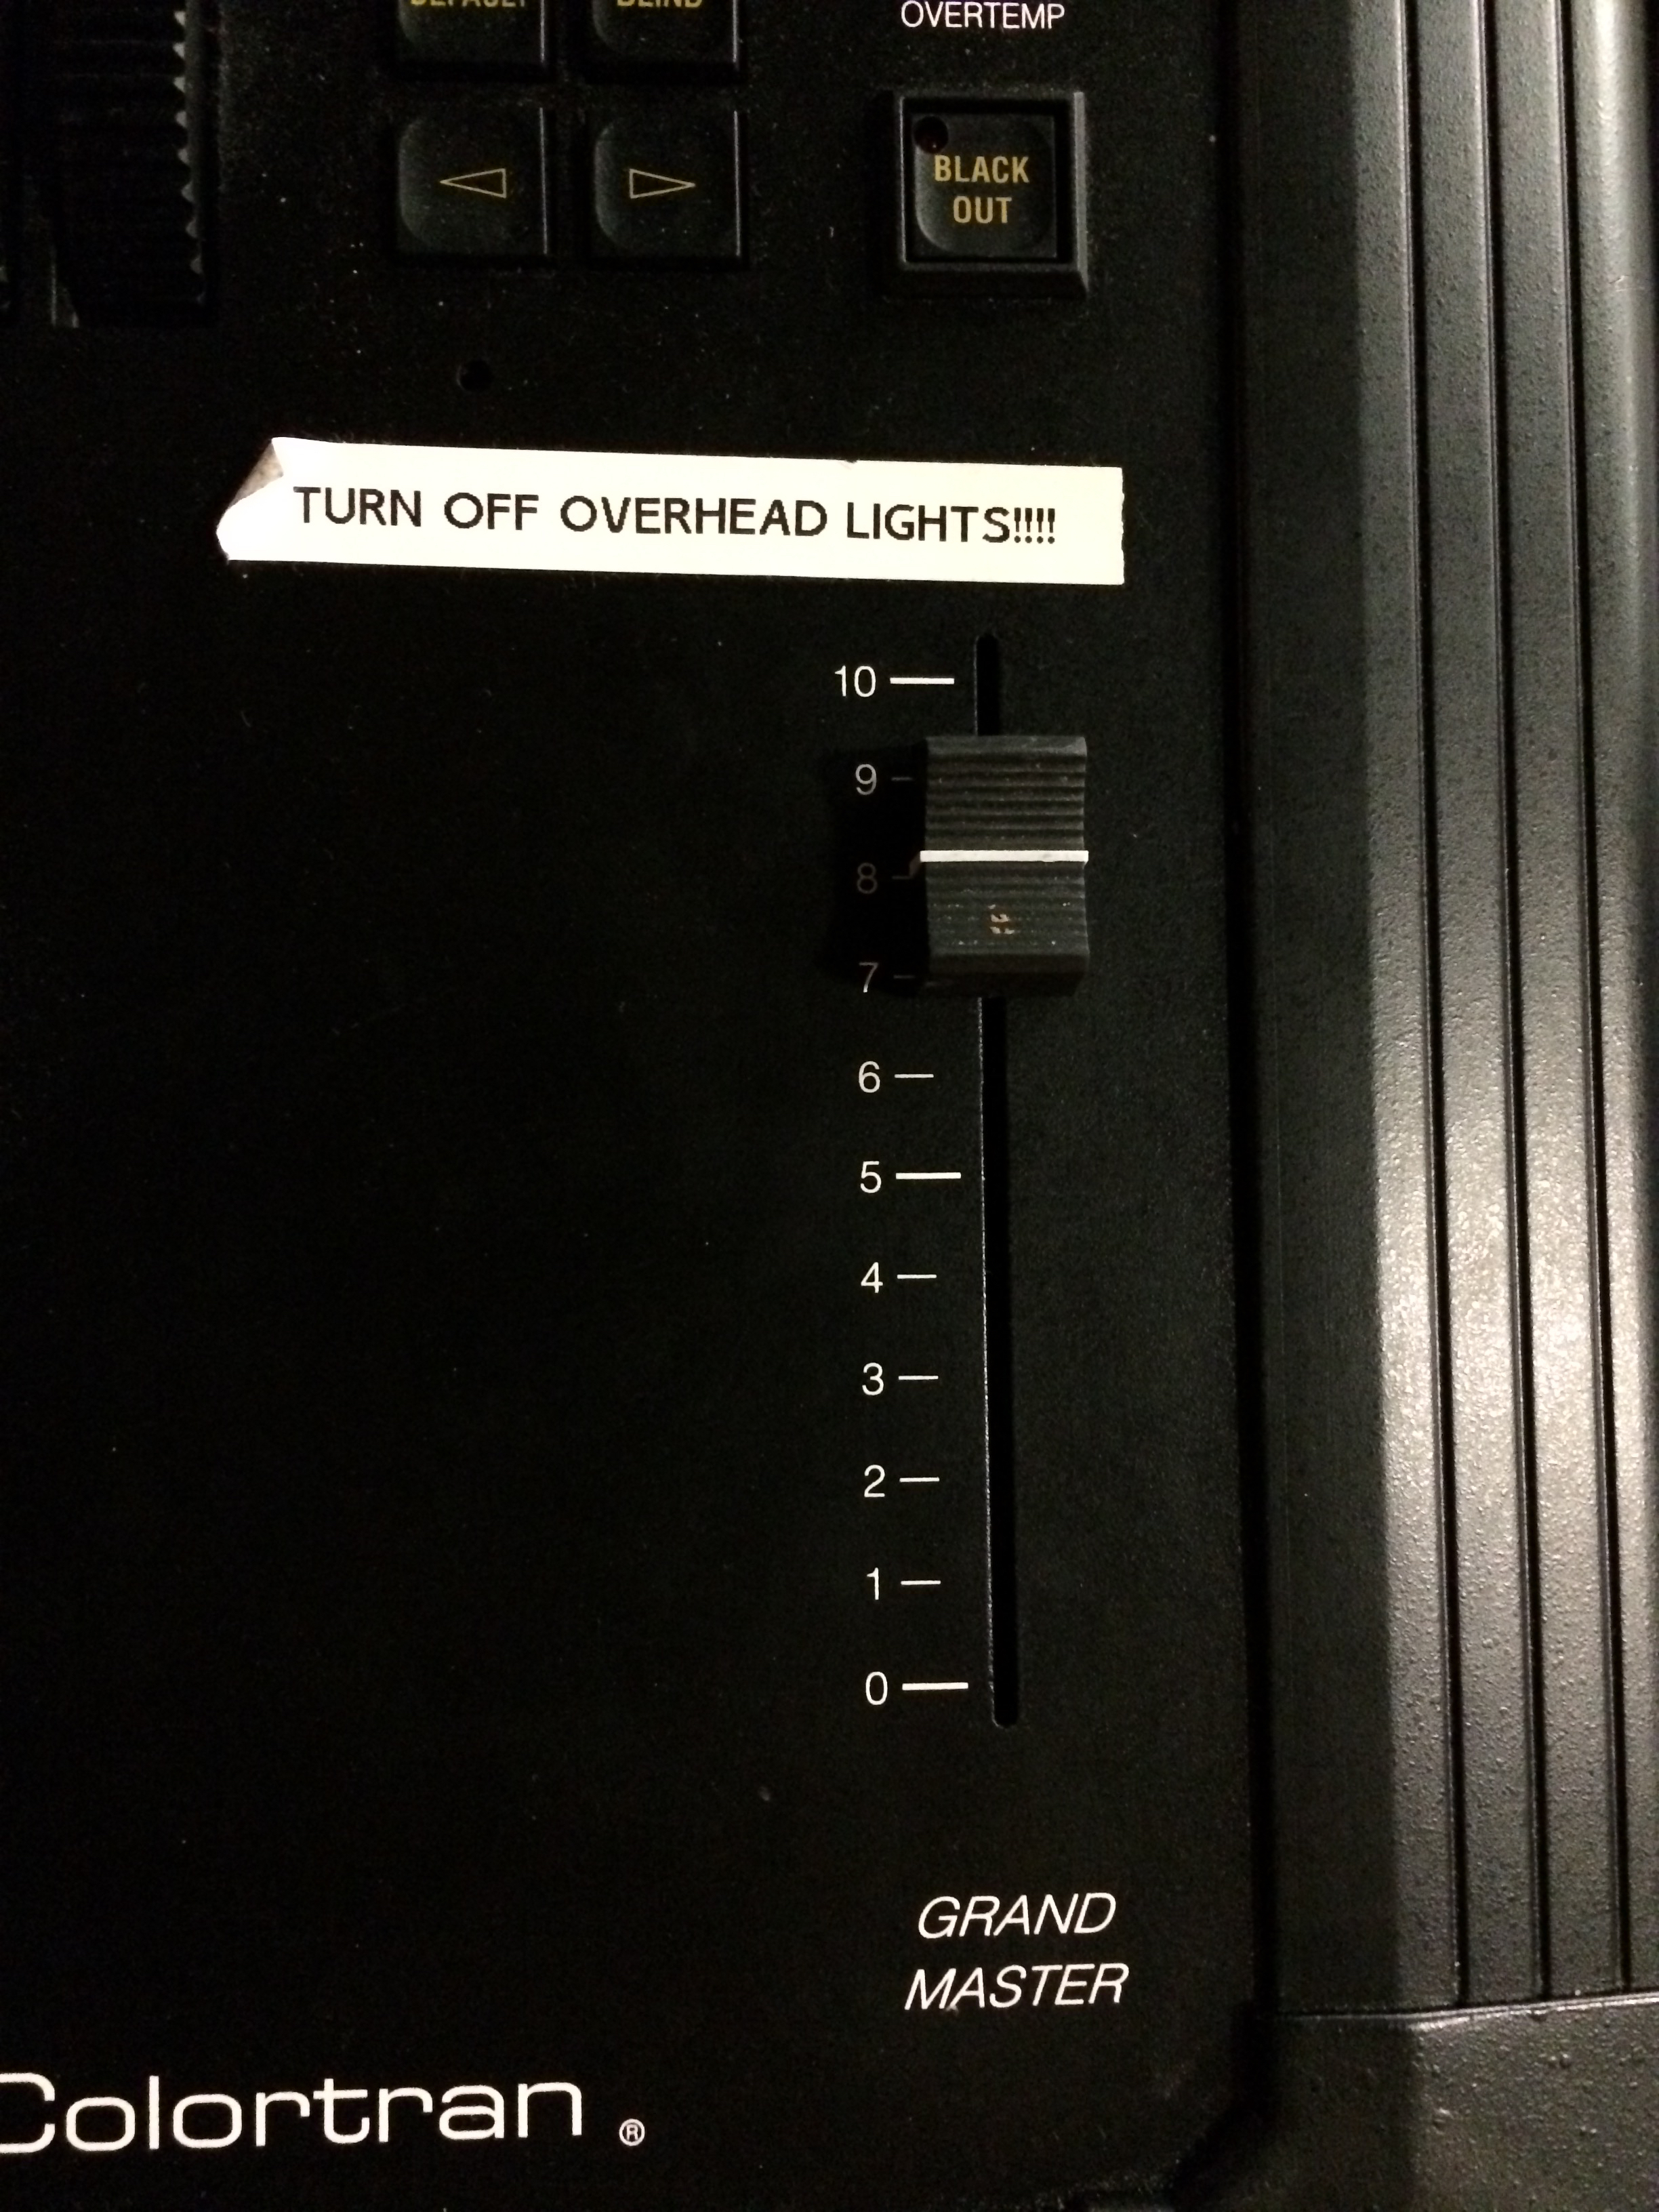
Most of the time, all you’ll have to worry about for studio lighting is one slider. That slider is right of the black dome and has a strip of white tape above it. We generally put at around 8 (80% power).
(Oh, the lighting board has been moved. It’s now against the wall near the printer and dividing glass.)
All other lights should be off in the studio (fluorescents).
On the rarest of occasions, a specific light may need to be turned off. DO NOT DO THIS. But here’s how, just in case.
On the number pad, hit Clear. Then put in the number of the light. If you look up at the ceiling, you should see numbers near each light. That’s the number you want to plug in. Then hit At and then Full or type in a percentage like 50. Then hit Enter.
For NNN, put 1-82 at full and 69 at 0. (69 is the light that makes the TVs glare).
Playback
Sets up playlists based on rundown, plays clips during show, counts down clips (1 min, 30 sec, 10… 9… 8…)
Playback needs a rundown as soon as it’s ready. They need to arrange all the packages, VOs, SOTs, PSAs, Animations, etc. Usually this is done by creating playlists for channels.
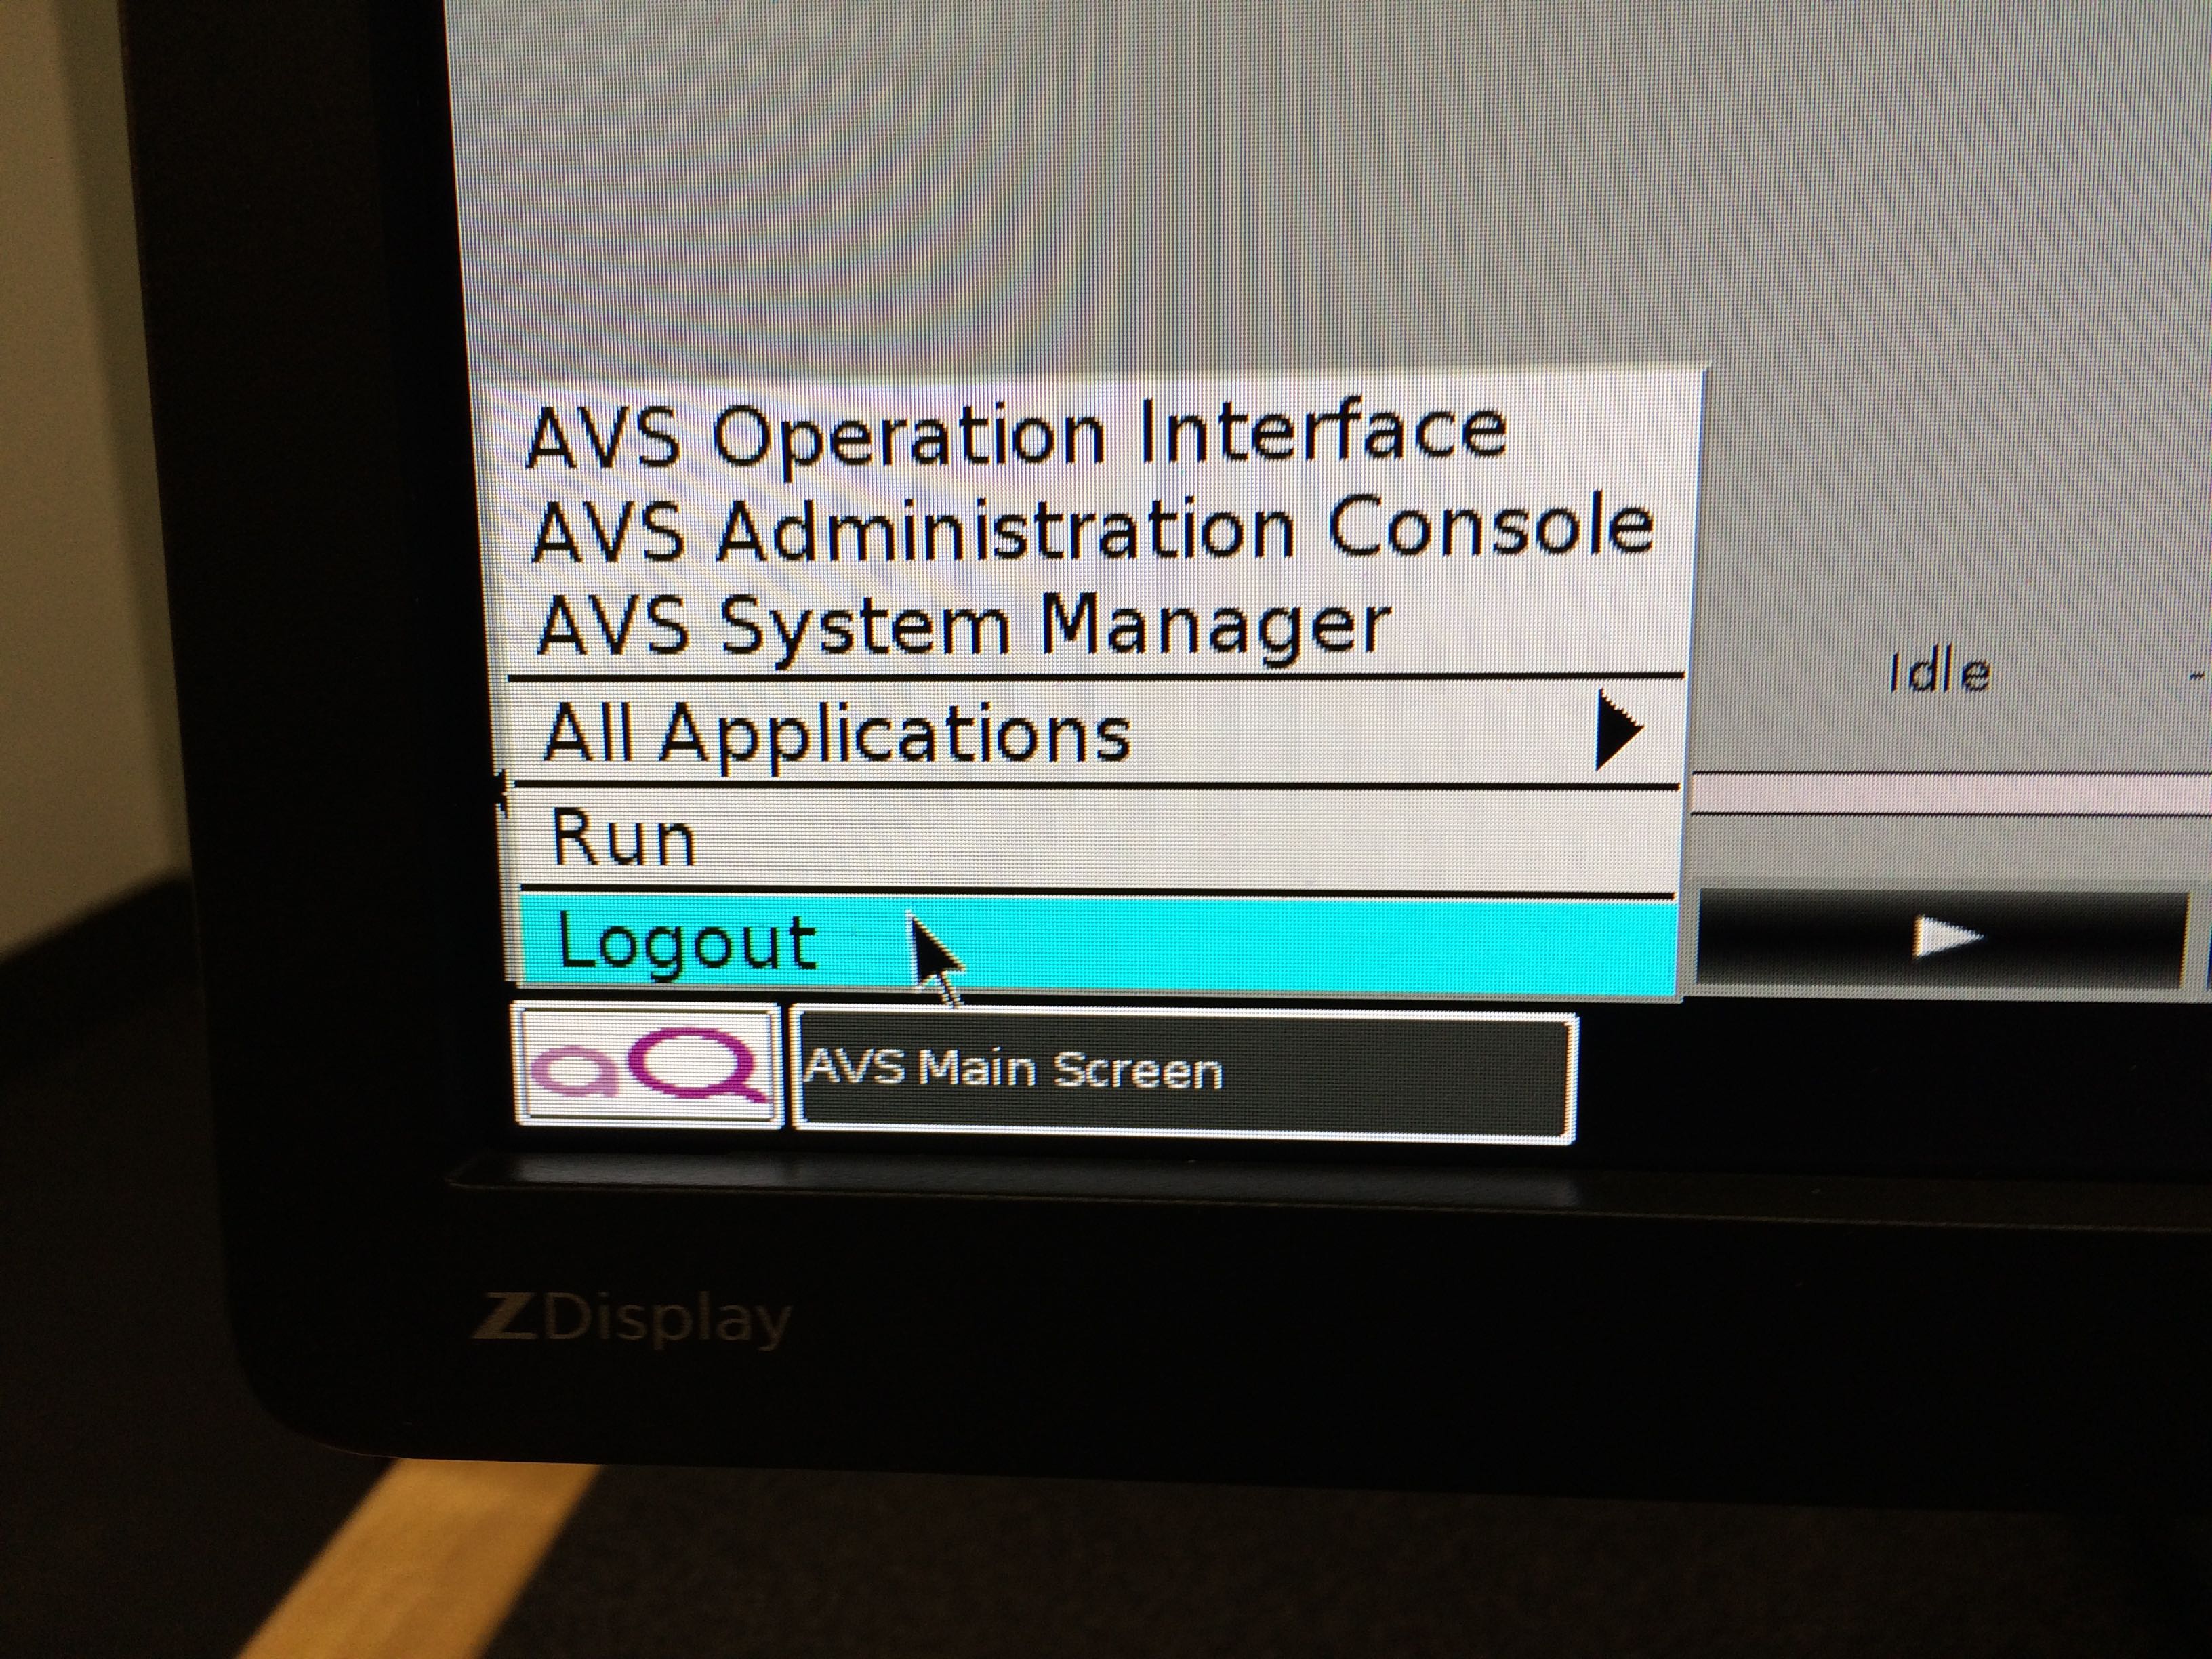
Before you start, restart the graphics server. Do NOT SHUTDOWN. RESTART.
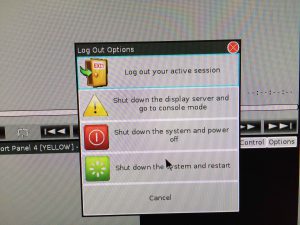
It takes a few minutes. Some people might yell that they can’t put videos on the server. Tell them we restarted, and it will take a few minutes.
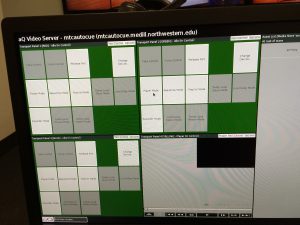
If you get a blue screen while restarting like so: 
Hit CONTROL-ALT-DELETE.
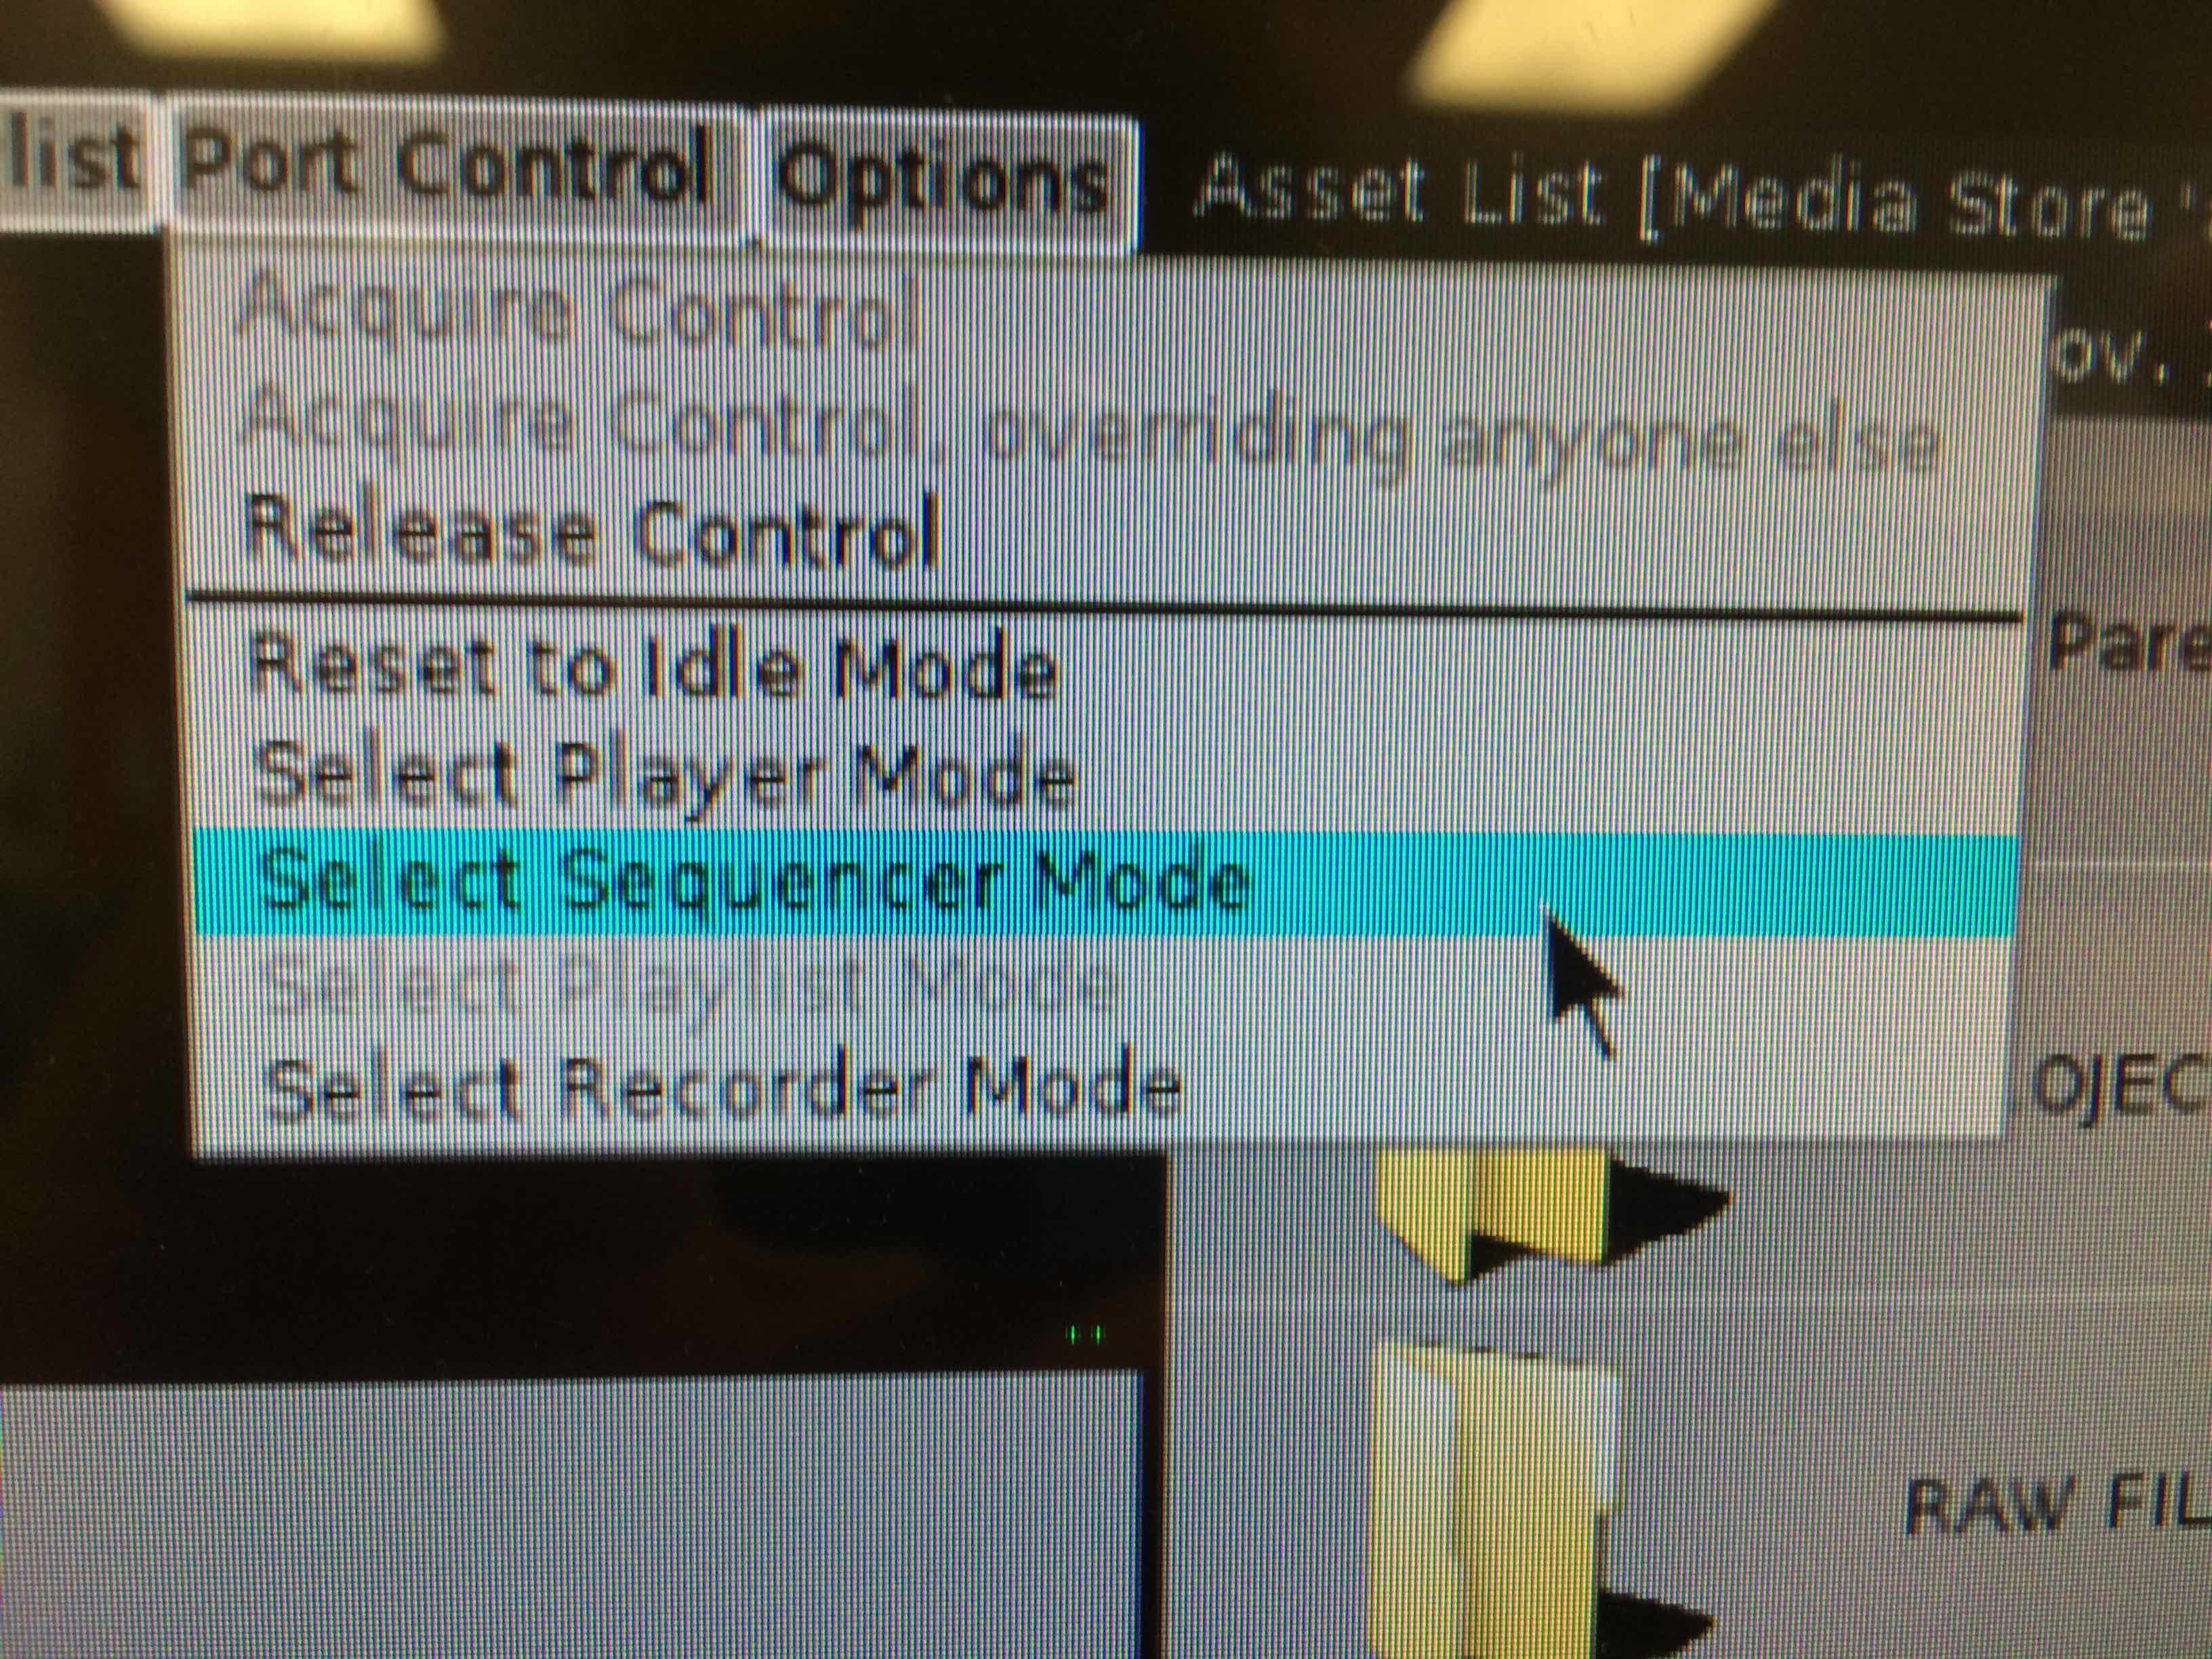
When the screencap below happens, hit TAKE CONTROL for each quadrant. Then hit Player Mode or Playlist Mode depending on how you’re feeling.

To create a playlist, right click on a grey area for the color channel you want, and hit new playlist.
To create a new playlist, hit Port Control > Select Playlist Mode.

You can now drag videos into playlists.
To load something onto the Playback Server, go on a computer in the studio and look on the desktop for something with the word Autocue/Playback. Hit that and enter media media49
Viola!
Audio
Producers: make sure proper audio notation is in the rundowns for breaks, intros and highlights. Weather can also have music. For sports highlights, make sure the music length matches the clip length.
Due to licensing violations, we’re now only allowed to use tracks 1001-1005 on the Digicart. You can use the arrow keys to navigate if needed. You can also use the music on the actual soundboard. If you hit the “RECORDER” button you can find it.
Before anyone is even on desk, Audio needs to make sure there are enough mics out. Check with the producer on the number of people and their location.
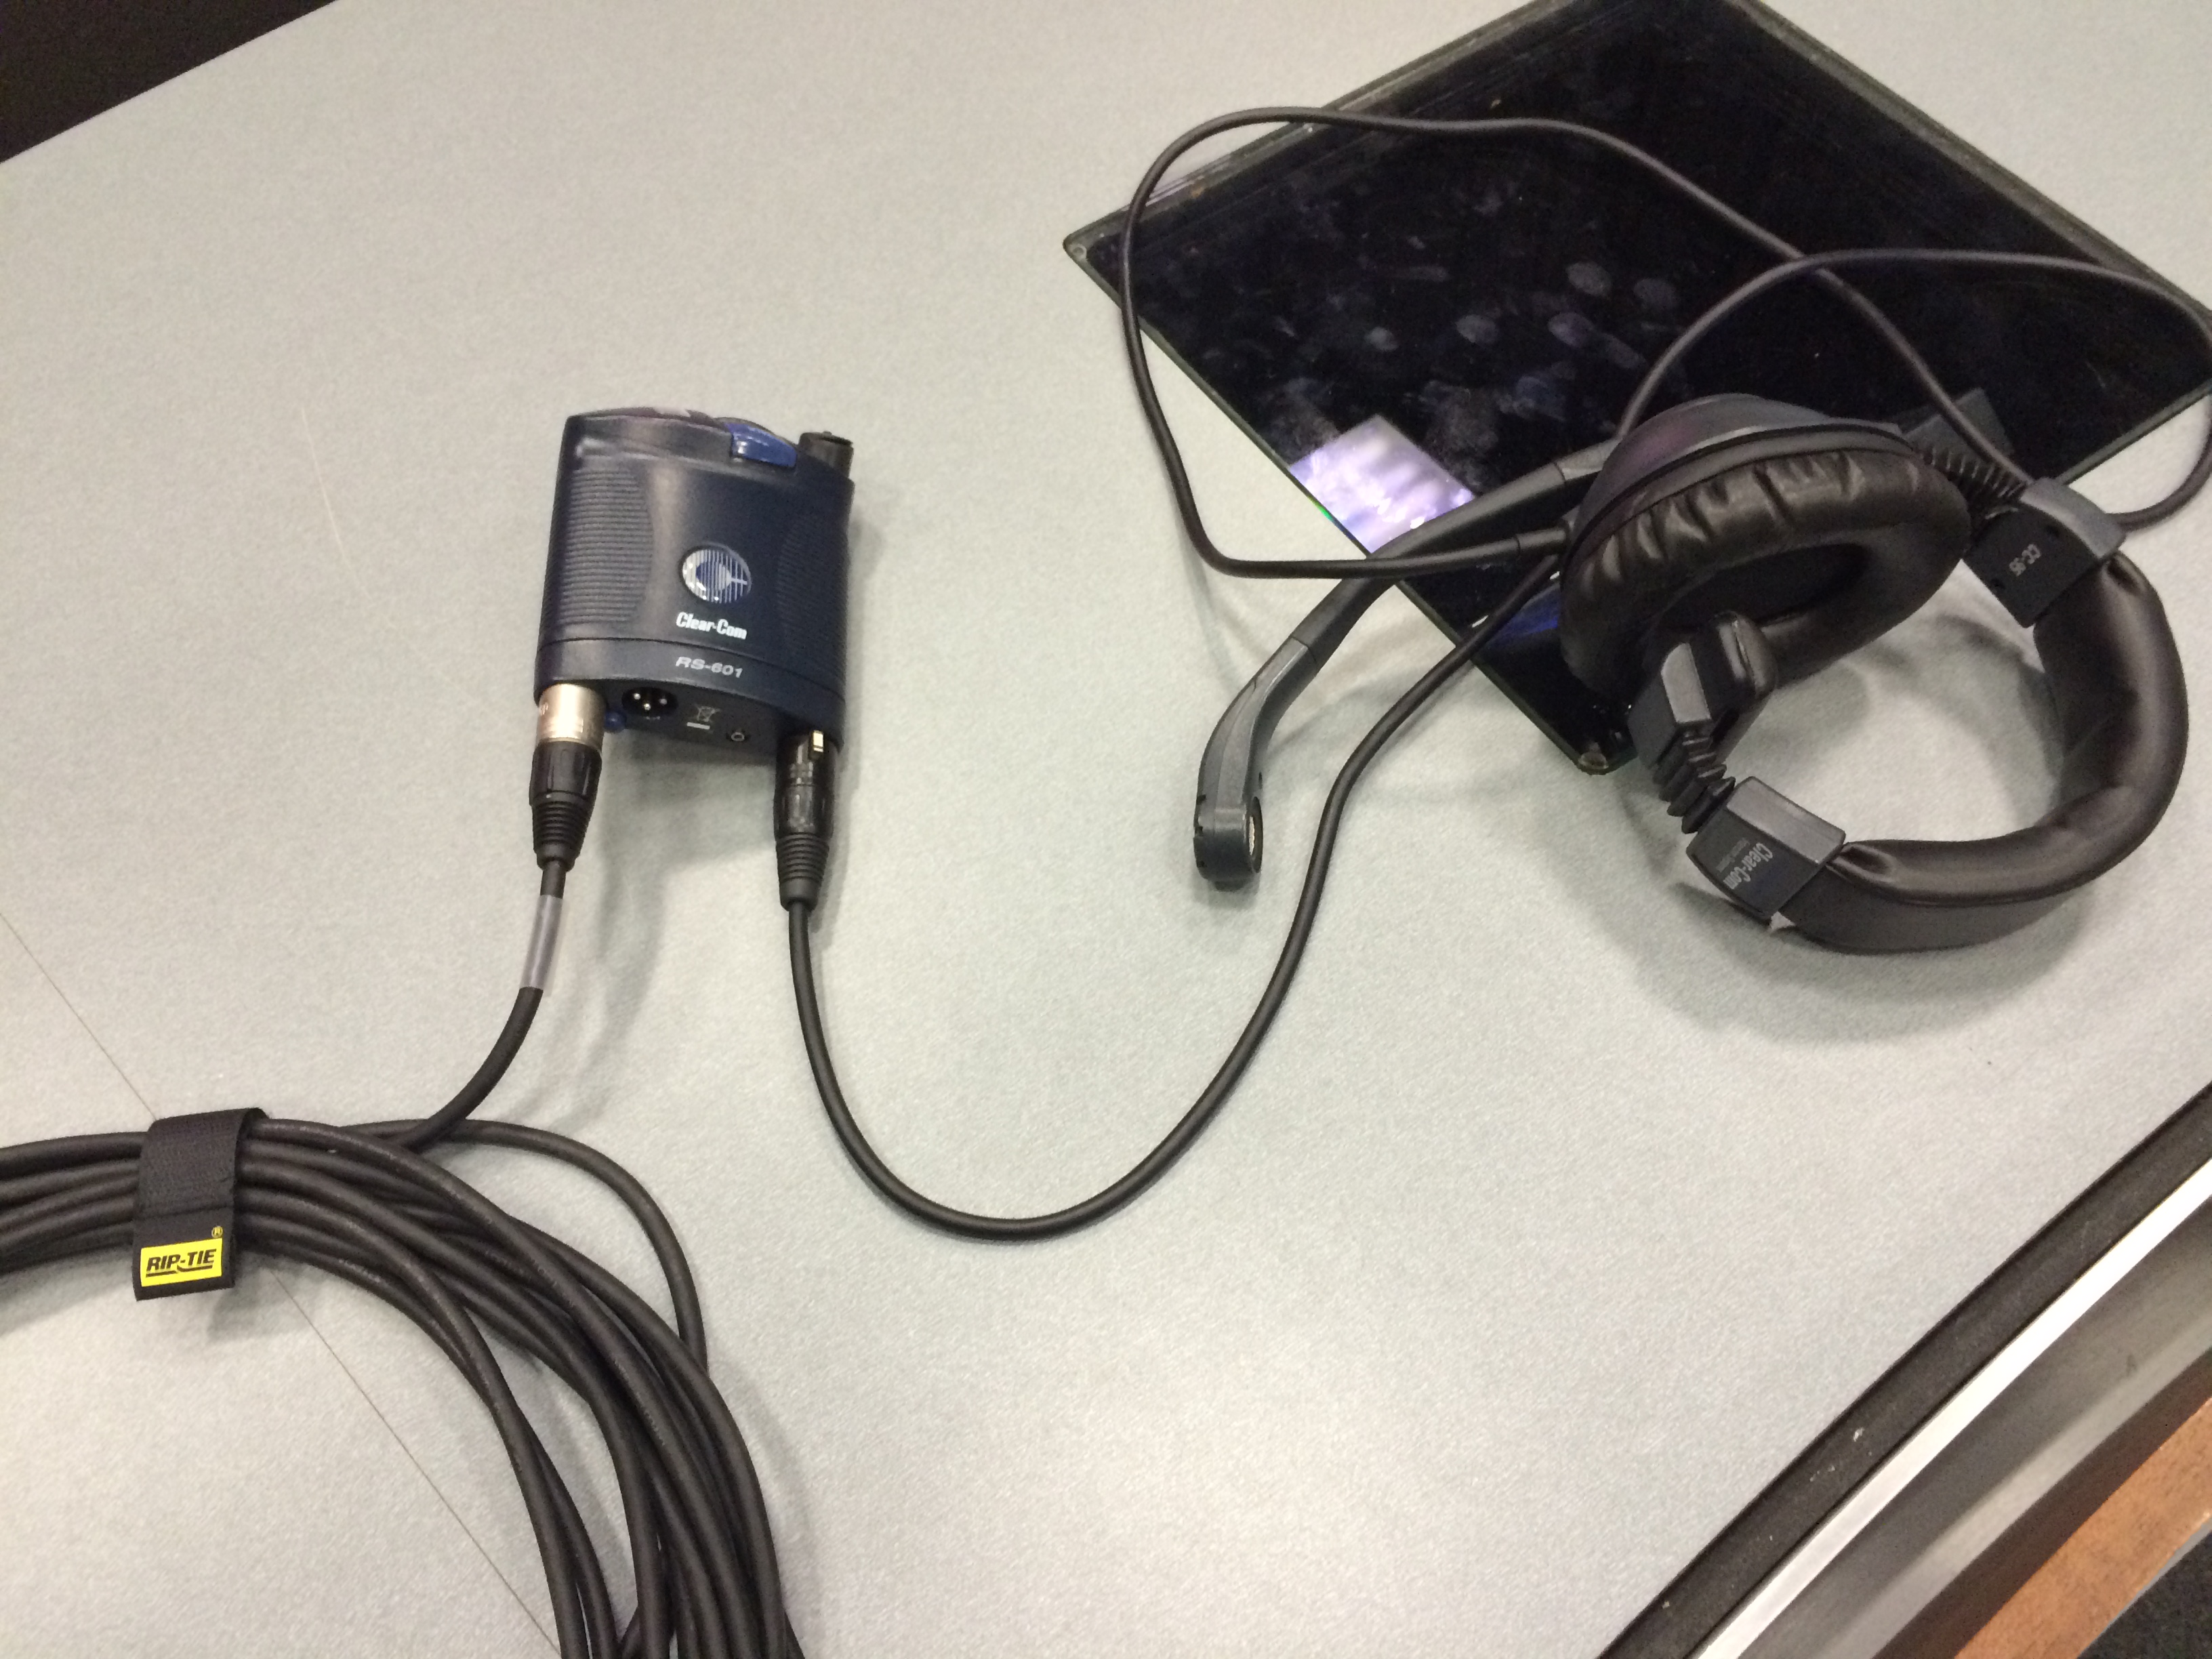
Audio also makes sure the floor director has a headset. That’s plugged in to intercom A. If you can’t plug in to intercom A, you did something wrong. Make sure the only things plugged into the receiver (the plastic box that connects to both the headset and the wall) has things only plugged into the ends.
Always do a sound/mic test for all the people with microphones BEFORE the show starts. Holler if you need to do this and no one’s paying attention.

Above is a complete audio set up with a mic plugged in and an IFB. An IFB is a headset worn by anchors so the producer can speak to them.
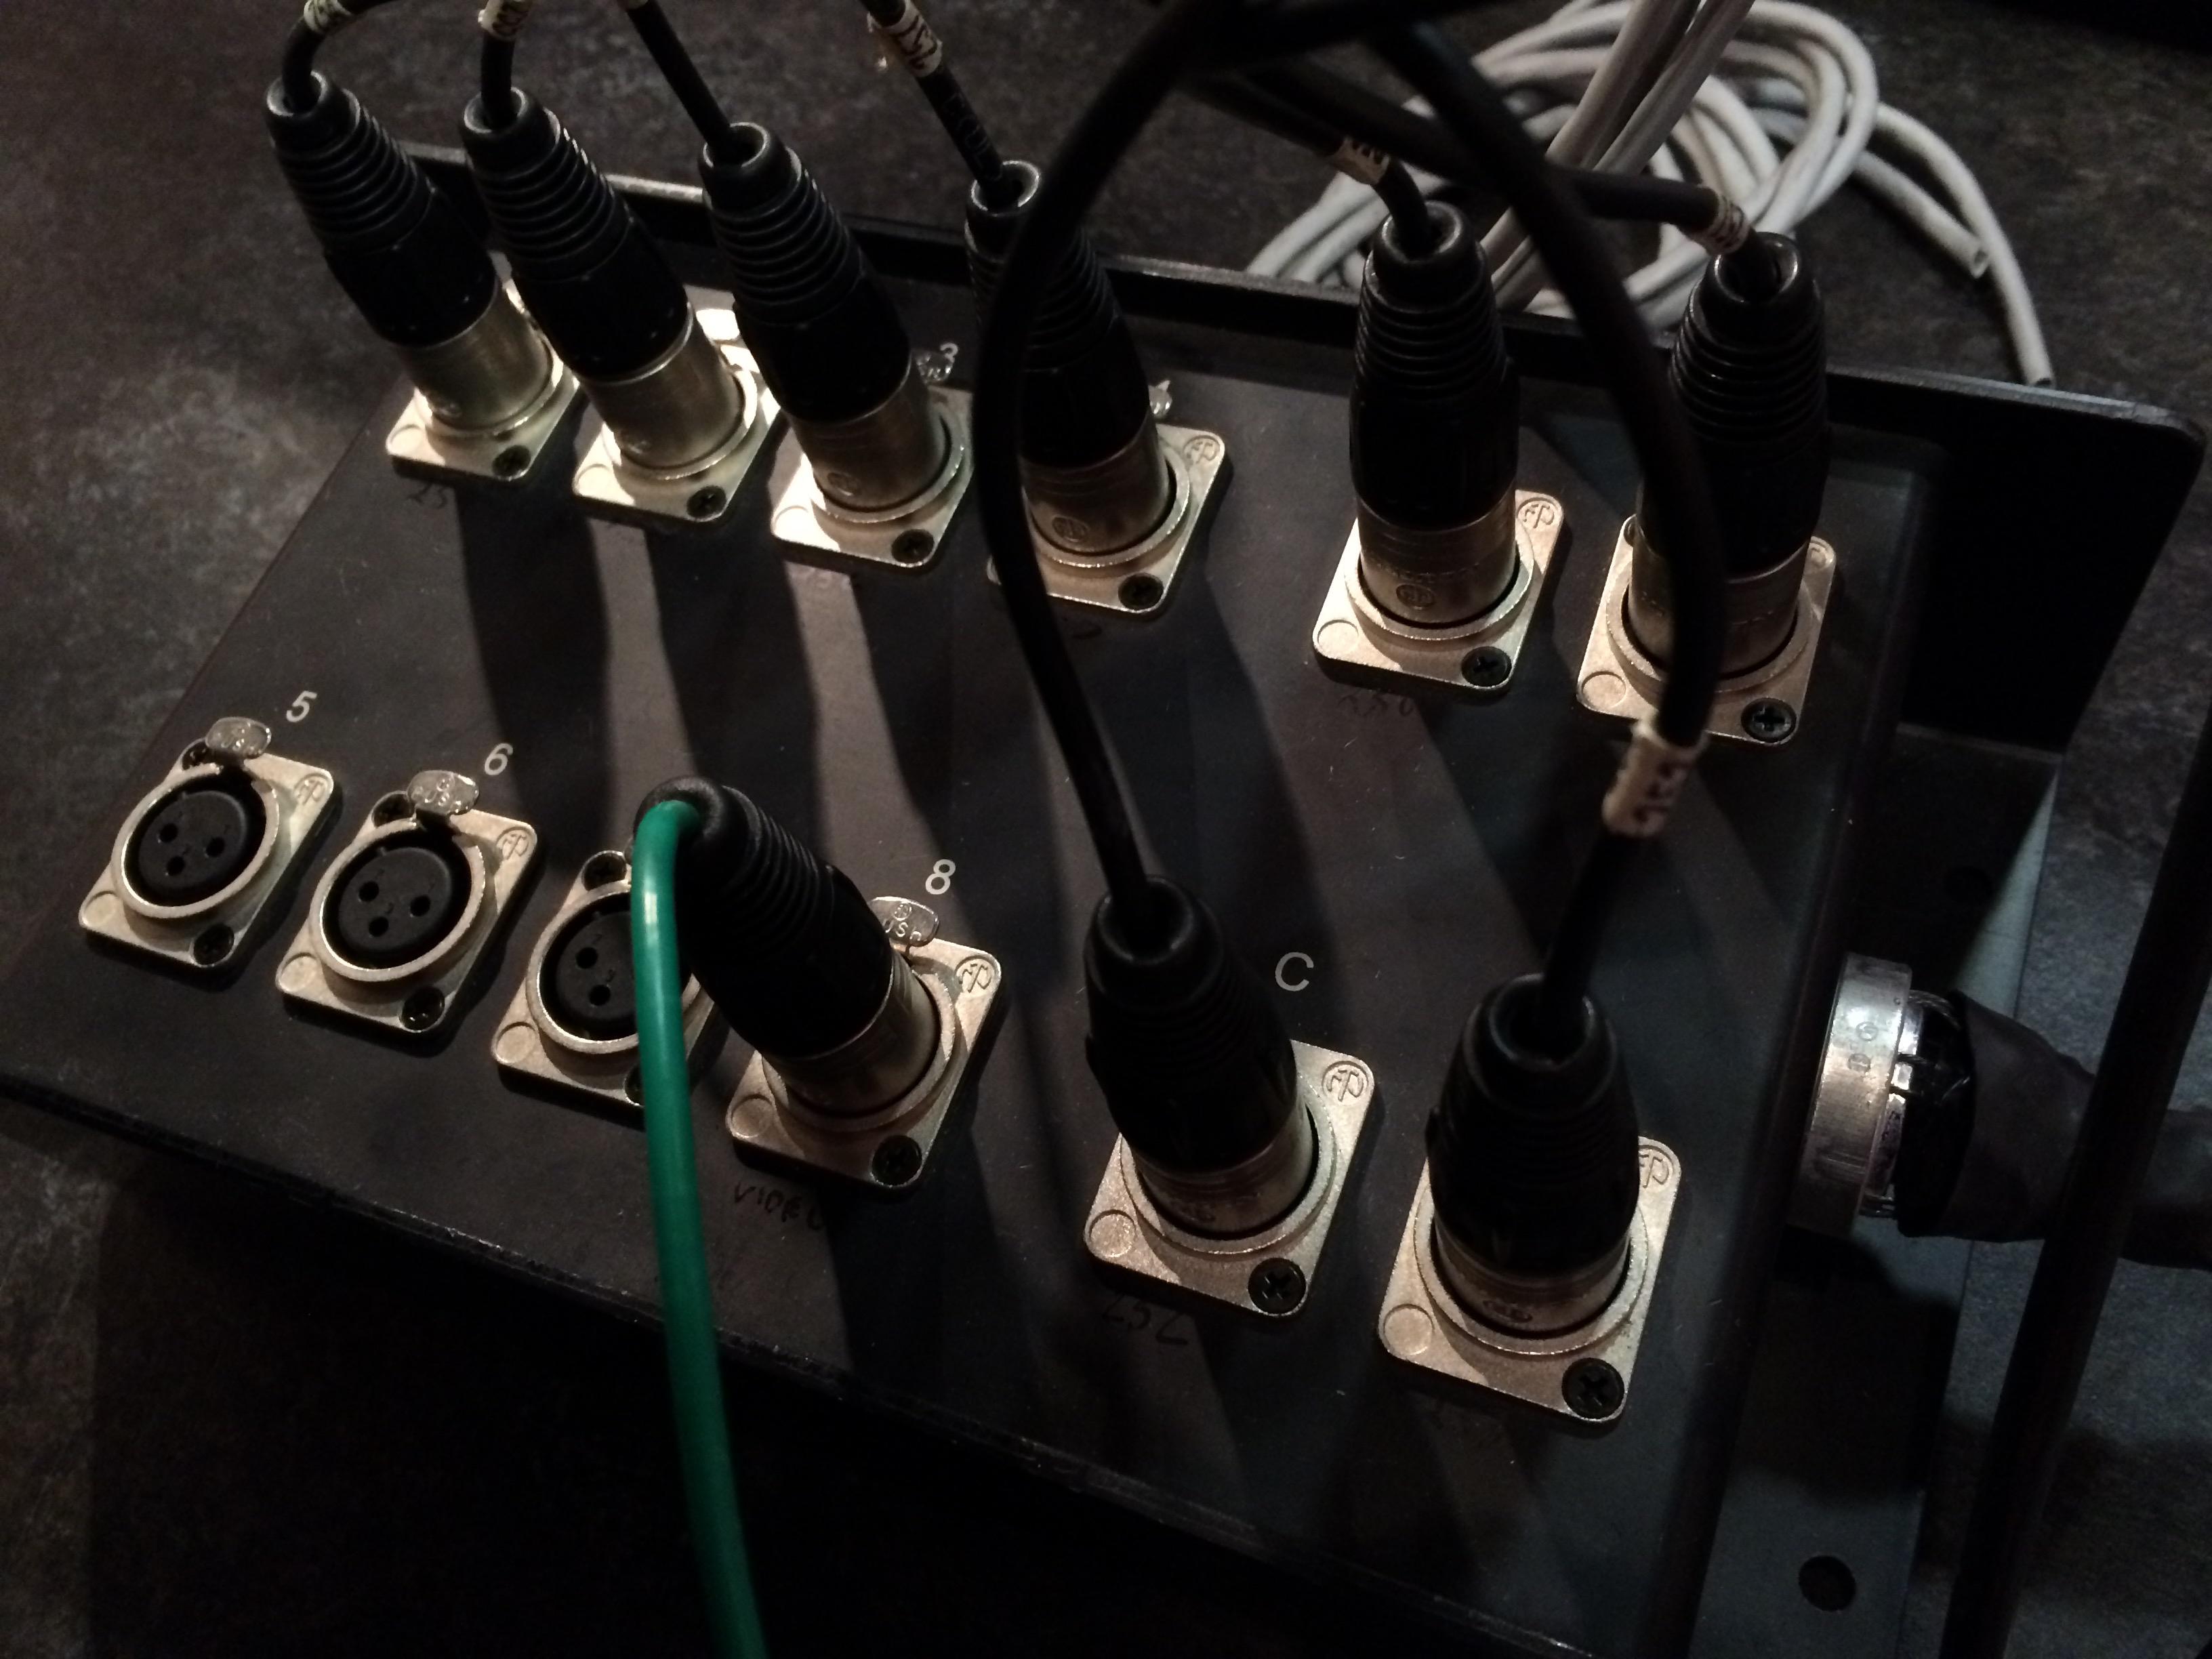
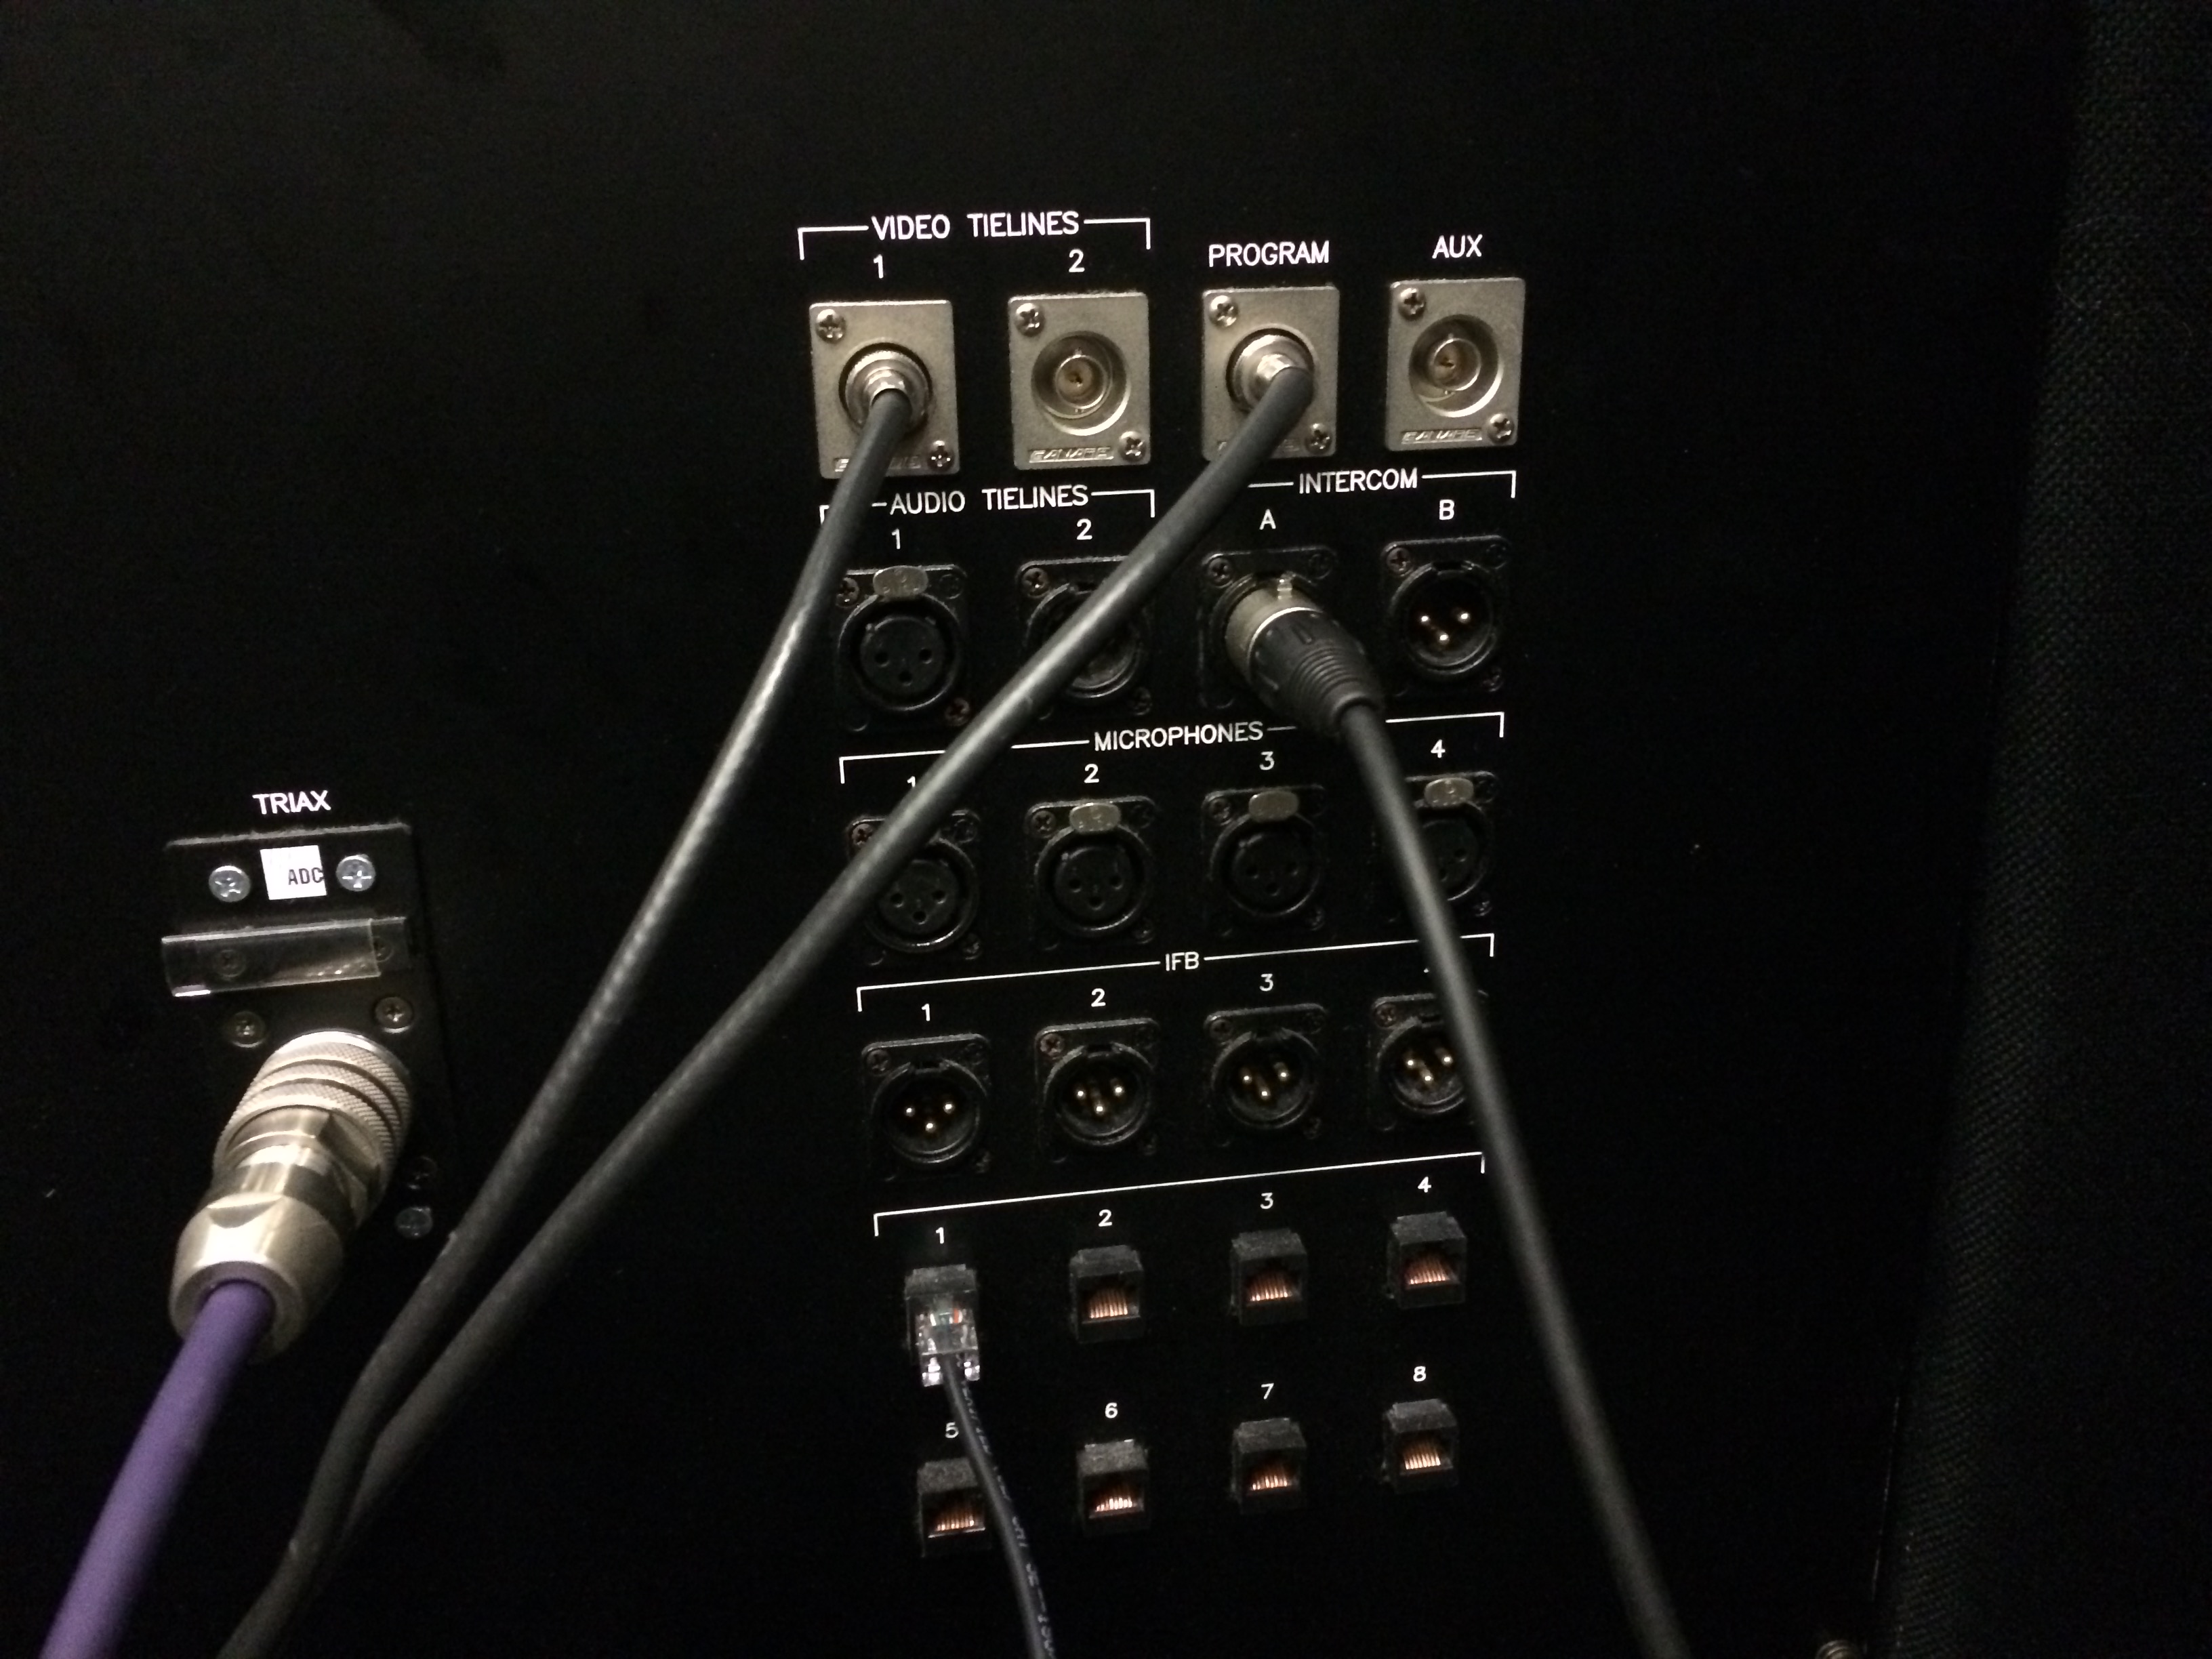
This is the audio box behind the desk. If you move the desk, you’ll probably want to unplug all these. Plug in chronological order. You should be able to make out some numbers in the photo if you need help.
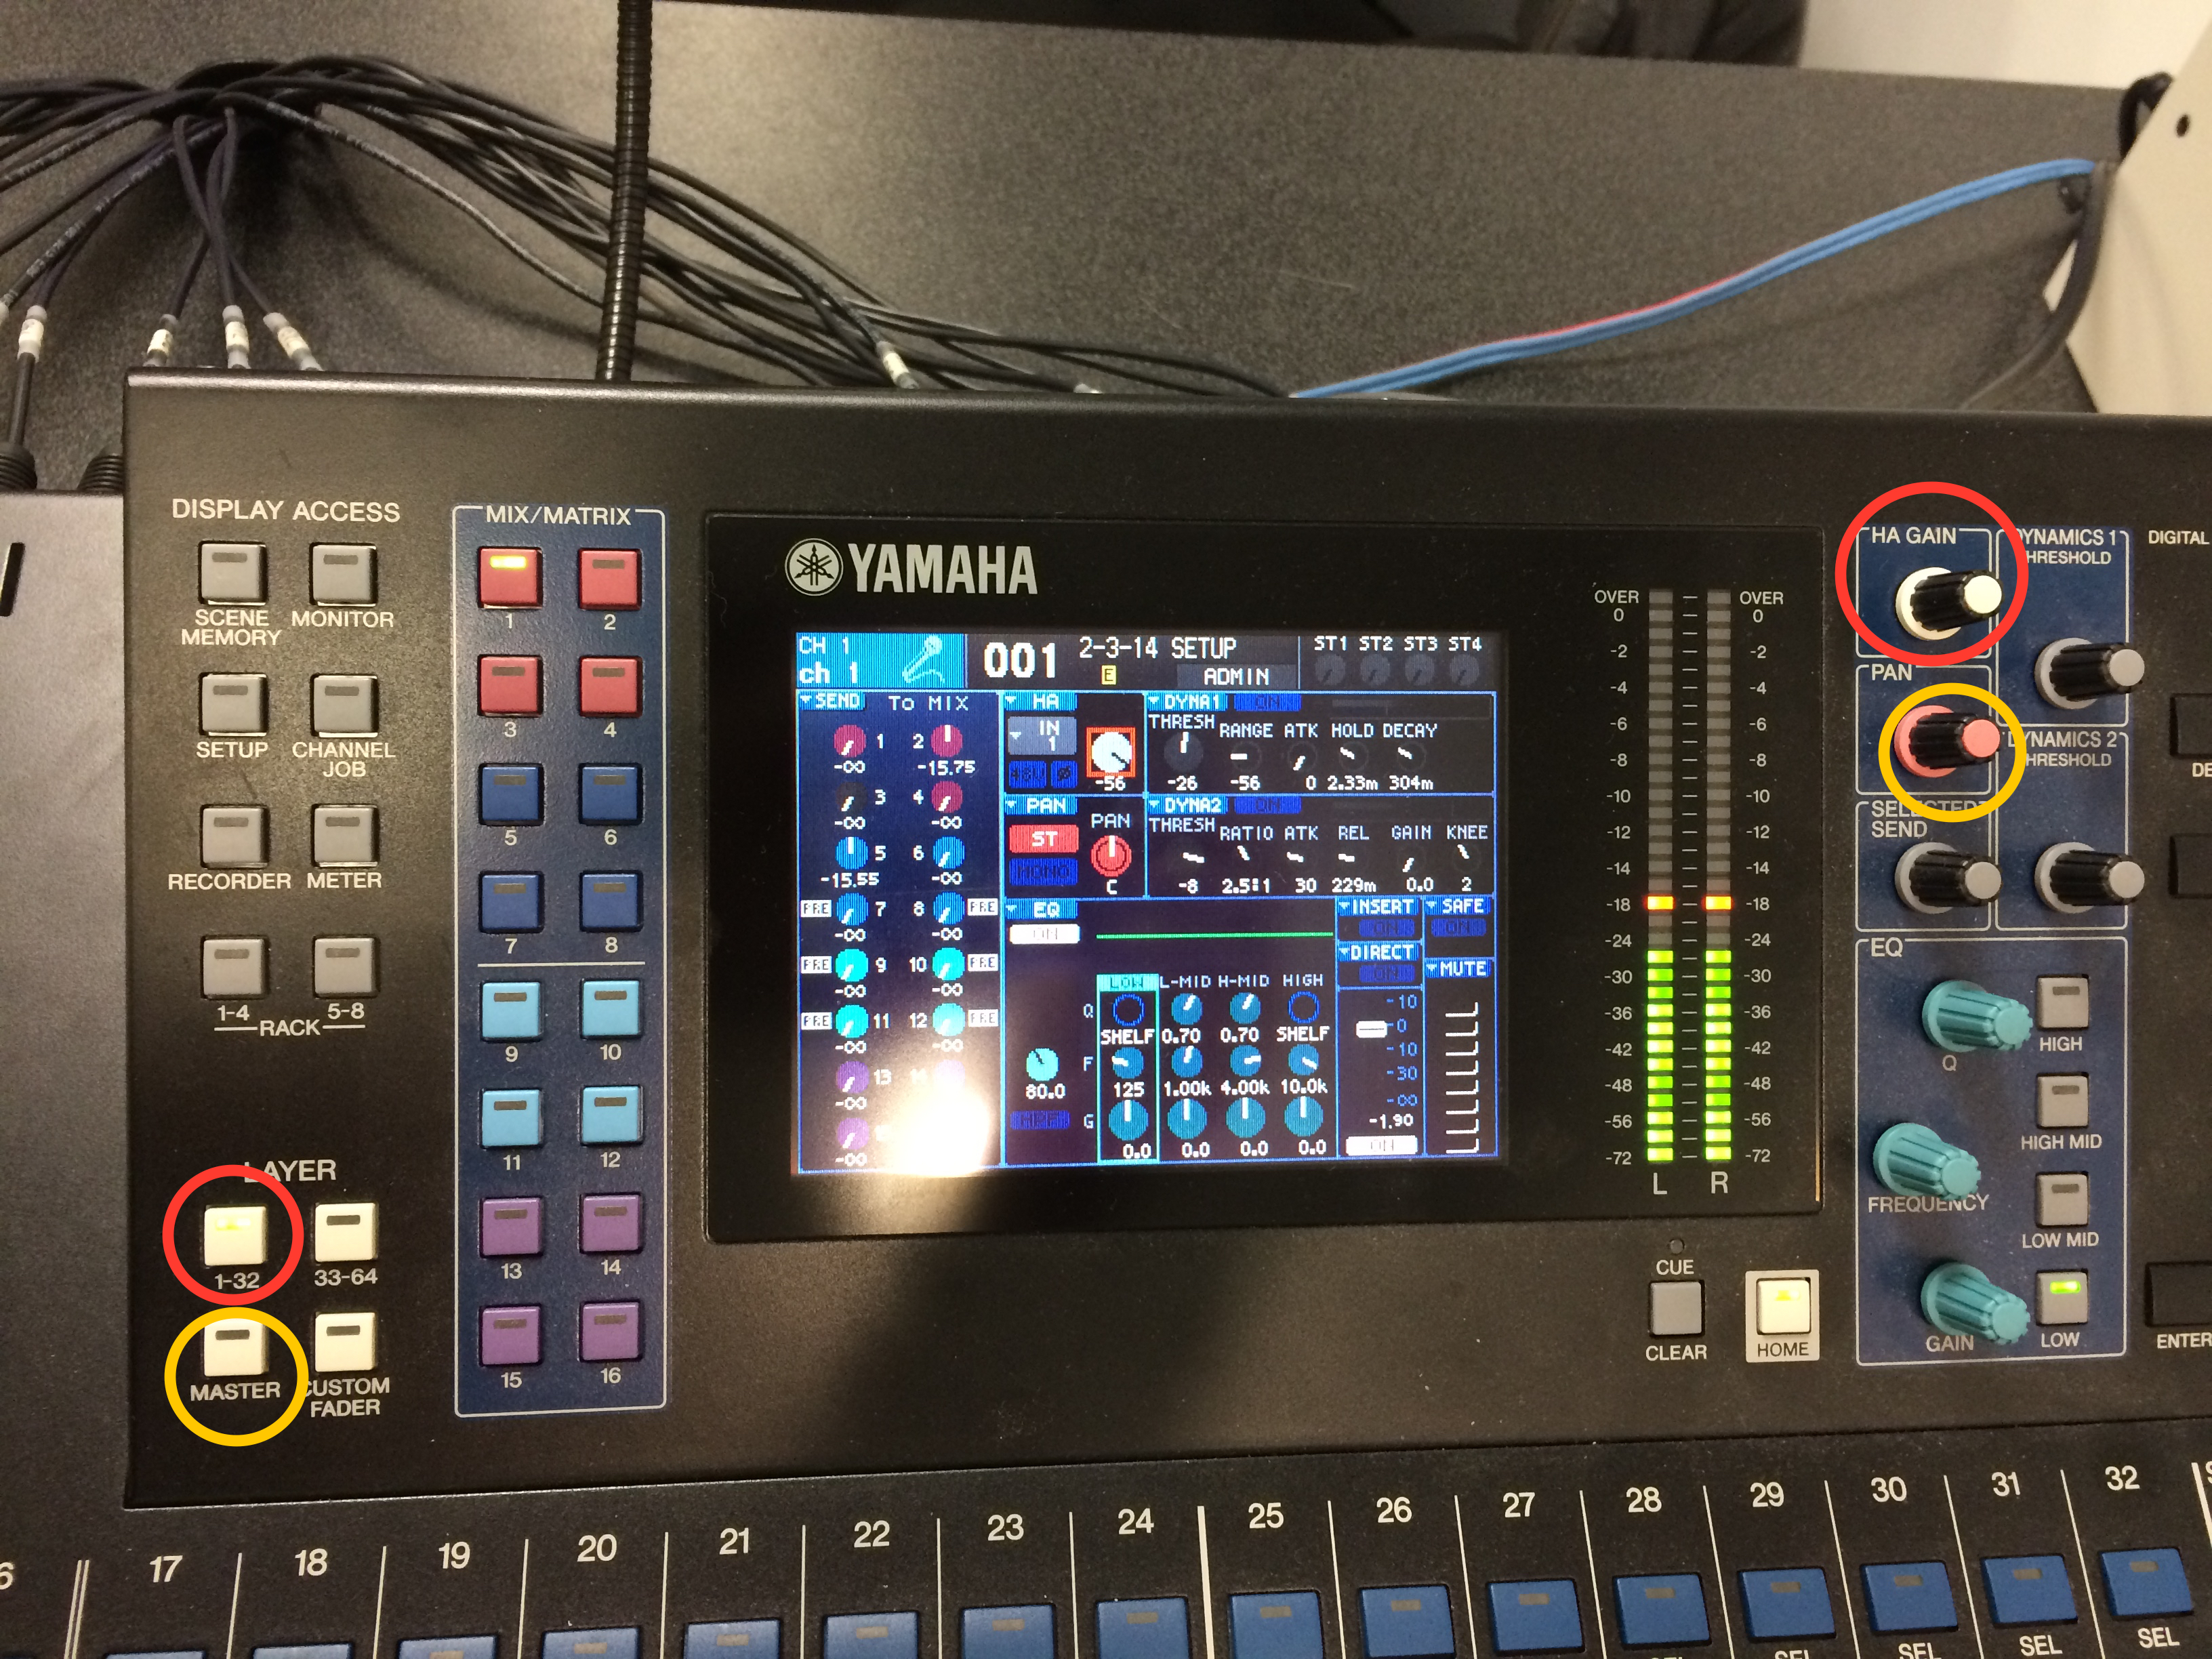
The circled buttons on the left toggle the audio board between speaker levels. Speakers in the studio are 3&4 and are usually kept off during production.
The circled nobs on the right are to change individual inputs. The top white one, mic gain, controls how loud a microphone is on a finer level than the physical sliders on the board.
Generally during mic checks you should use this gain control instead of the physical slider. Press the blue button under the number of the mic you want to change and then use the white nob to increase or decrease gain (volume). The screen should display a number which should be around 54 for speaking voices.
However, you should adjust based on the moving towers of green bars. They should be just hitting a few of the yellow bars (-18 dbs)
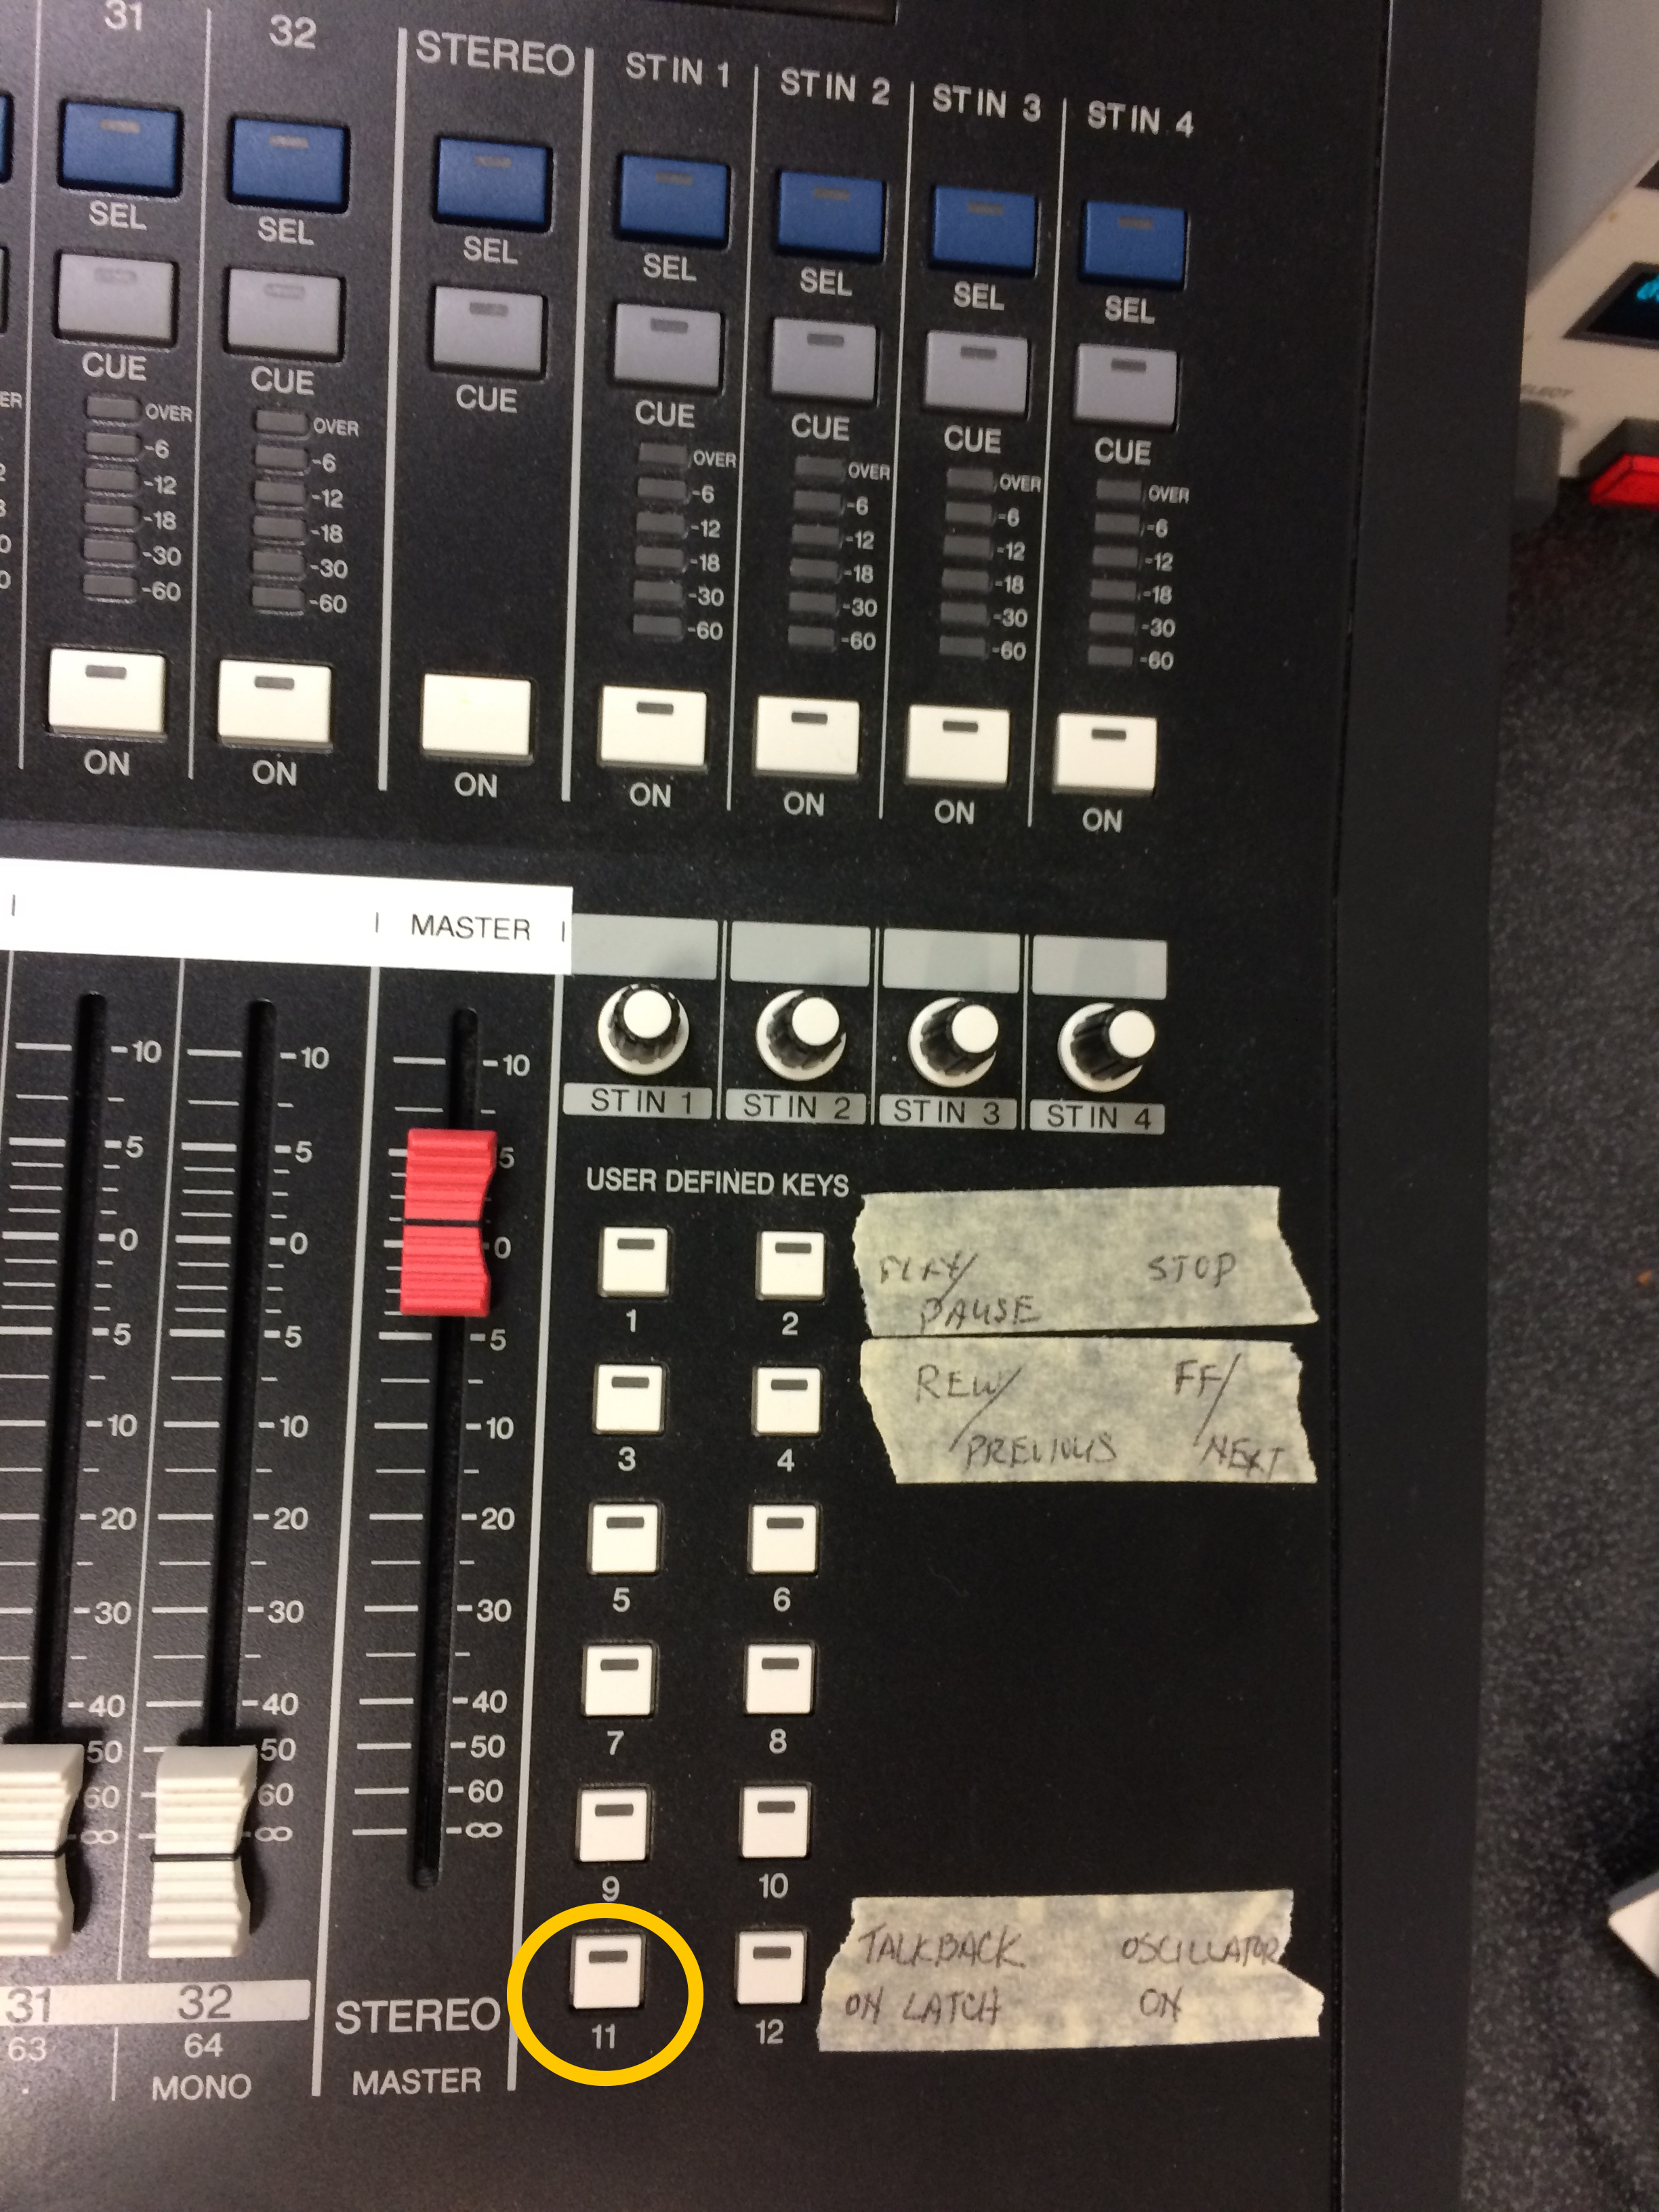
The yellow circle shows the button you can use to speak into for the IFBs. The mic you speak into is at the back of the board.
Here’s the Digicart. This is how you play music. OP stands for Open Music. Hit a number to play. Hit stop TWICE to stop. You can also fade down with the sound board.
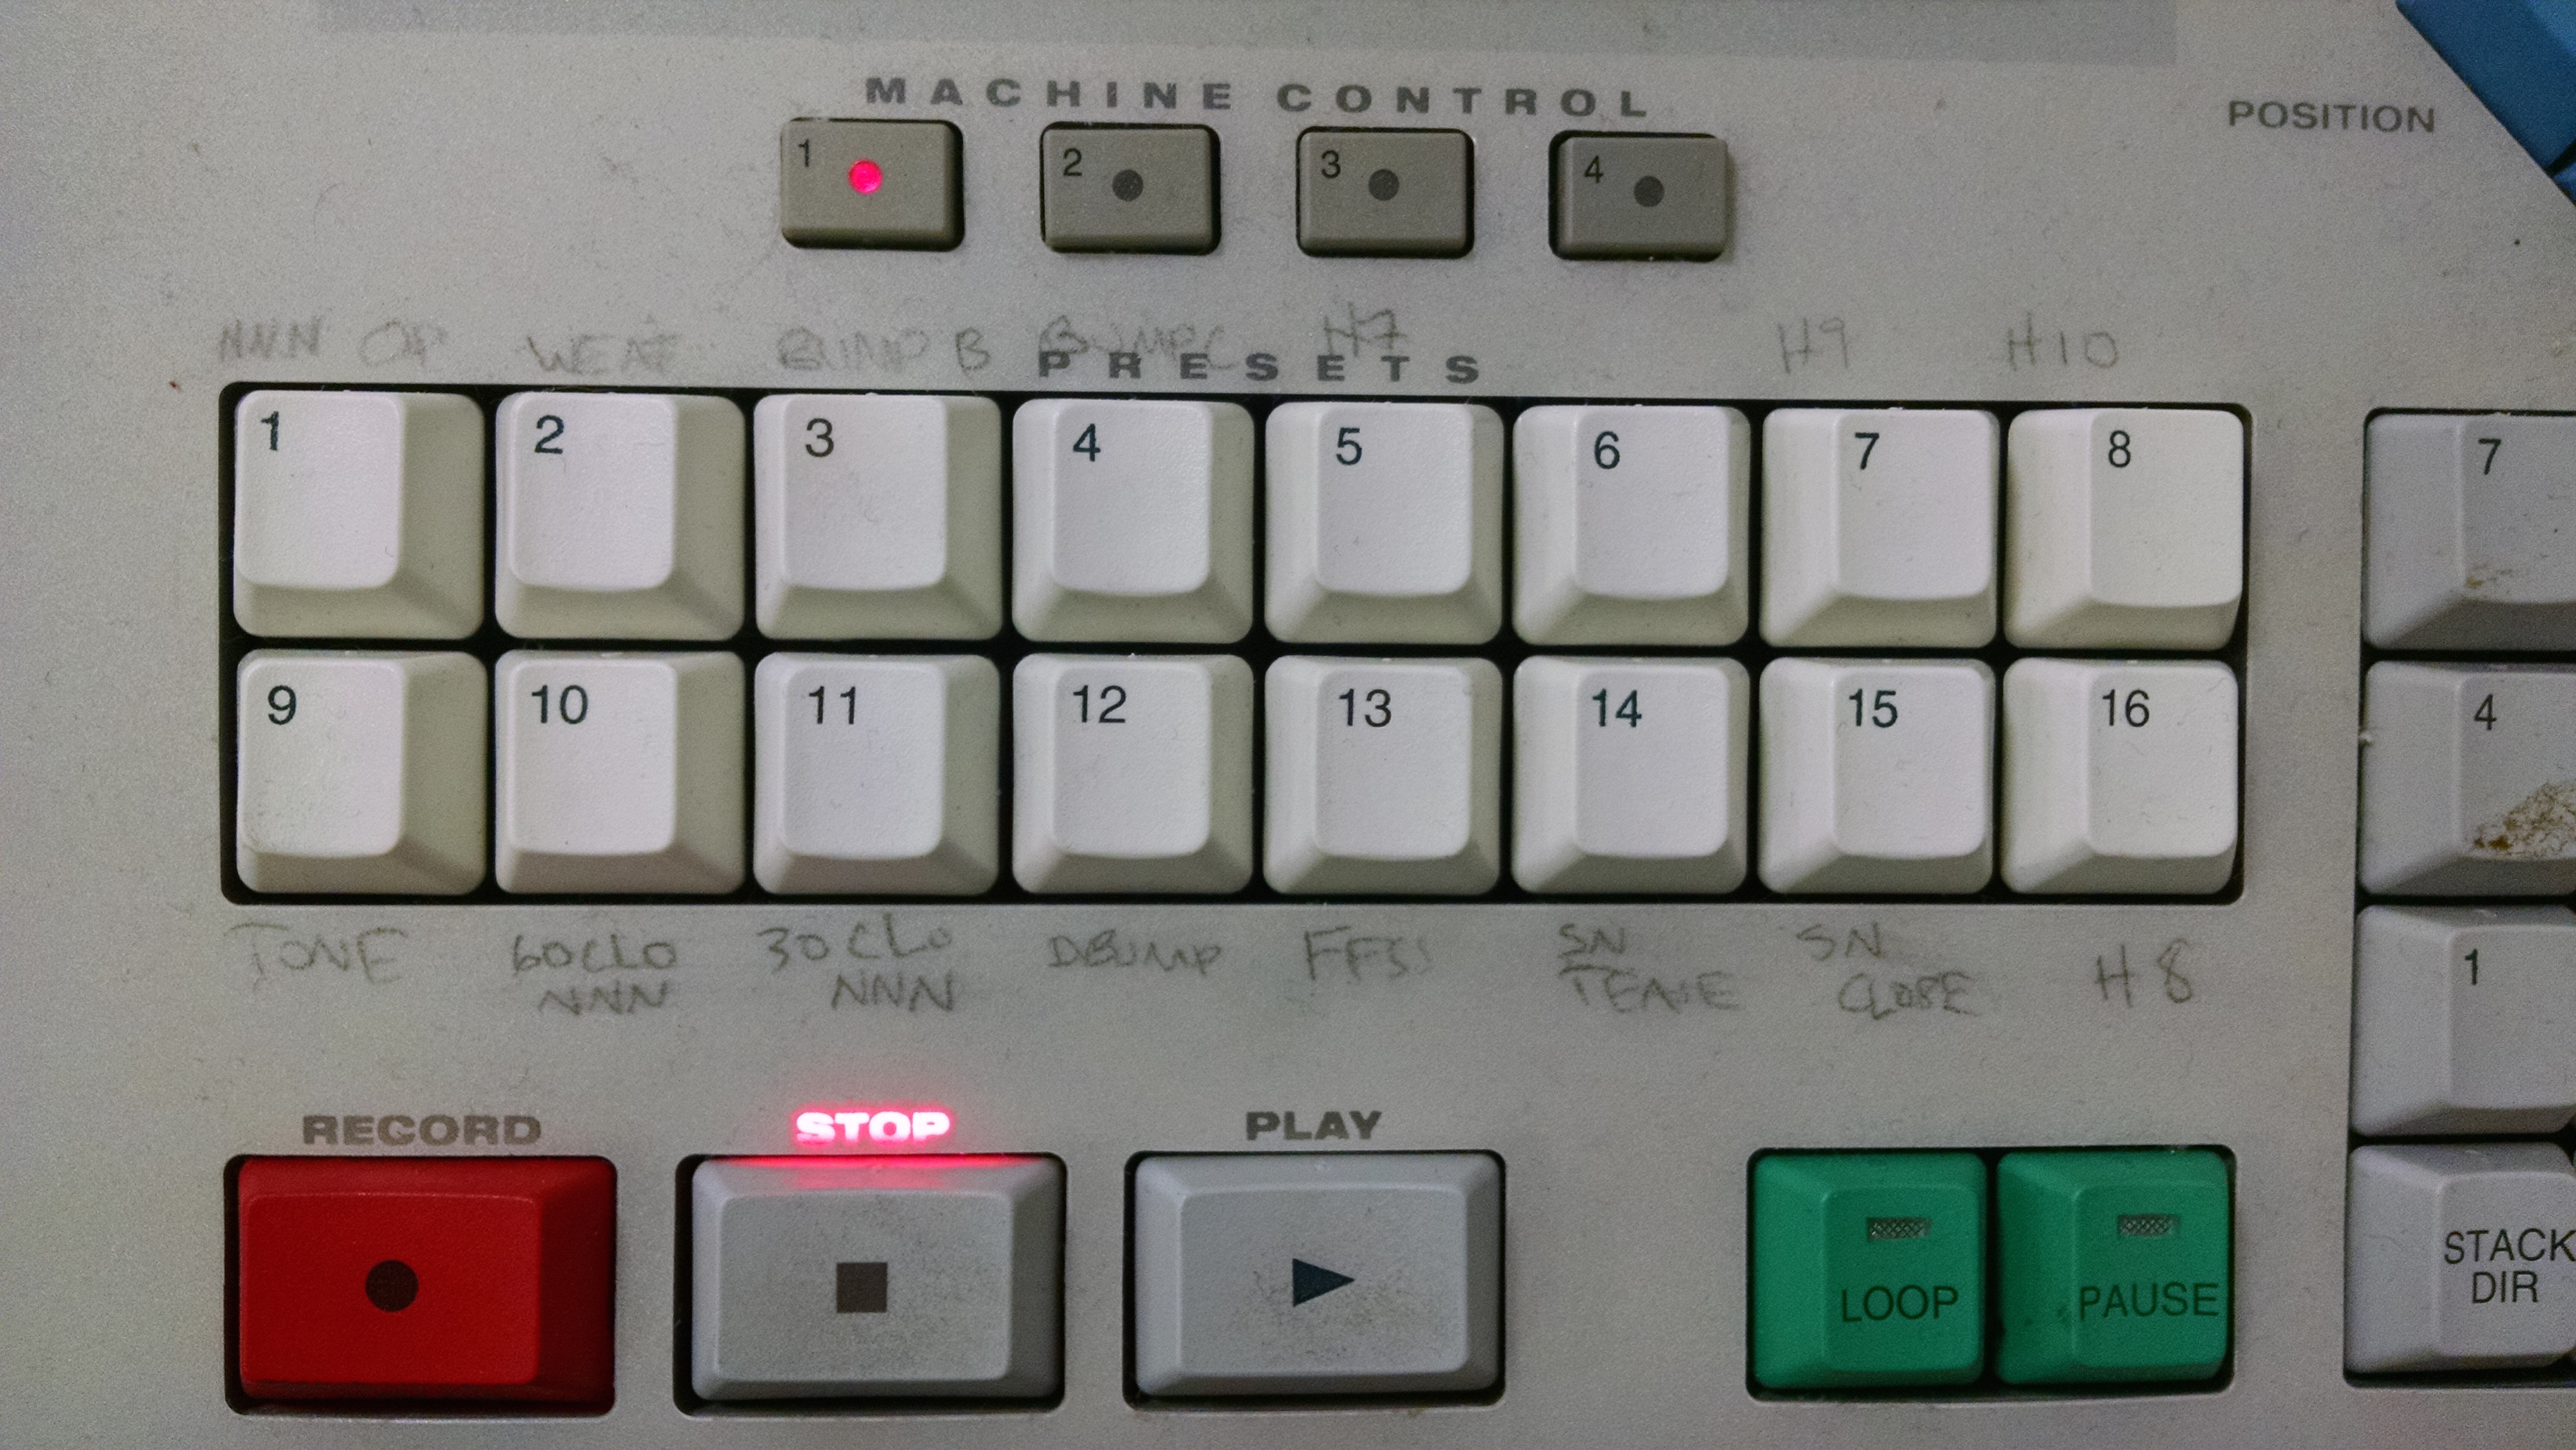
UPDATE: Music is now directly on the soundboard. Hit “Recorder” and then use the arrow buttons to navigate. Yes, this is clunky.
Sound also has to deal with the wonky levels of all the different videos being played back on channels Red, Green and Blue. Take a look at your rundown for what channel is coming up and what’s going to be played.
When you move the levels up, do both sides (both sliders for one color). Also, make sure the ON light is illuminated.
For instance, for VOs (Voiceovers), the anchor will be talking while video is on the screen. The audio on the video being played back should be LOW.
VOSOTs mean there’s going to be someone talking and then the anchors are going to talk while the video continues to play without sound. This is tricky. This is where everyone screws up. It’s OK. If you’re not making mistakes, you’re not learning.
Anyway, for VOSOTs, you should have the audio for the video slightly higher (you can always move the levels up though) and the anchors mics on.
SOTs (Sound on tape) means that we’re holding on to old lingo. We don’t use tape any more. But it still means the same thing – the video is going to have sound. It’s going to be short (maybe 5 seconds, 10 seconds…)
The anchors should know not to talk during a SOT. If you want to be safe, you can mute them during a SOT, but make sure to bring them back immediately.
PKGs are packages. That’s when you mute the anchors mics. Packages will run for about a minute. Listen to playback to know when a package is ending so that you can unmute anchors’ mics.
Common mistakes include:
1. Not muting anchors’ mics immediately after package/ads begin.
2. Having anchors mics muted at the end.
3. Not muting a guest’s mic when they’re done.
4. Not reminding anchors to keep their hair away from the mic.
5. Leaving Red, Green or Blue too high.
Prompter
Scroll at the pace of the reader, ensure you’re at the right place at the start of each segment/show.
Prompter is a position not covered by the hired technical crew.
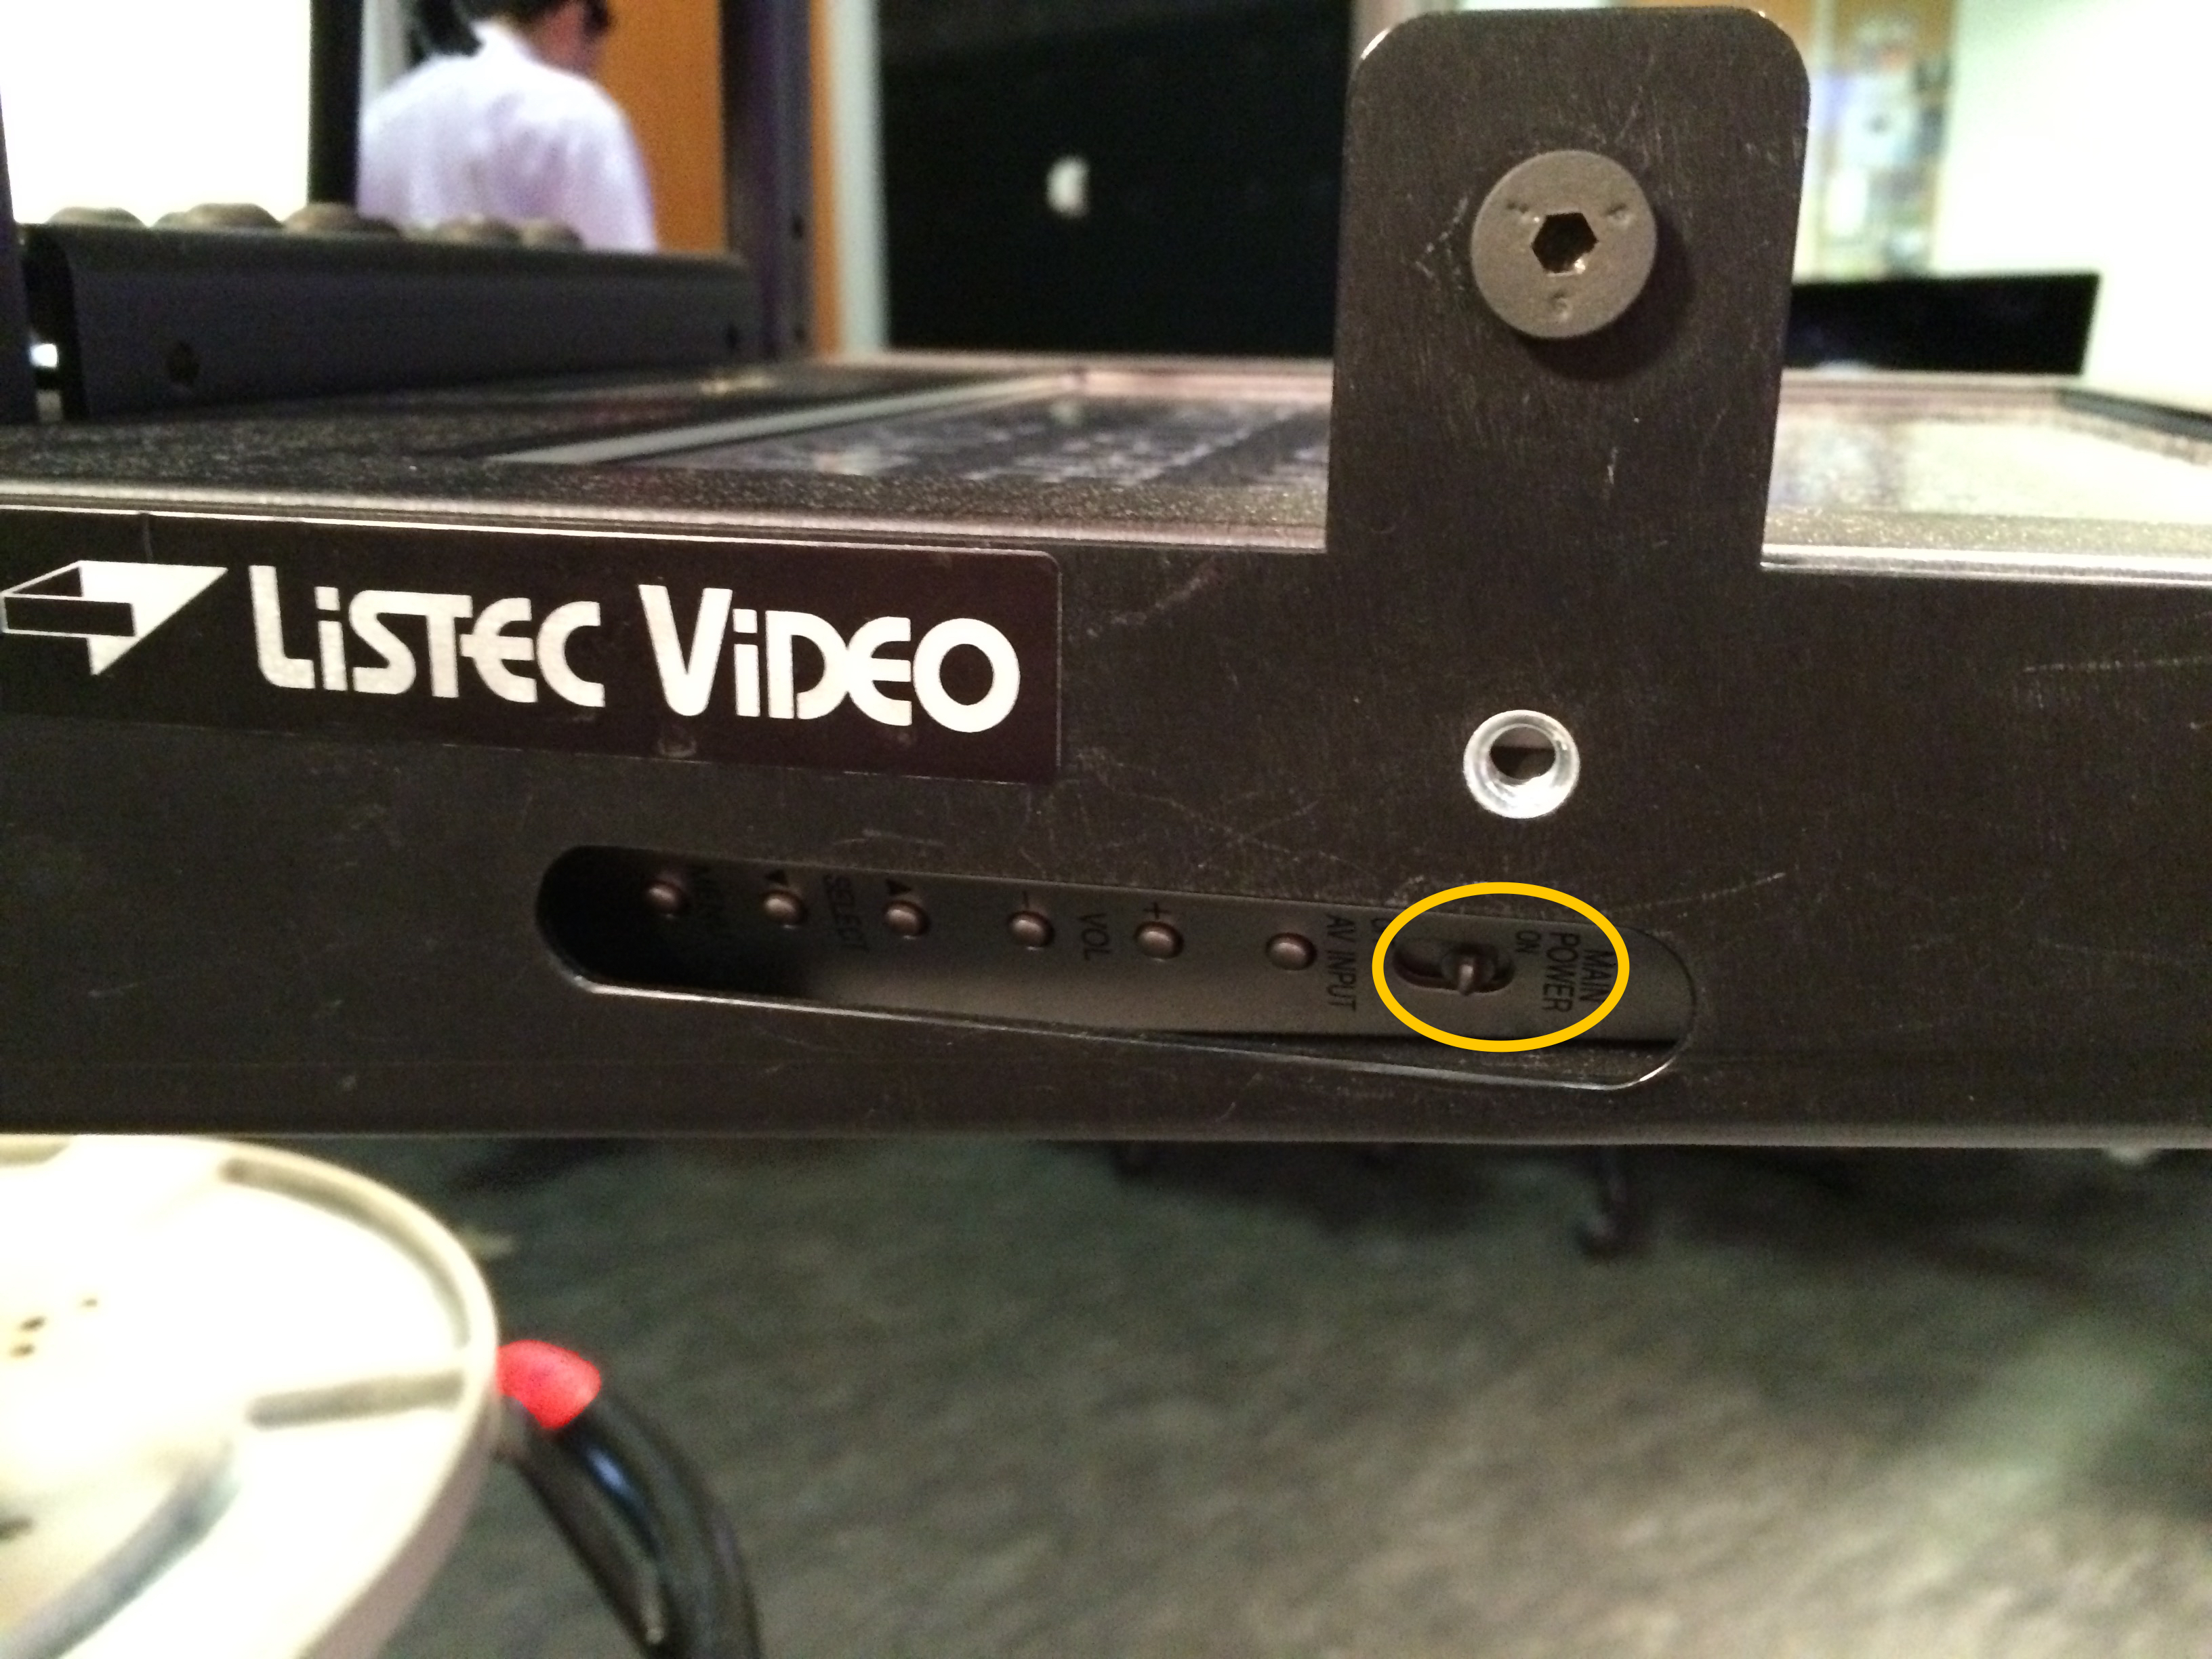
Never look at the text directly in front of you. Look to the big screens on the wall.
An update to the software means you can now watch the screen directly in front of you.
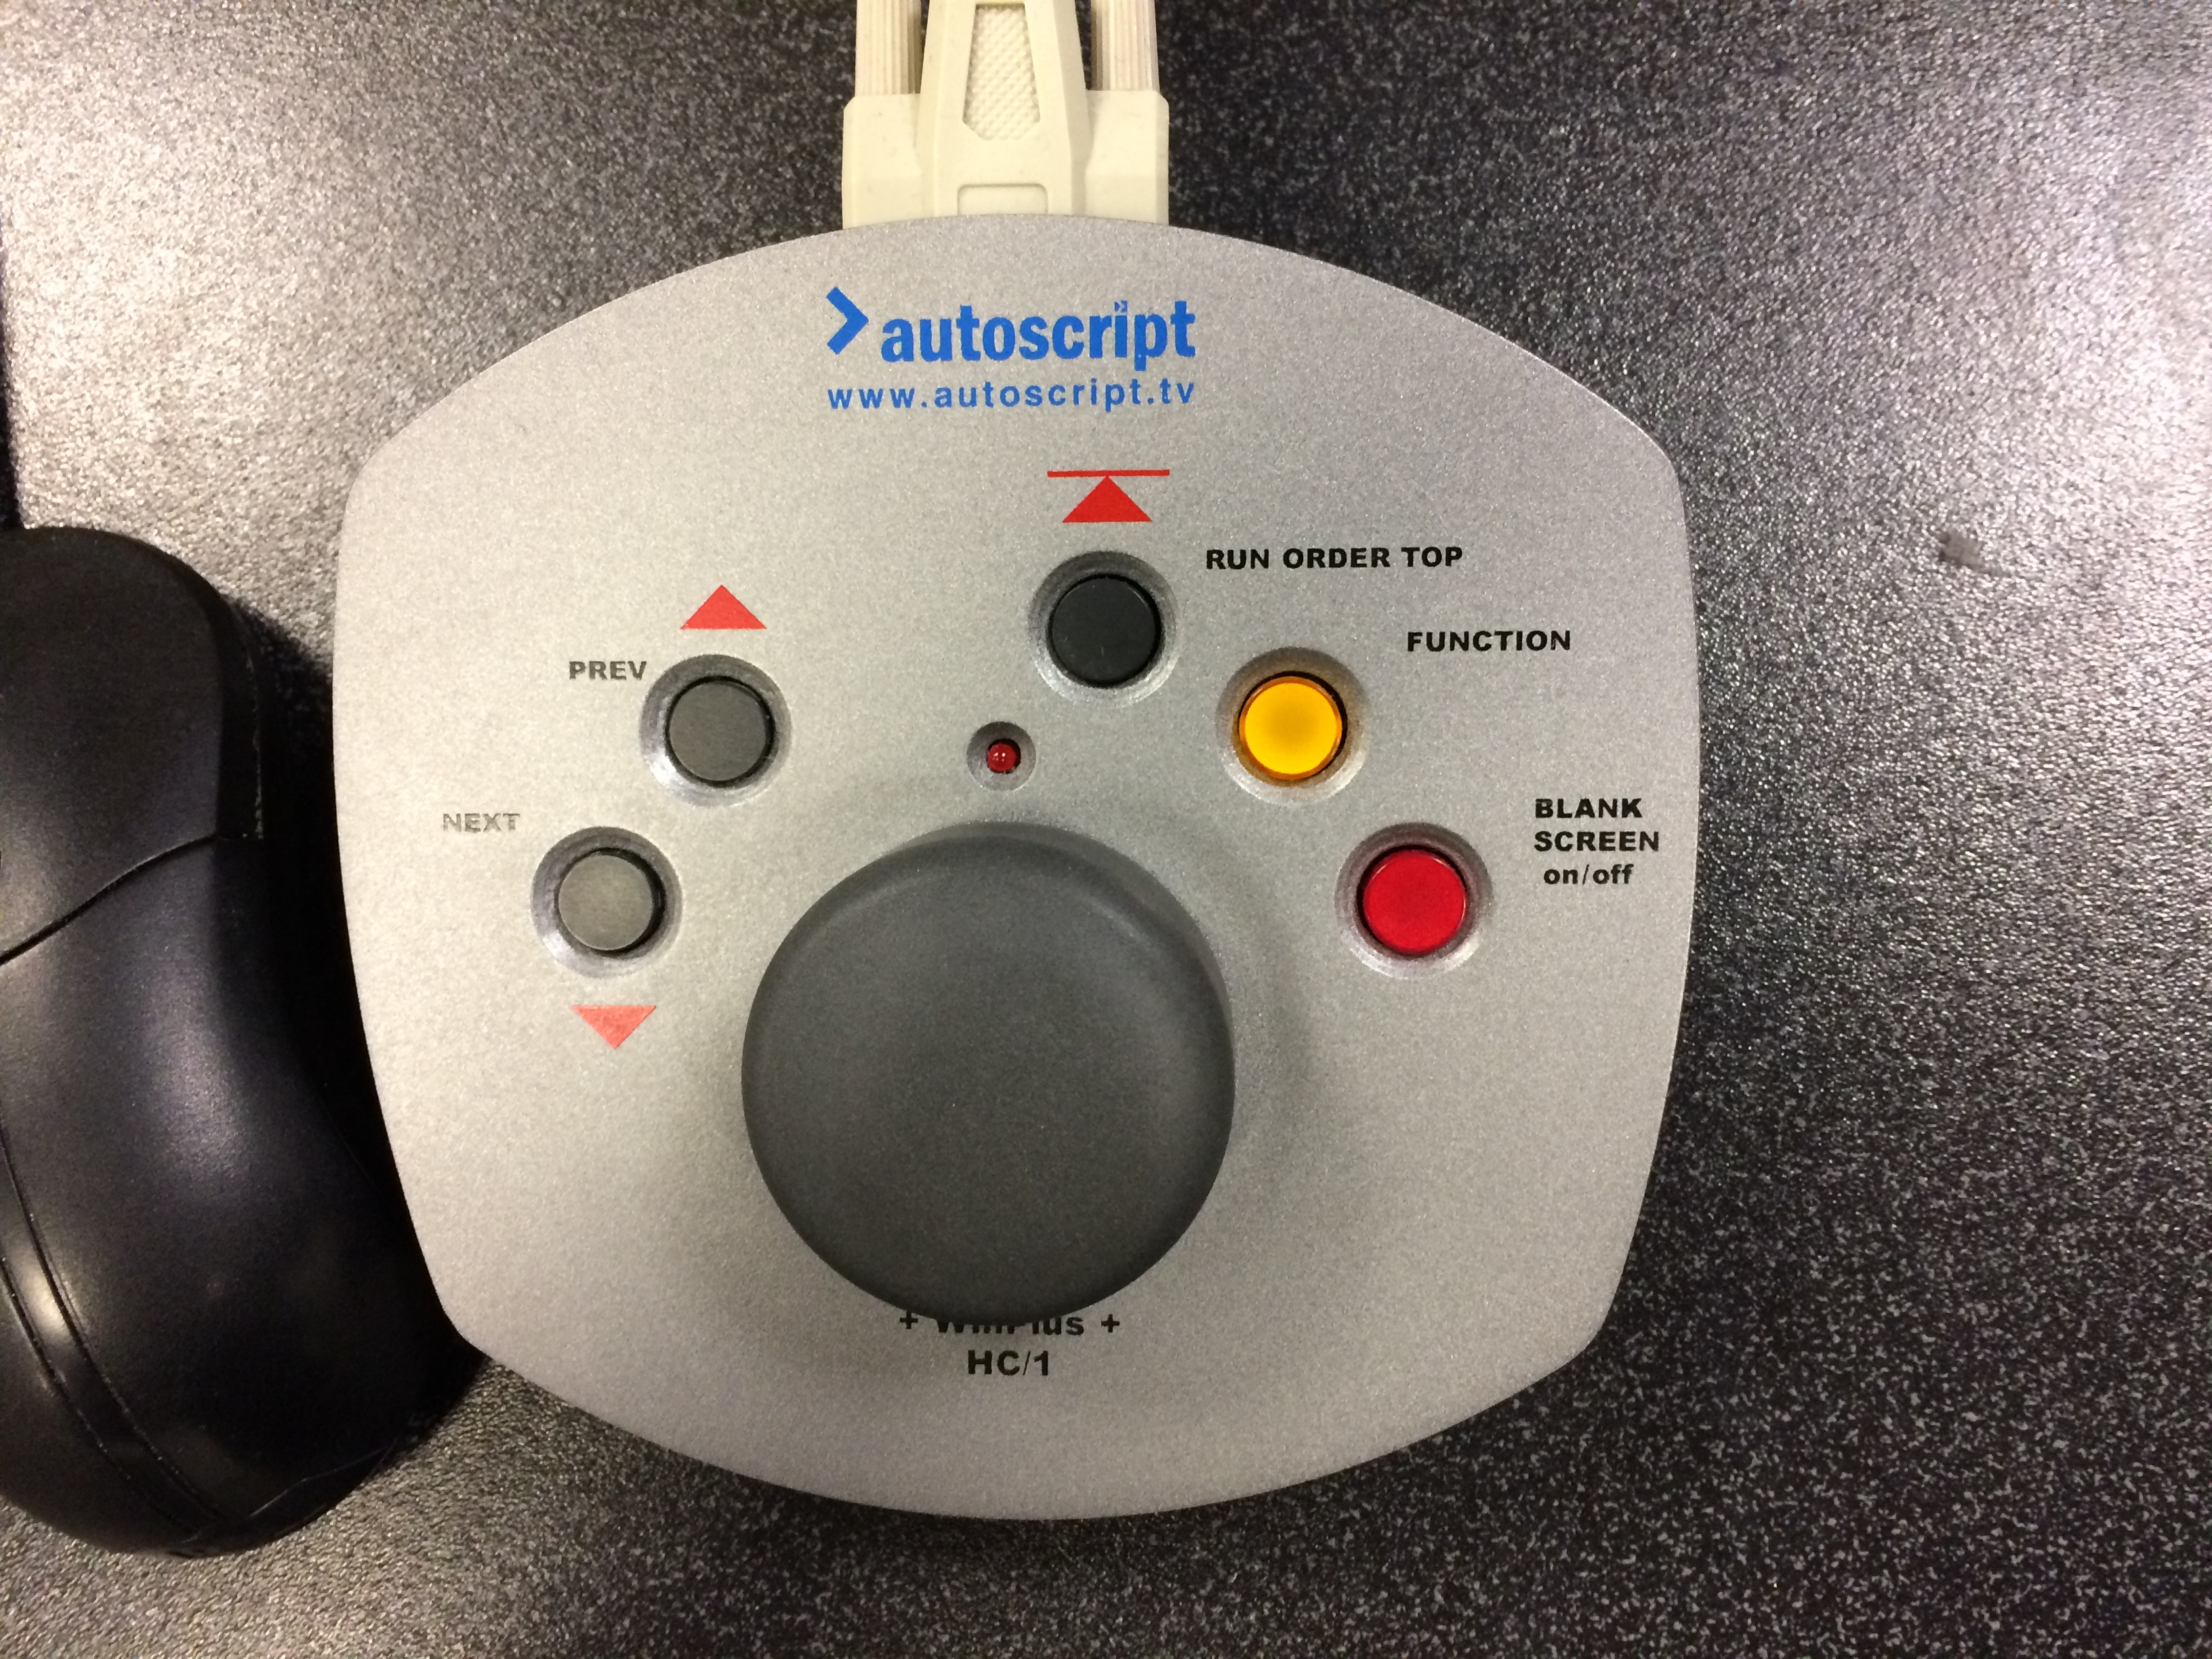
Use the rotating grey dial to move through the text. You can also use the self-explanatory buttons if you need to jump ahead.
If it’s your first time, PRACTICE. Roughly 1/6 people just can’t do this job (Citation Needed). If you can’t, that’s fine. But have someone else do it.
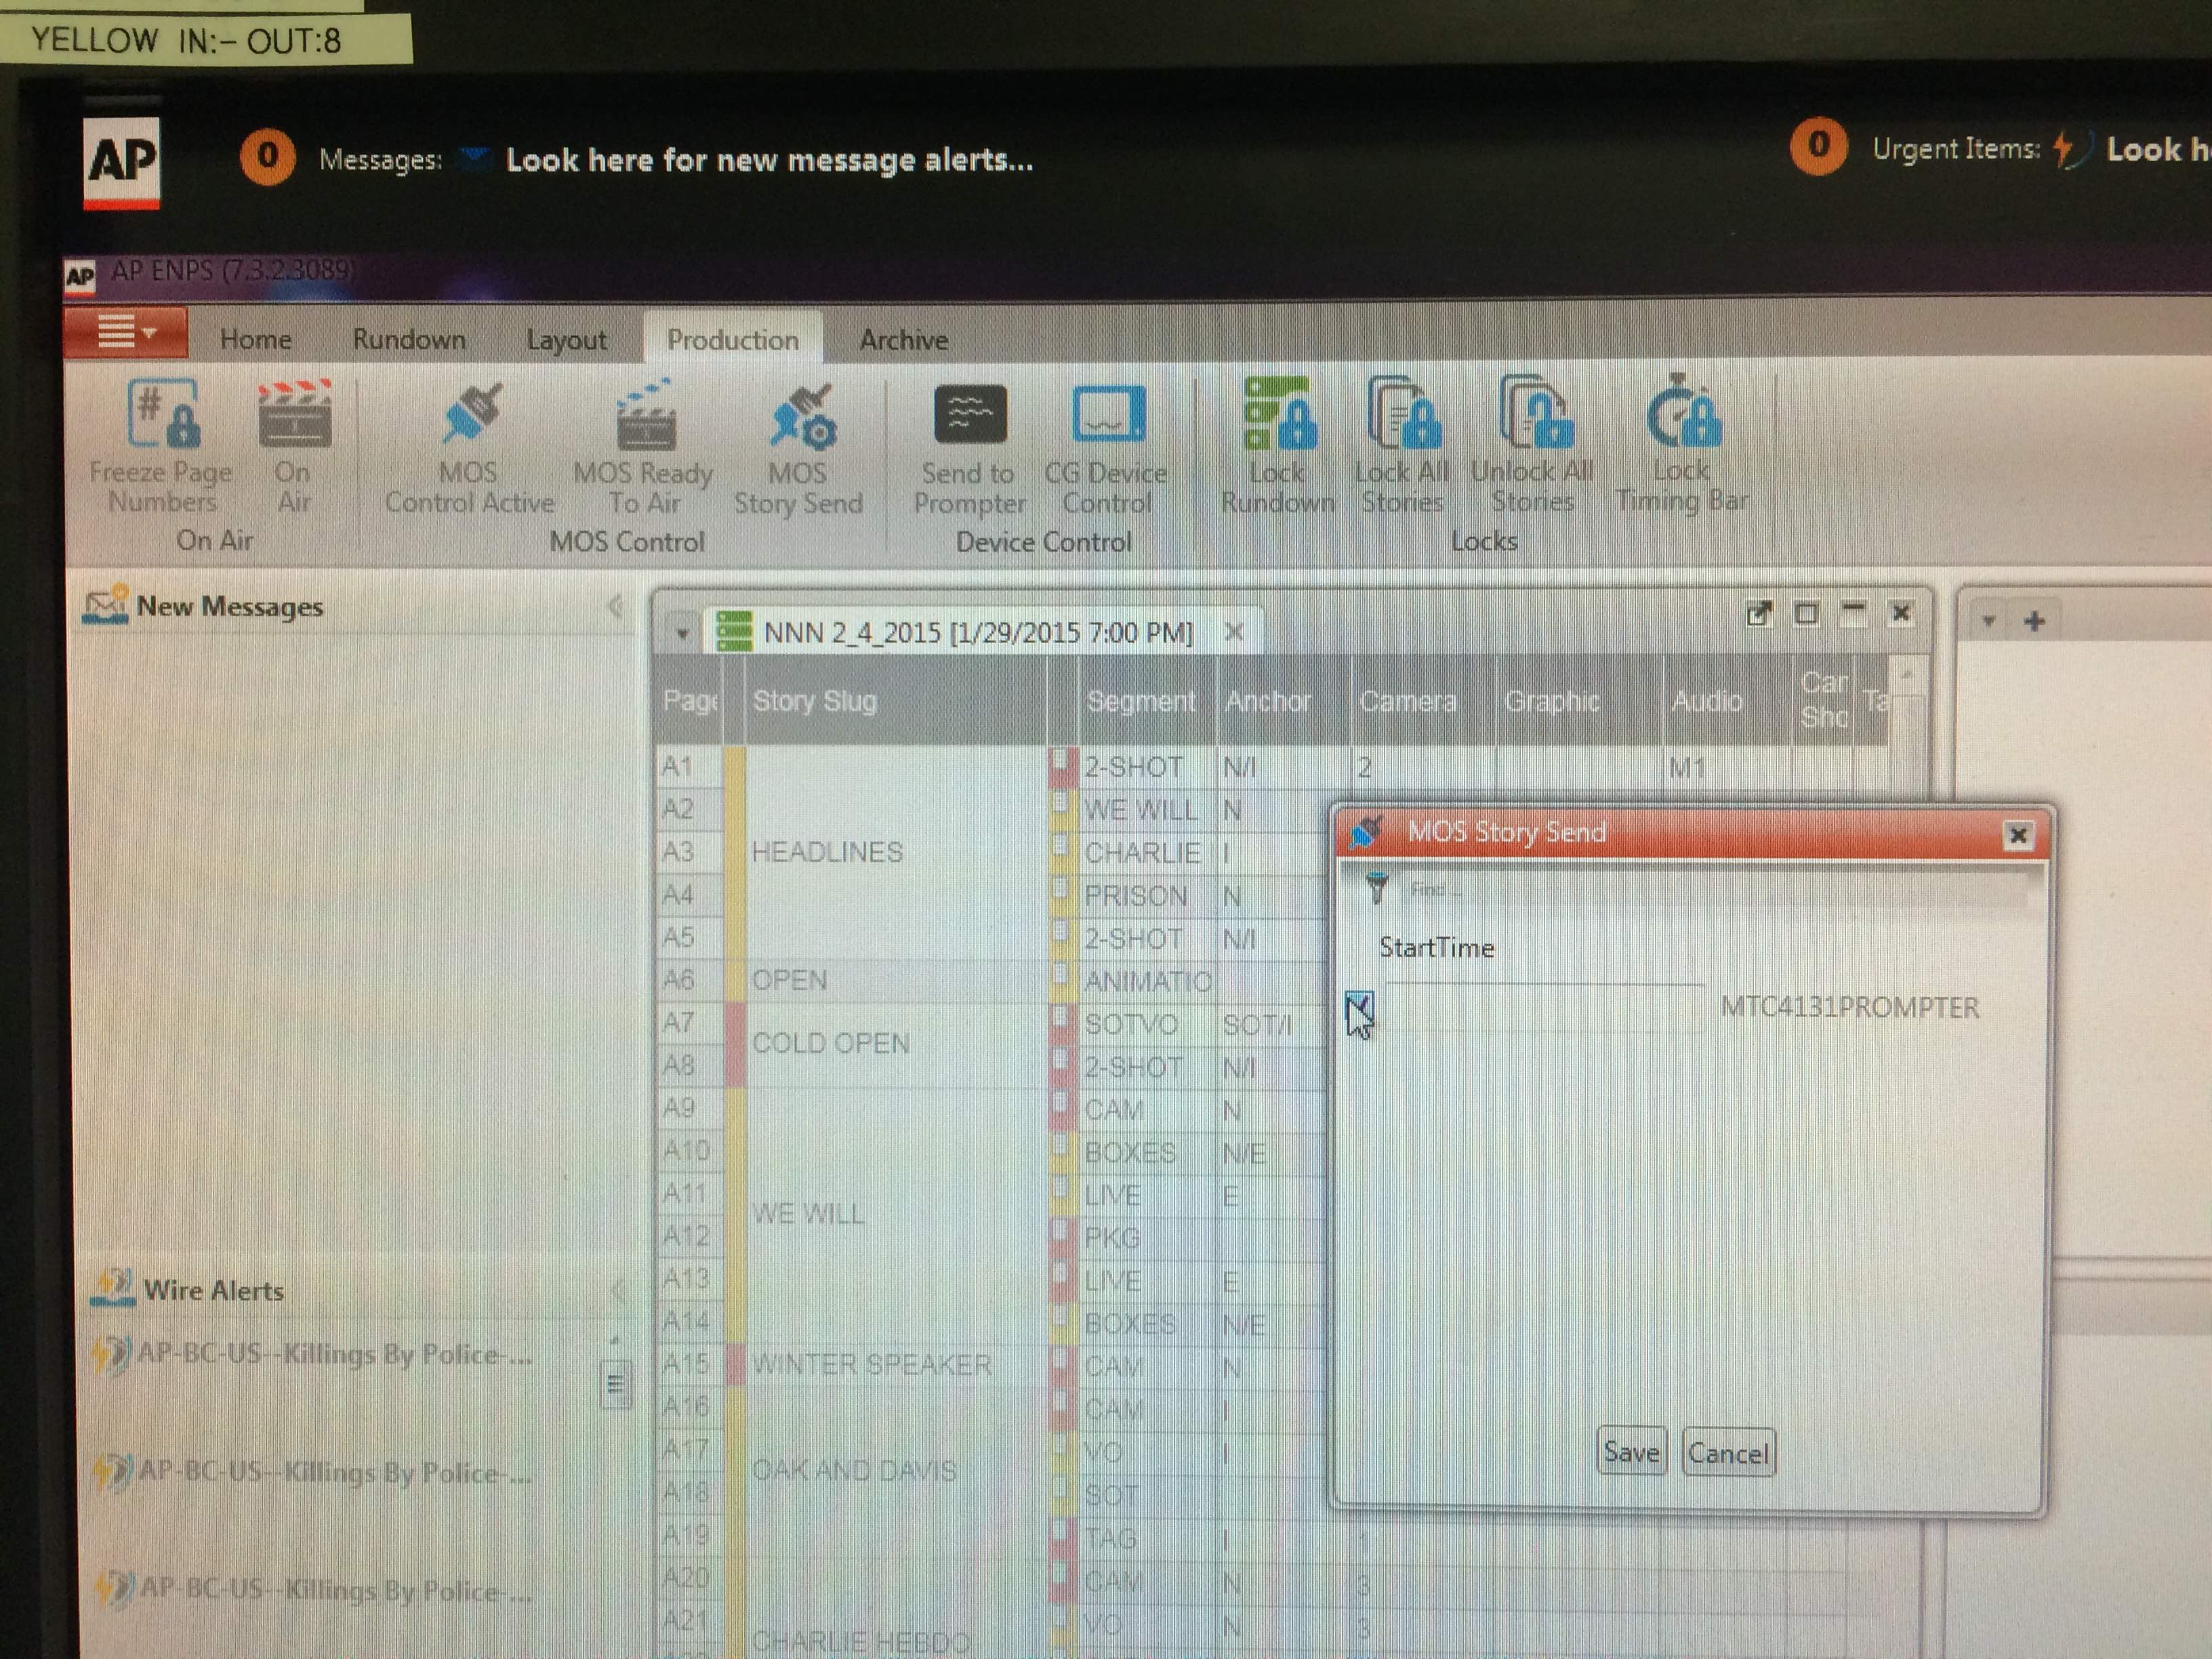
Here’s how to load a script onto the prompter if it’s not already there.

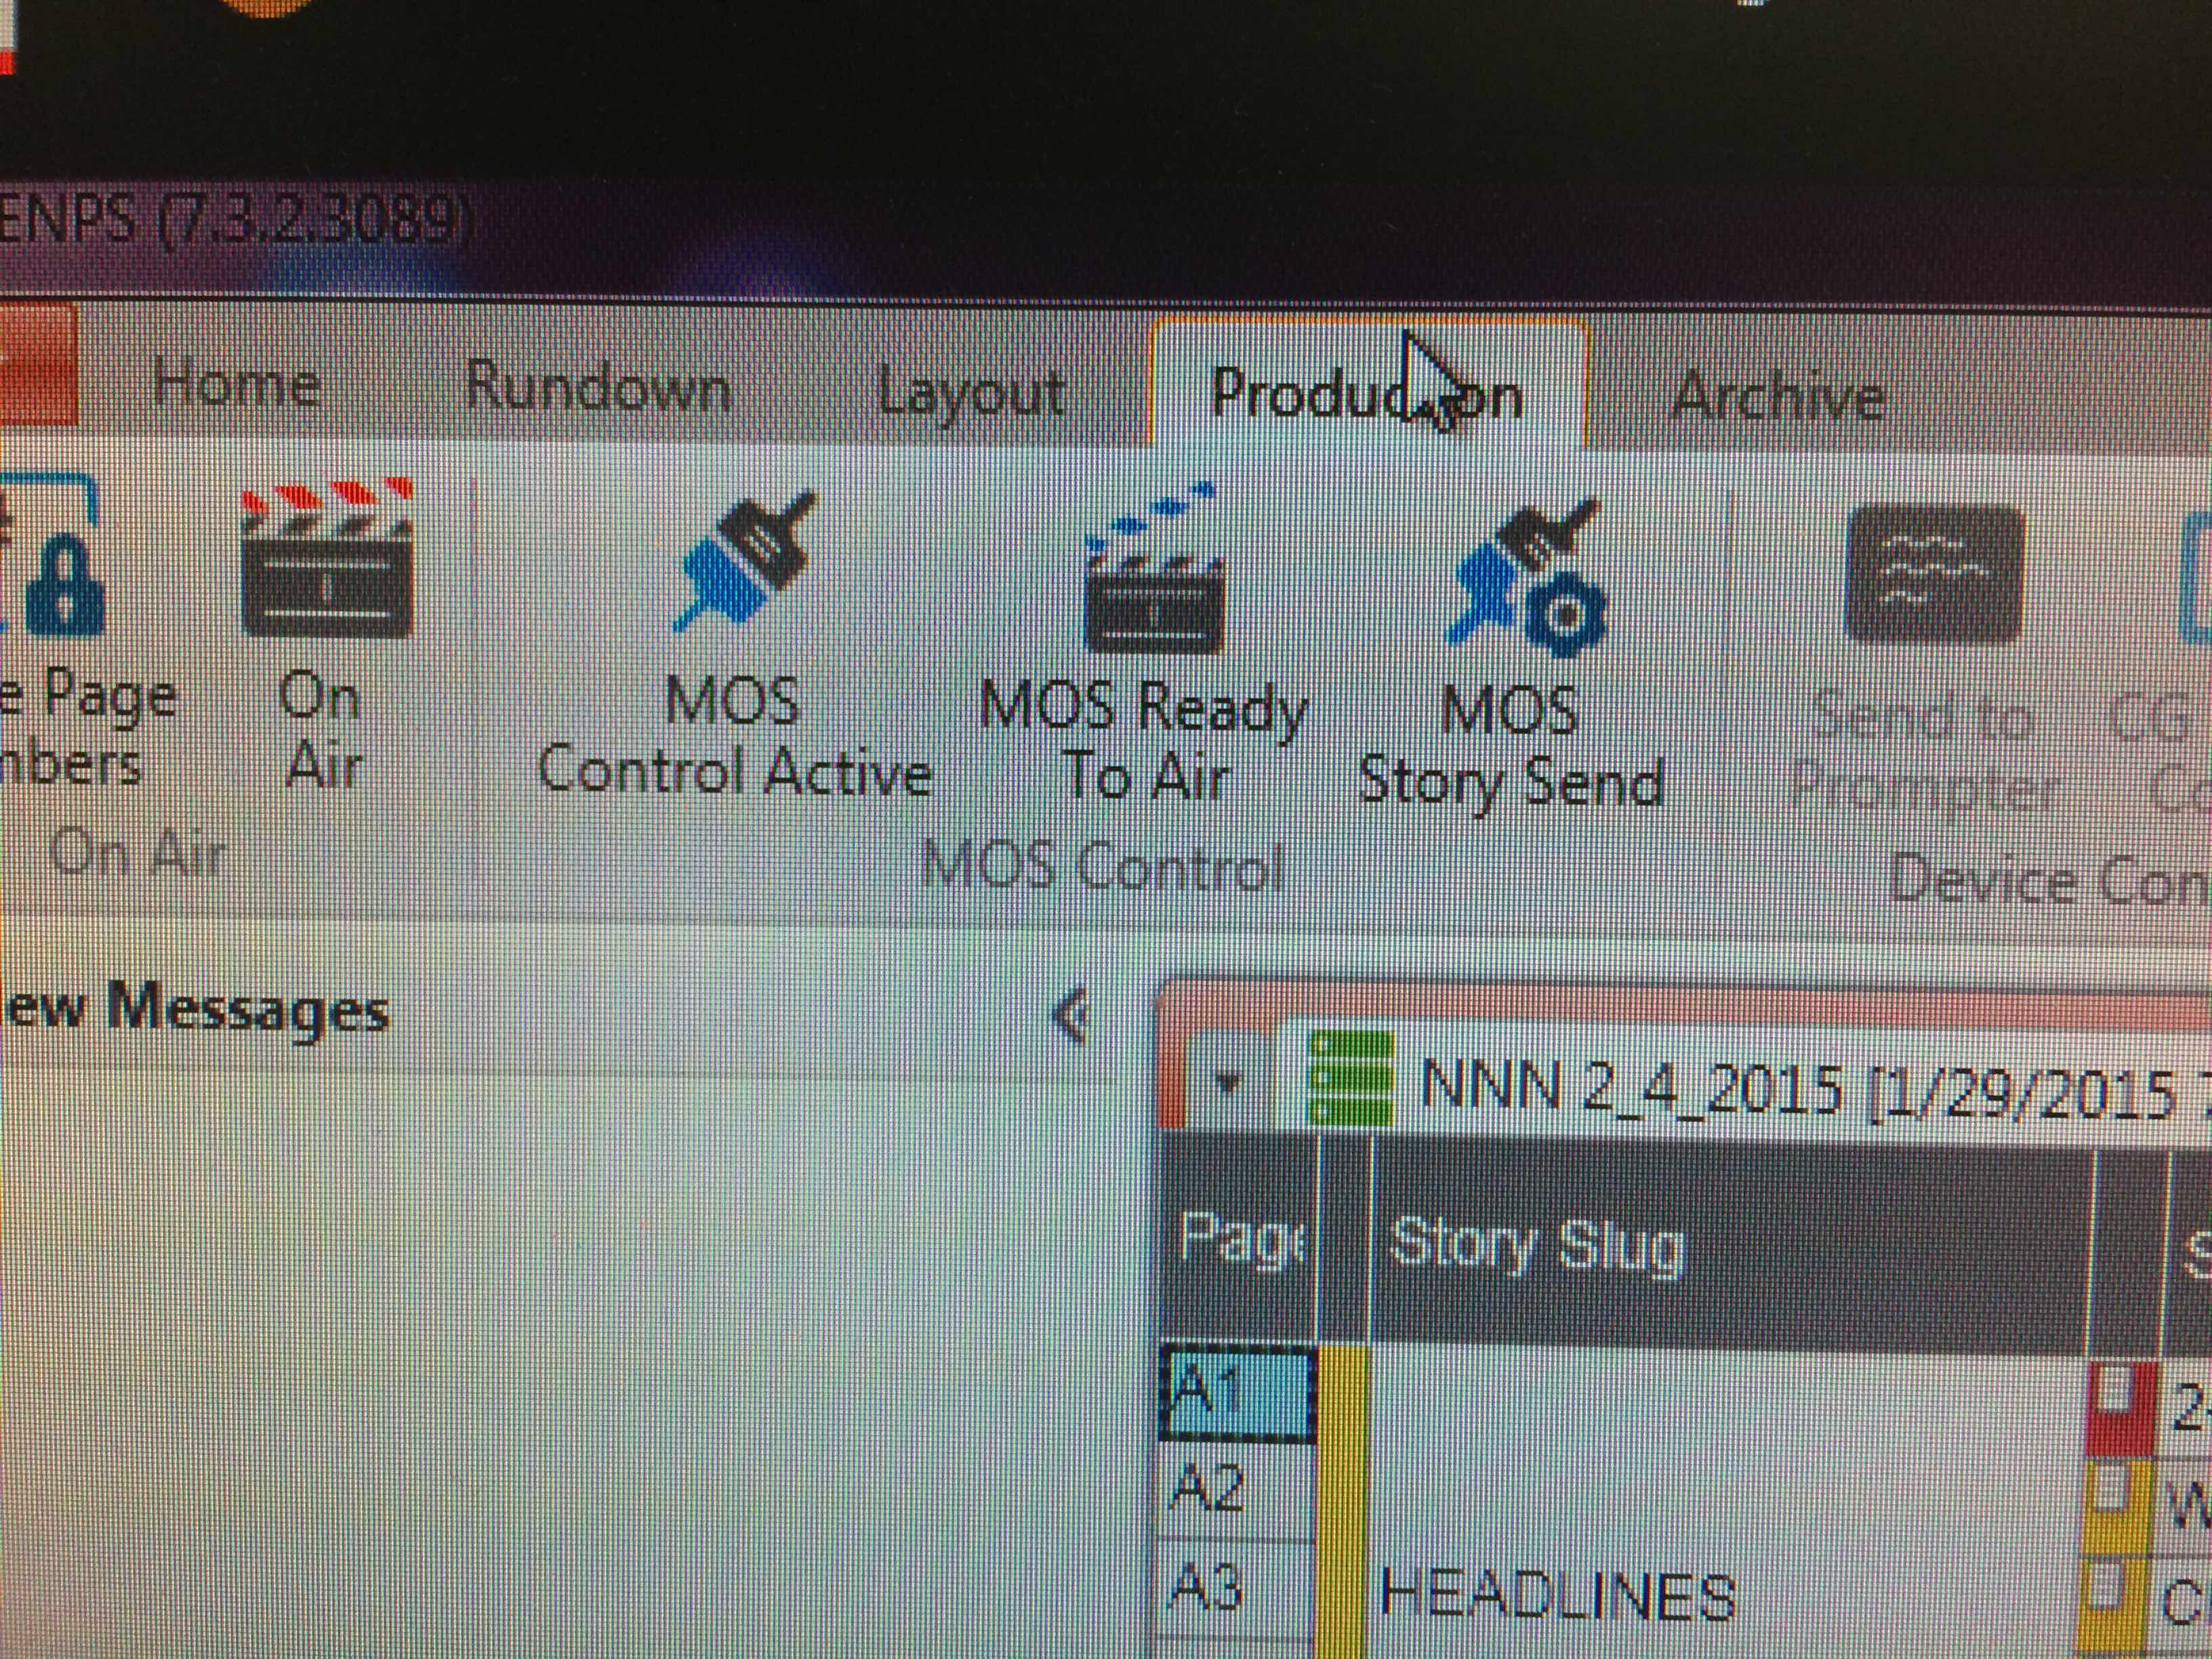
Hit MOS Story Send, check the correct box, save, then hit MOS Ready to Air and MOS Control Active.
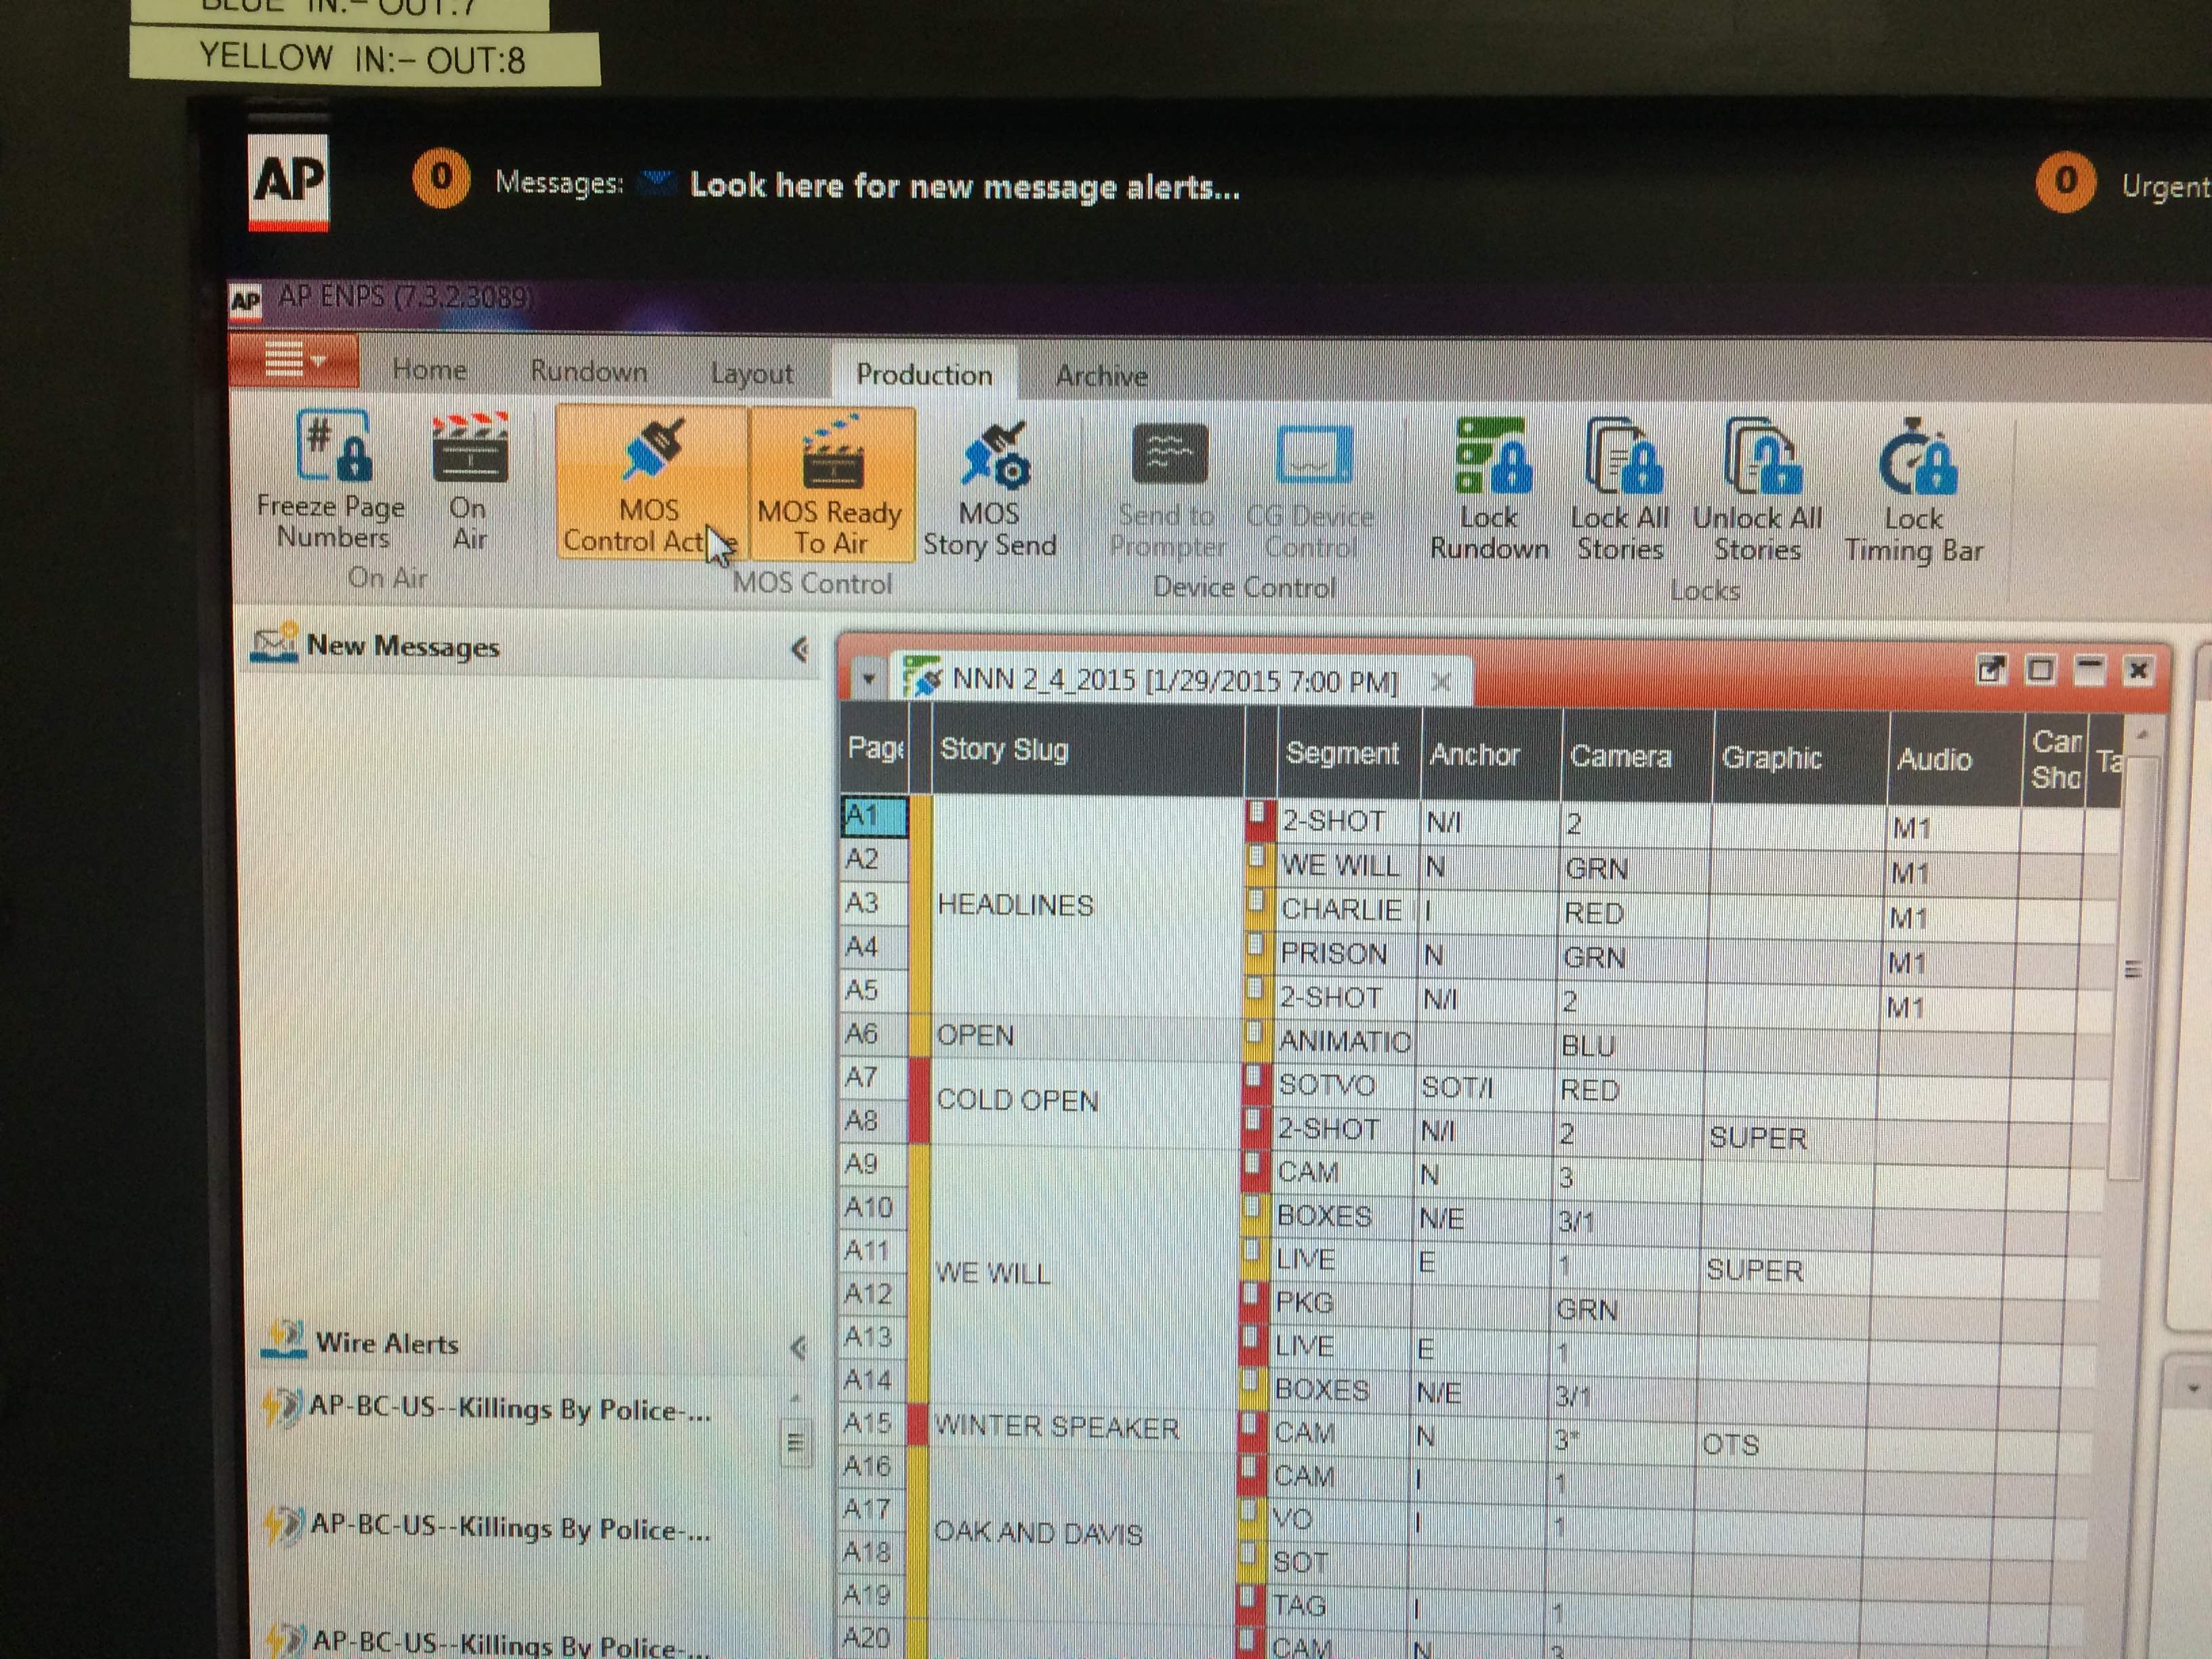
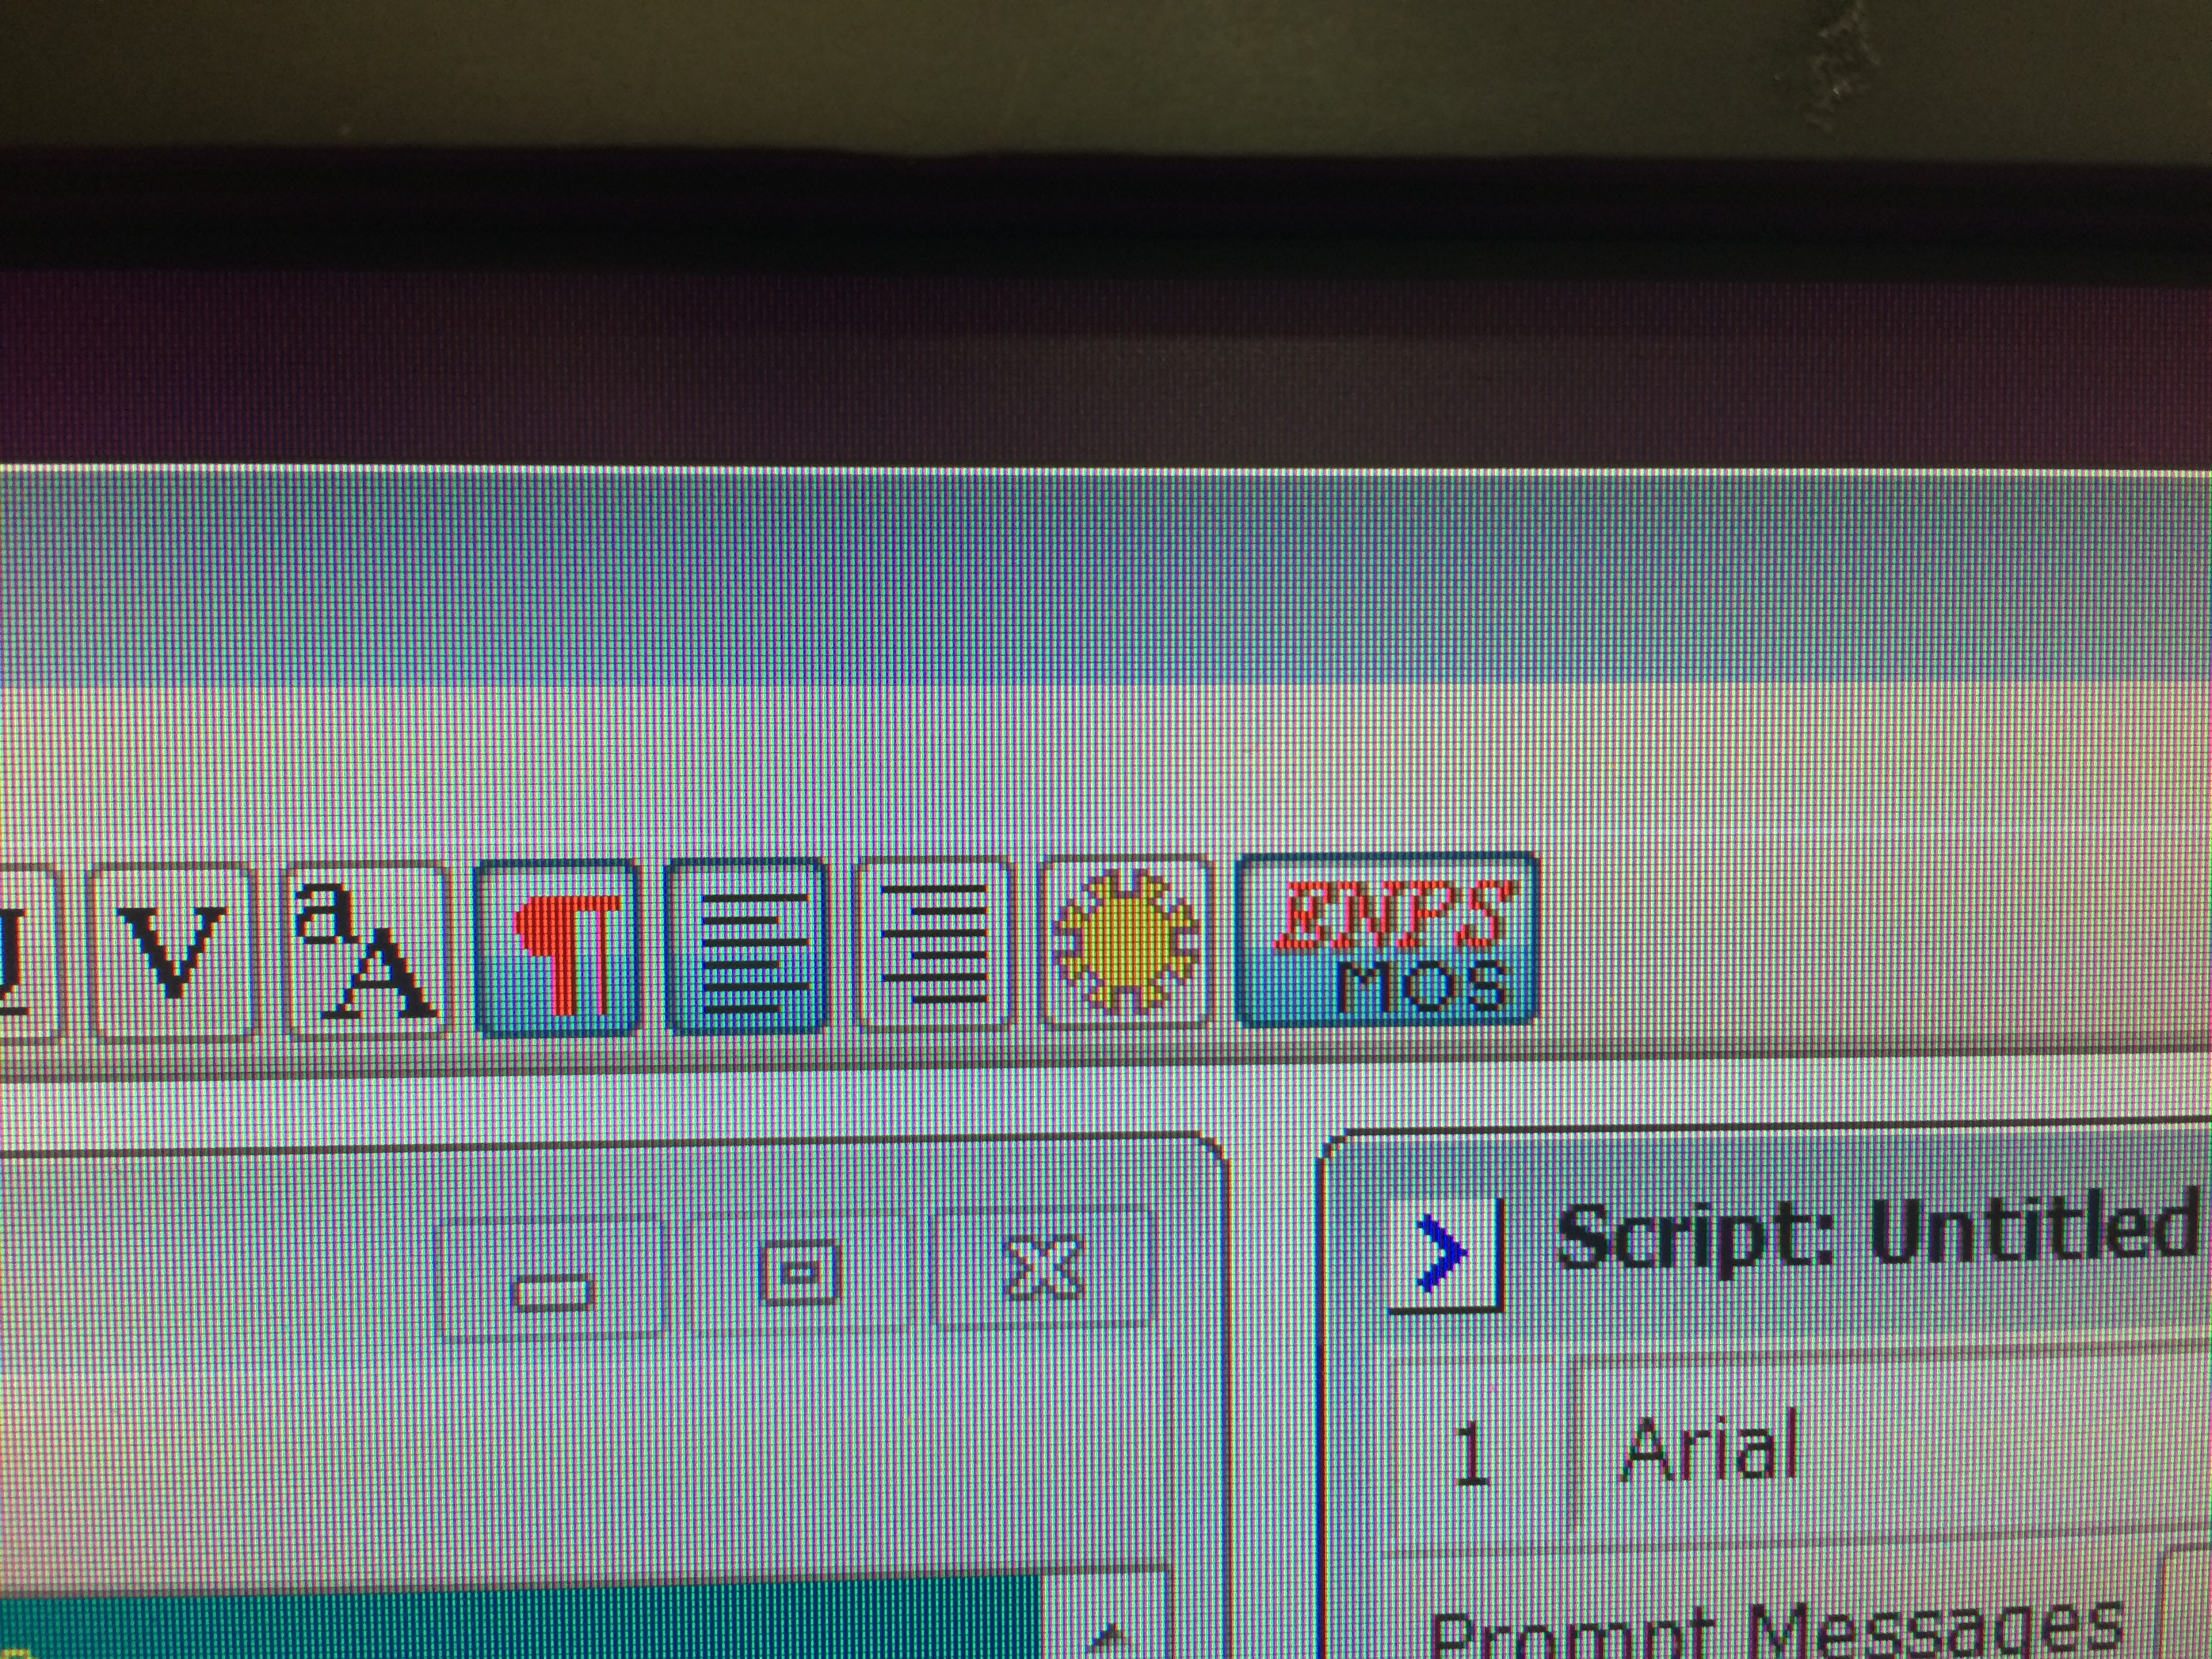
Make sure ENPS MOS is selected. Otherwise, it’s not receiving.
Hit the green dot up at the top. Properties. Check or uncheck On Air, MOS Control Active, and MOS Story Send. Hit Apply. We eventually want them all checked with MOS Story Send having medill.mtc.4131.mos
The computer with the prompter scroll wheel attached should have the right program open and in receiving mode.
Common Problems:
1. It’s not working. Close everything and try again.
2. It’s sending but you don’t see any text. Make sure the stories aren’t in the “Z” block which means it’s been floated.
3. Can’t open the actual prompter. Go to the file menu and hit “prompt on”
Floor Director
Make sure talent knows which camera they’re looking at, gives count down out of packages & SOTs, shepherds cameras/positions, help with audio set up during show, make sure chairs are in position
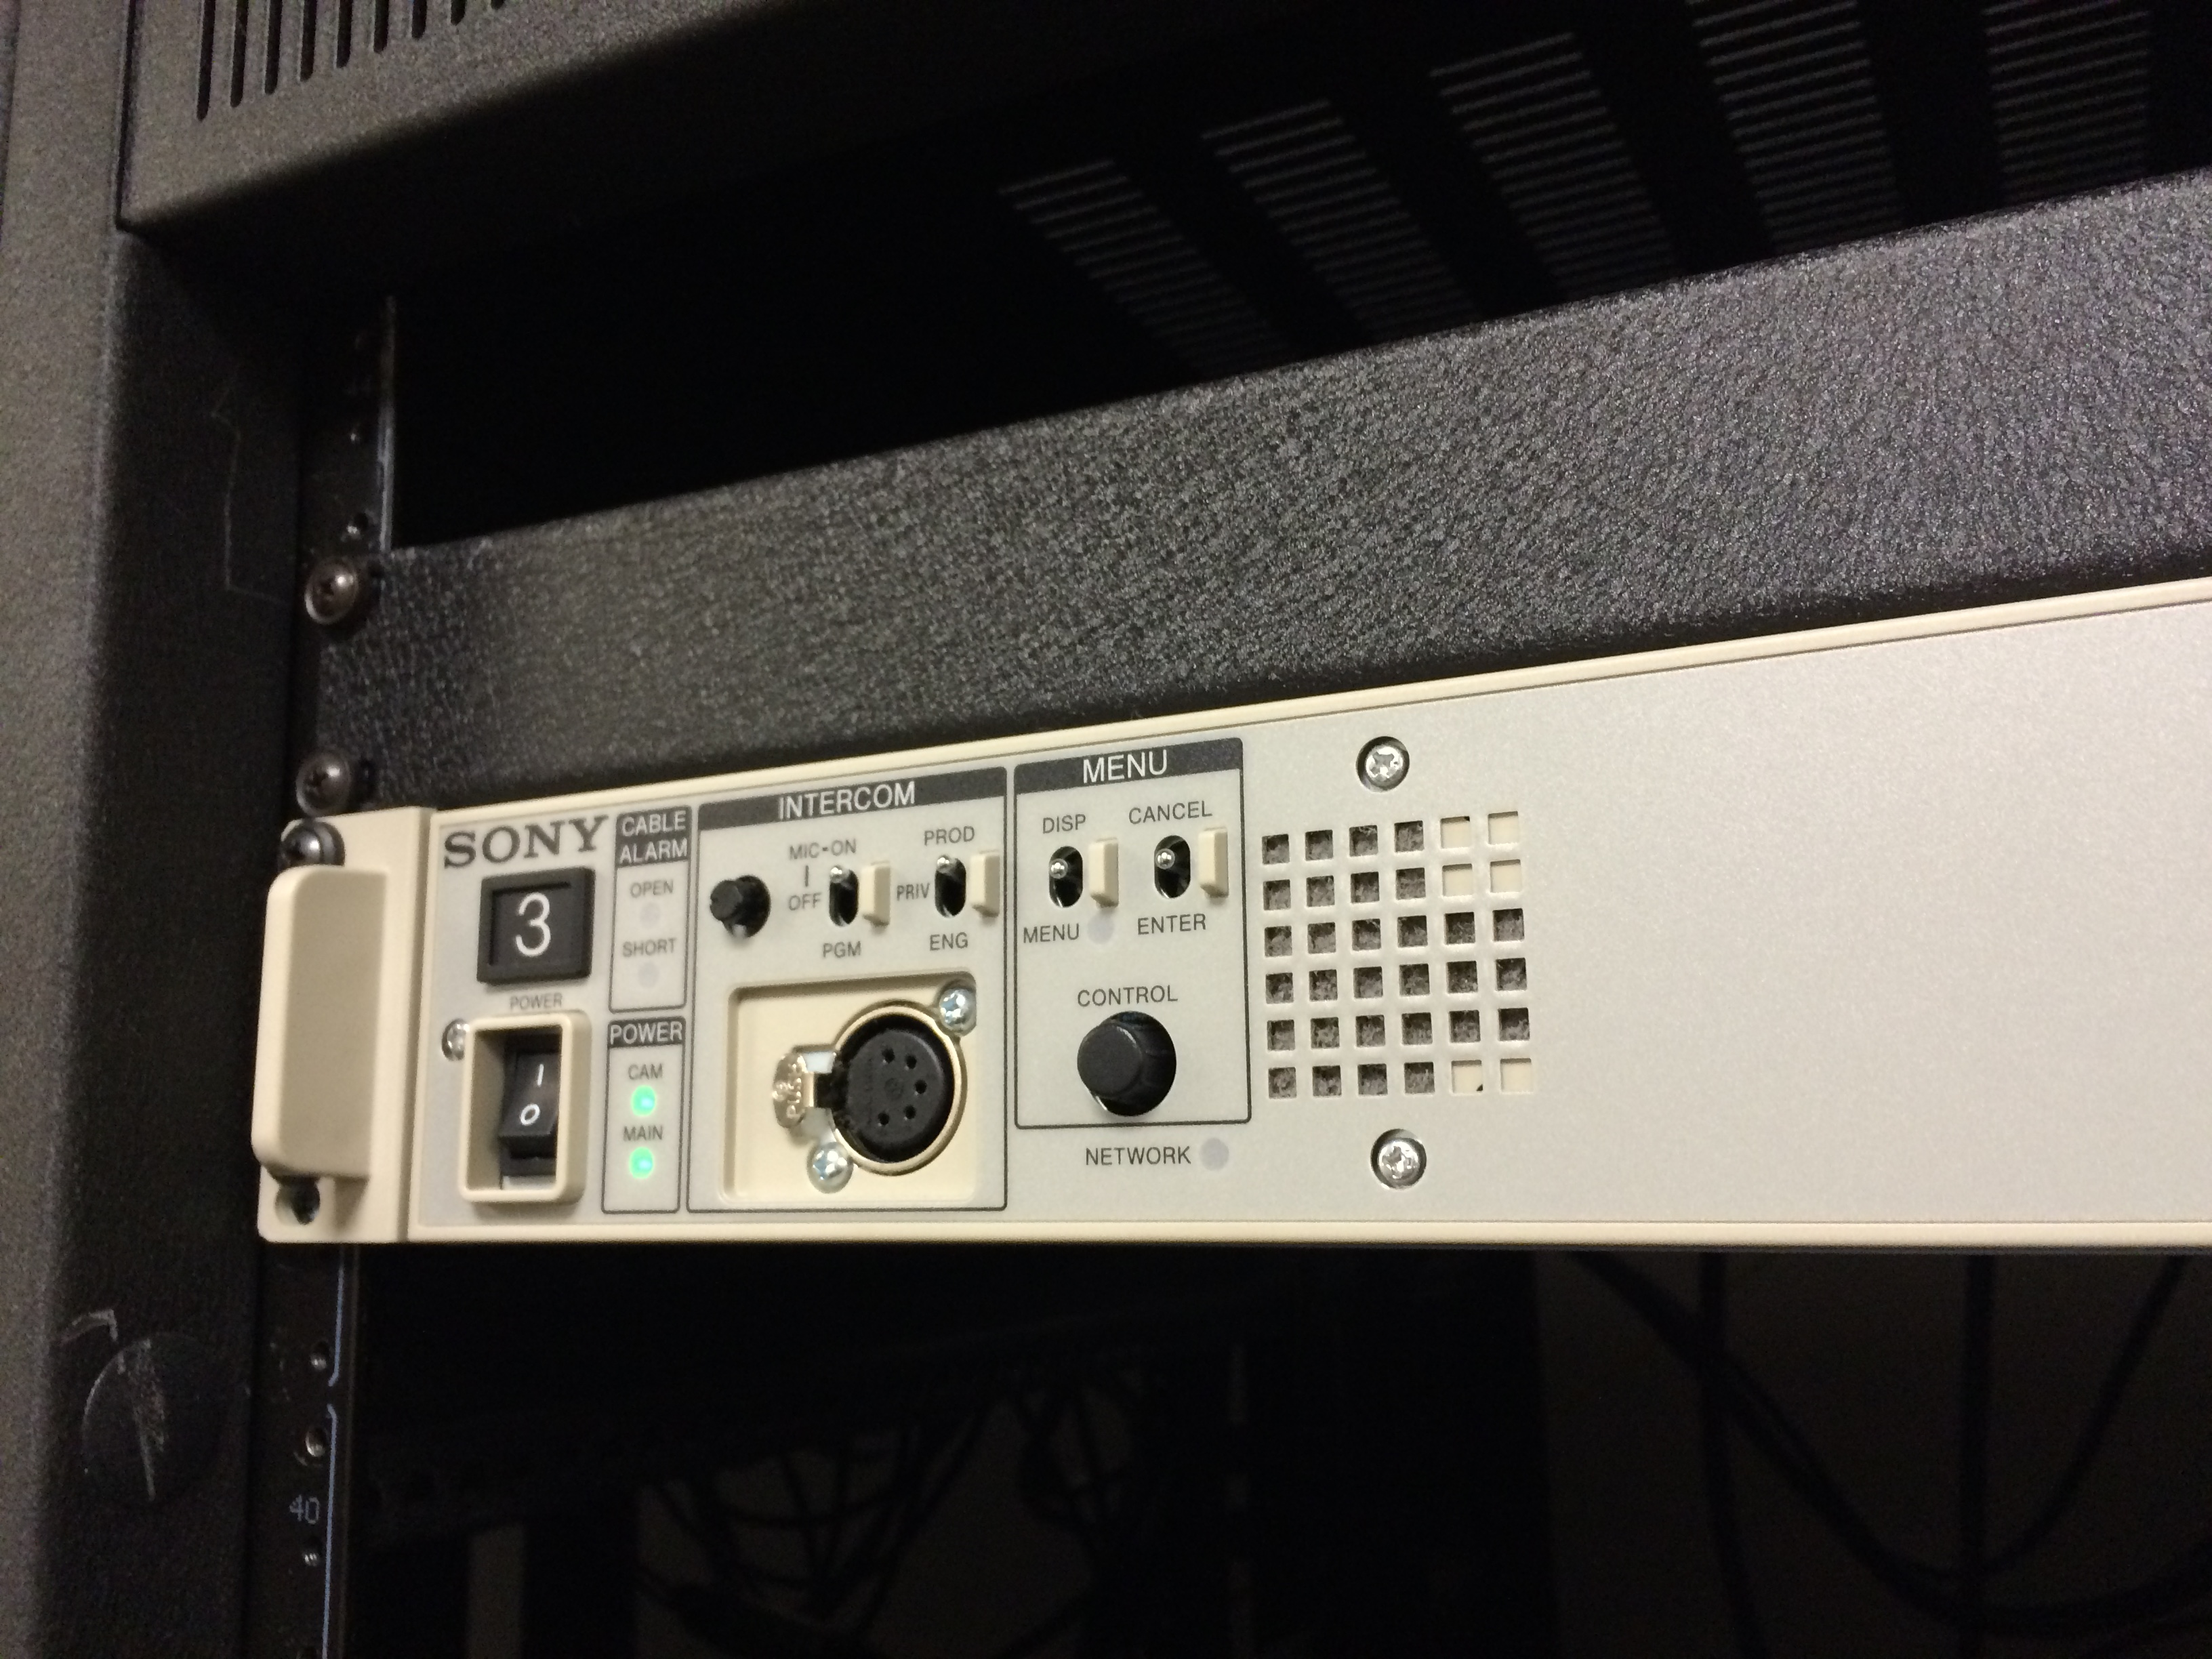
Intercom A is where you need to plug in your headset.
“I spent half an hour just now doing a pretty intensive check of the intercom system, and it does turn out that Channel A of the TD station is defective. Even with the volume cranked and audio blasting into the system, there’s barely any audio coming through; I can understand how someone trying to use that at a normal volume level wouldn’t hear anything. Please use Channel B until further notice. I’ve made the necessary adjustments elsewhere in the system so that everyone can communicate on B. The Floor Director will want to make sure their cable is plugged into Channel B at the wall. The Audio Board operator’s station should be set for Channel A, but it is connected to Channel B; that station’s just weird.”
As “floor” you point to the anchors when they need to talk and make sure they’re looking into the right camera. If you’re the only one (unlikely), you’ll also have to adjust cameras from centered to OTS (over the shoulder with more space to the right of the person).
Technical Director
Switches between cams and packs
Commonly referred to as TD, the person doing this usually just presses buttons and follows the instructions of the director.
Skilled directors frown upon the TD giving directions to playback, audio, etc. Since student productions rarely to never have professional directors, the TD & the Director should work together as a team.
The technical director should keep track of where we are the in the rundown/show and what the next screen should show. We use “Program” (PGM) and “Preview” screens and when preview is what we want to be live, hit Cut to get there.
So basically only use the lowest row of buttons and cut.
The trickiest thing about TD is graphics, especially boxes.
We do boxes with ME2. On the touchscreen LED buttons on the switcher there are BOXES, LEFT and RIGHT. Those are the buttons you’ll want to press. To take boxes, press the ME2 button in the ME1 switcher (the bottom one).
For graphics, we use two different methods:
1. Supers (lower thirds) use the auto cmpx1 key buttons all the way on the right. This will fade in a super live.
2. OTS (over the shoulder graphics) use the bknd key 1 key 2 buttons. in order to add, hold down both bknd and the key you want to put up. This will put it in preview and then take the preview with the graphic. To clear, hit bknd again.
TK UPDATES
Macro button turns the wrong numbers (like “2” above “Cam 1”) on and off. If off you cannot use any macros.
DSK refers to downstream graphics applied at the end of the render. Probably not a great idea to use it for supers because as of March 1, 2015 there’s a strange transparent effect being added.
To run backups from the TD station, put in a P2 card in and hit record. If the record doesn’t work, try hitting play & record at the same time.
Picture in Picture, or PnP is how boxes are set up. Use the touch screen to turn it off or on.
It’d be hard to sum up everything you need to know. Still here are some things that are handy.
To fade up we use the silver lever. Make sure “Mix” button is on and not “Wipe” which will change what the lever does.
This stuff looks pretty complicated. It’s not so bad once you get the hang of it.
[image]
^These bring in graphics – OTS, supers, etc. There should be a screen on the TV that shows what’s in COMPX1 and COMPX2 so you know what you’re about to bring up. Generally we’ll use the Auto button v. the Cut button. Auto fades in a graphic.
The Director
Directors are generally the most experienced of the crew. They’ll have the most balls in the air – making sure everything is working smoothly.
A good director uses the headset to make sure everyone knows what’s coming up and what needs to be done. For instance here’s an example what might happen at the beginning of a show:
Everyone good? Audio? (Check!) Playback (Check!) TD? (Check!) Graphics (Check!) Prompter (Check!) Floor? (Check!) OK! We’re going in 1 minute! Places! Everyone shut up or get out!
30 seconds. Let’s have a good show everyone!
10… 9… 8… 7… 6… 5… 4… 3… 2… 1…
Fade up! Cue!
Ready Green. Roll Green. Take Green. Ready Red. Roll Red. Take Red. Coming to Green. Roll Green. Take Green. Coming to 2. Take 2.
Ready and Coming to both mean the same. Personal preference dictates most of this.
Engineering
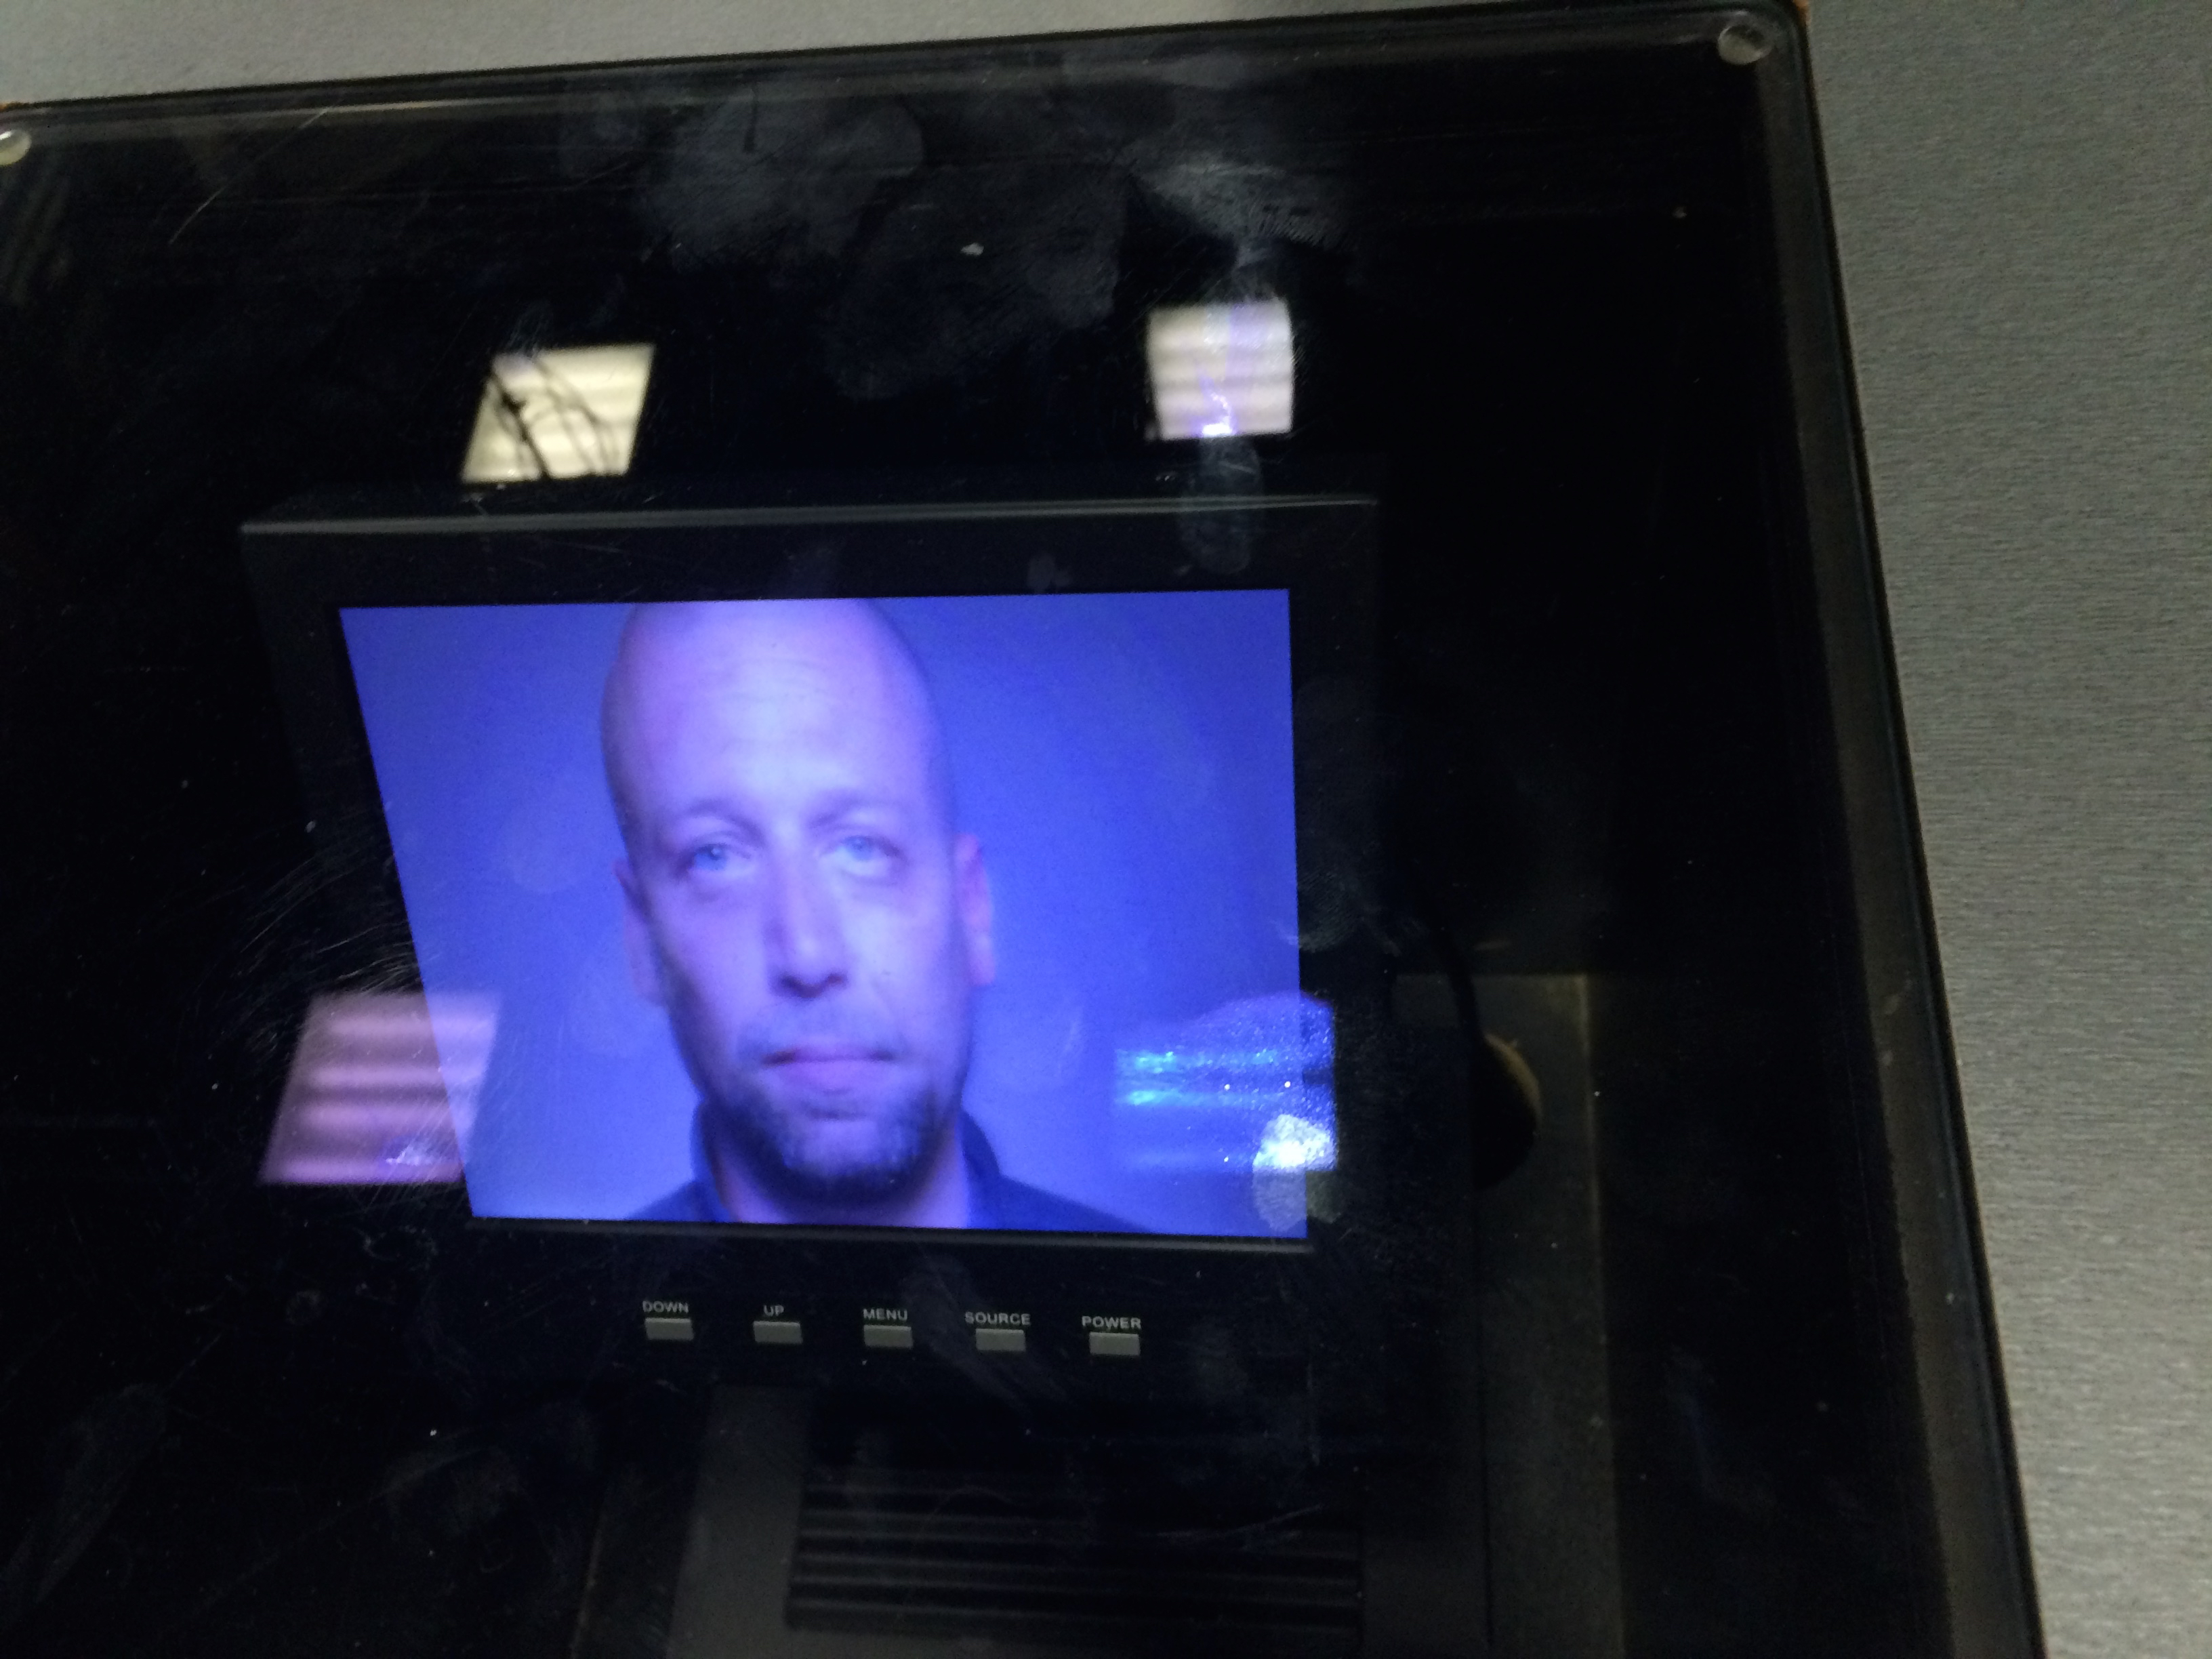
Monitor in the desk.
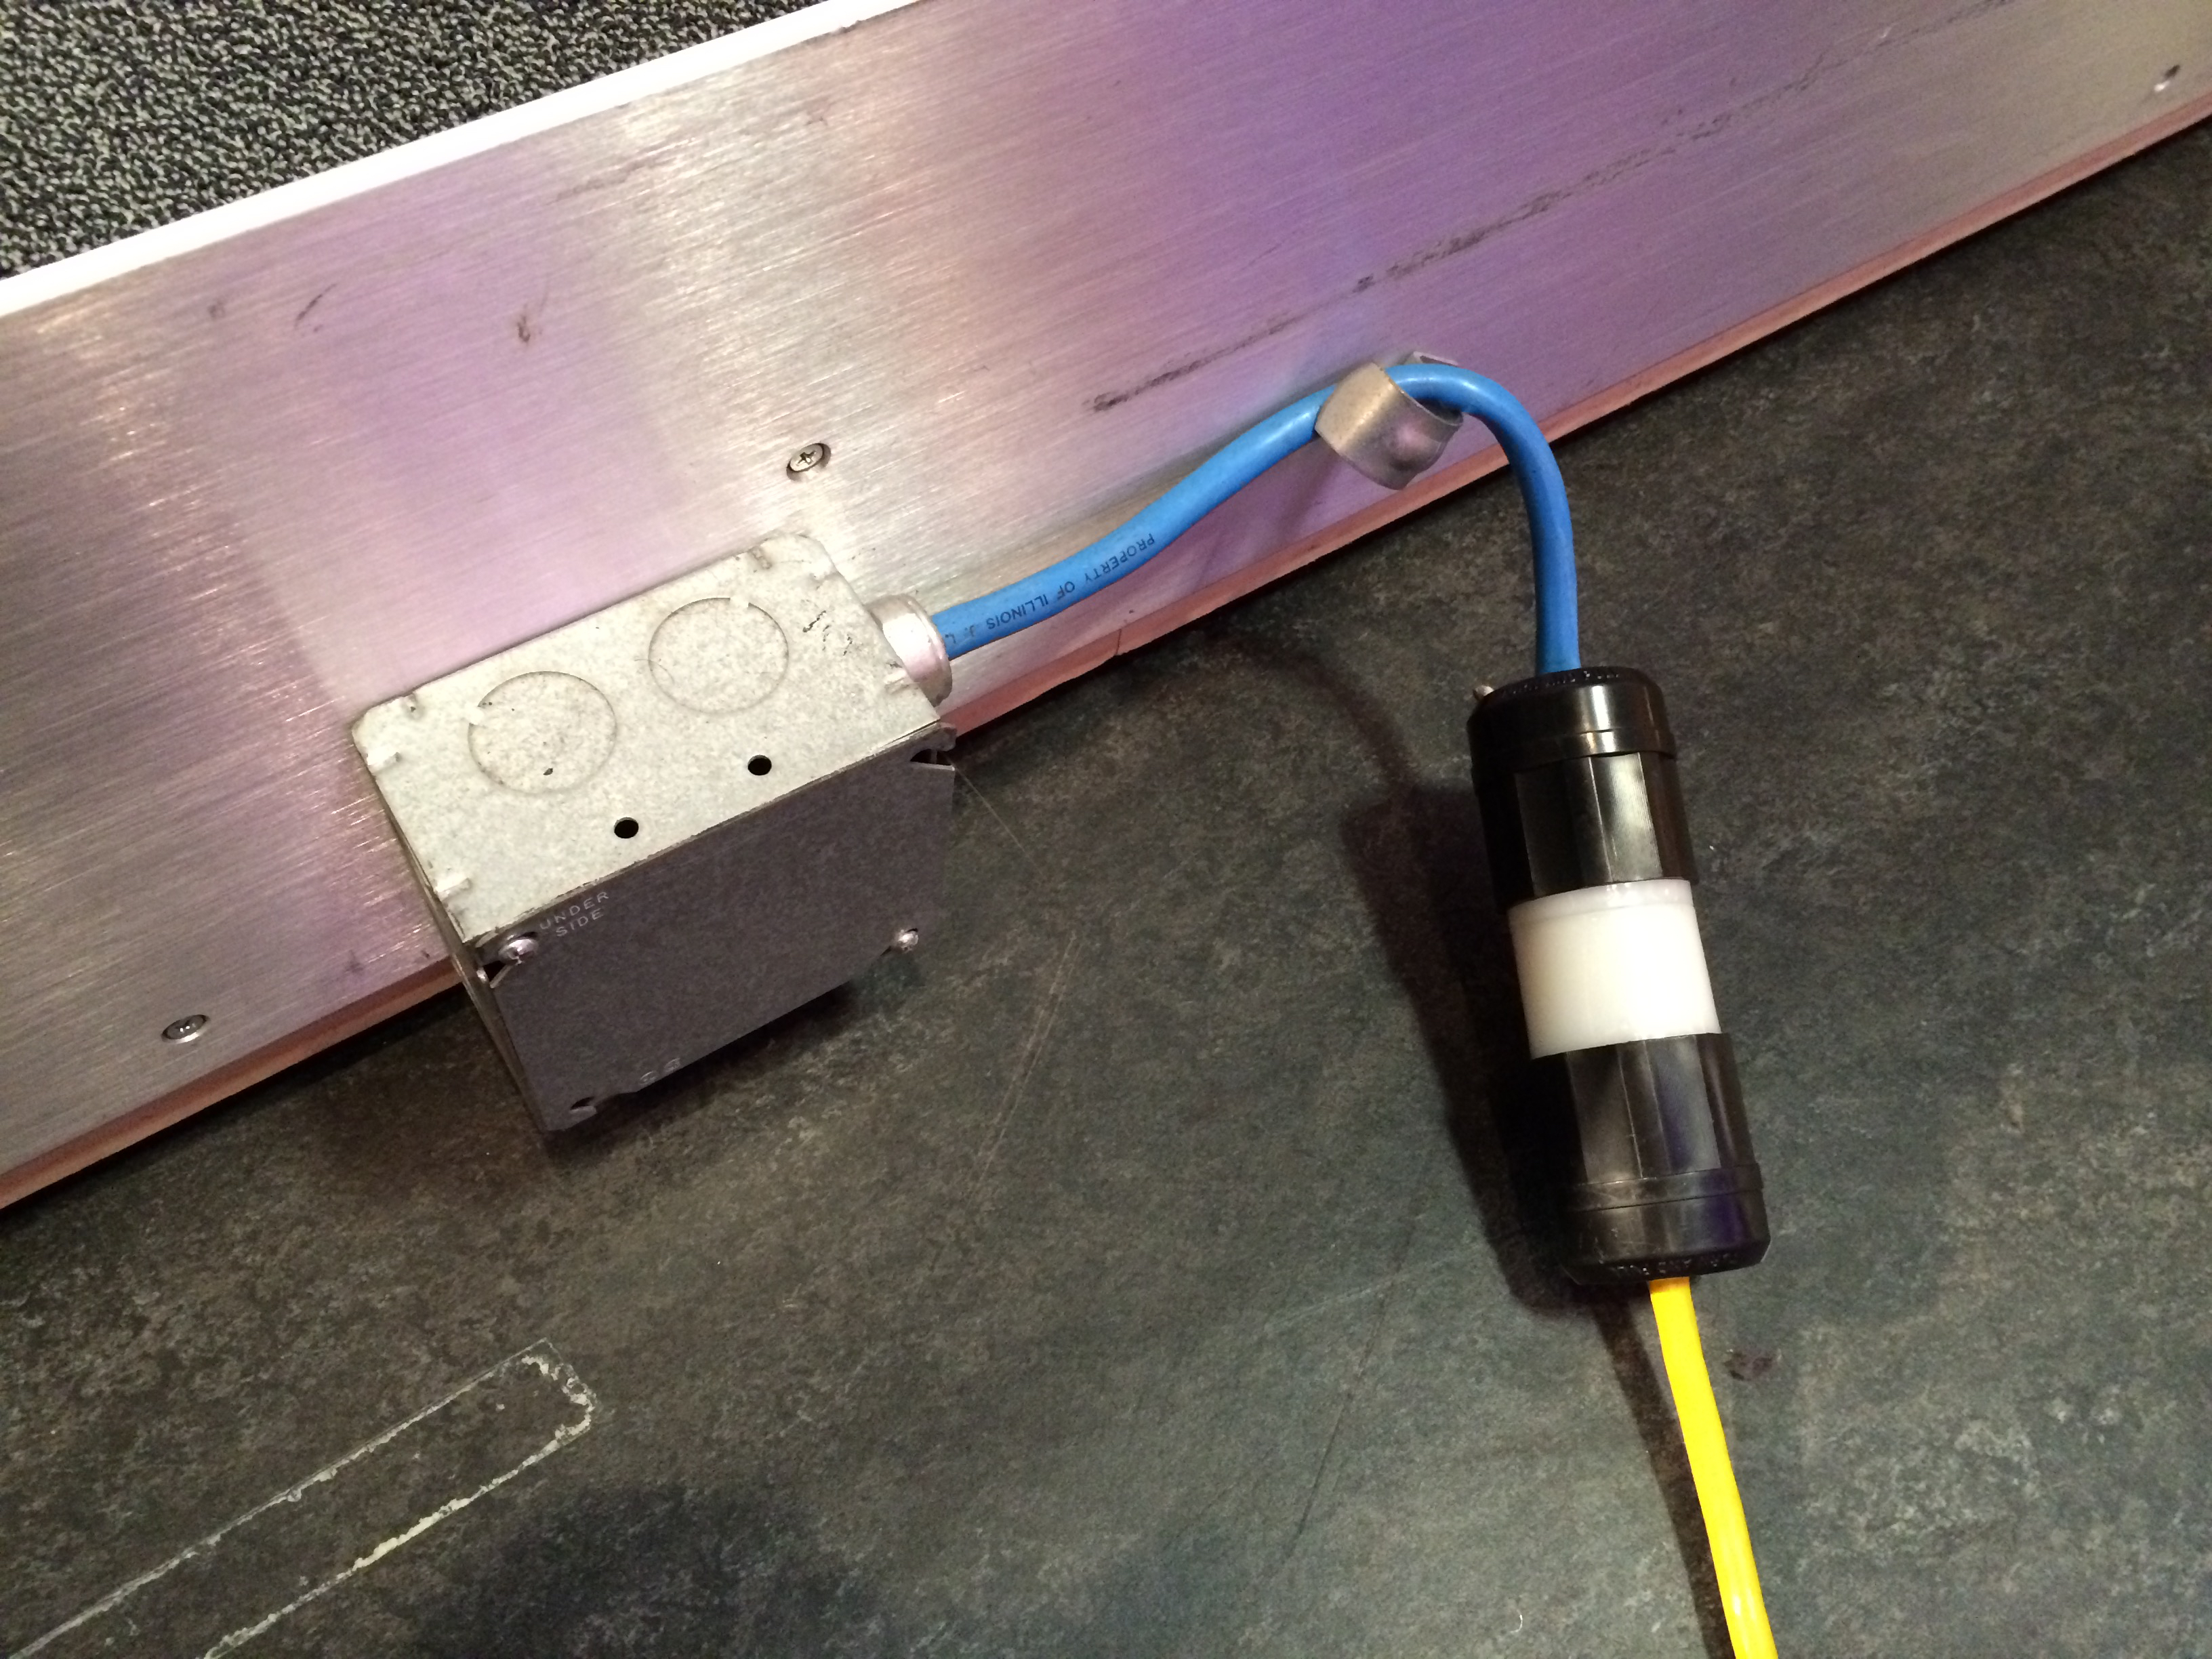
This is the cord that needs to be plugged in so that the monitors in the desk work.
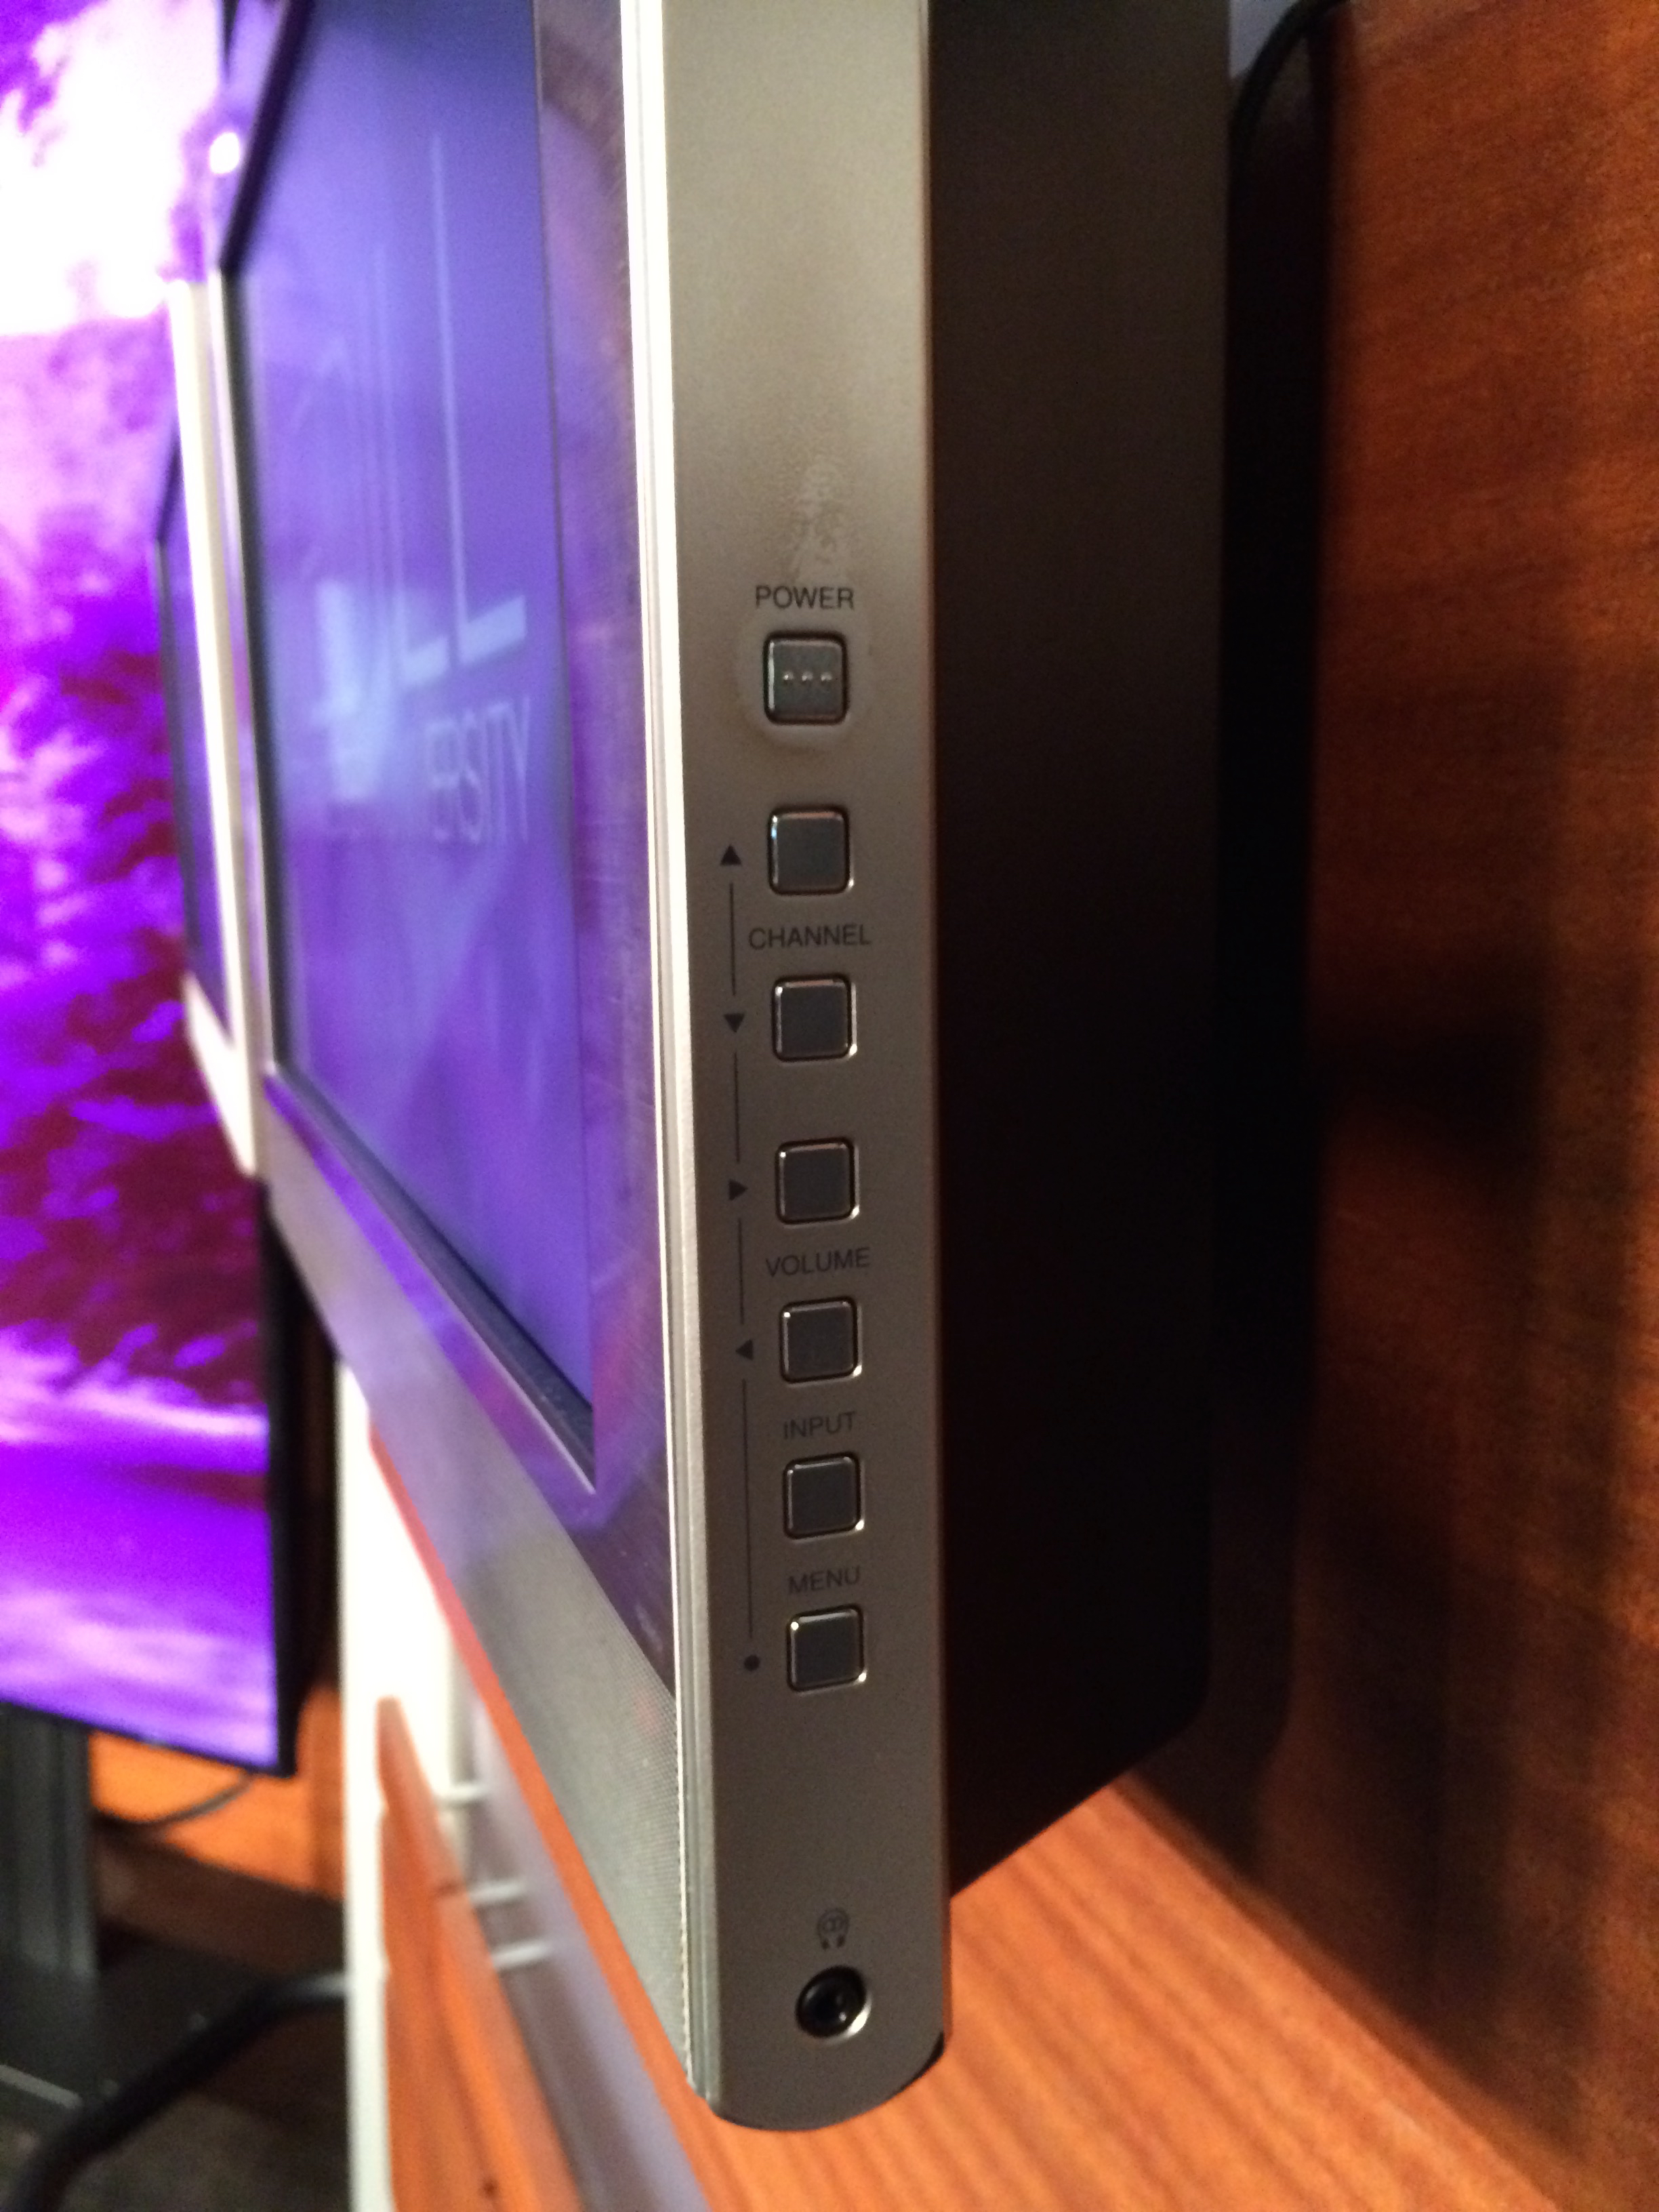
The TVs in the studio have power buttons. Turn them on. If there isn’t a graphic, go to the back.
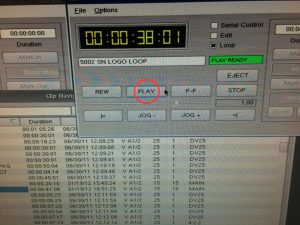
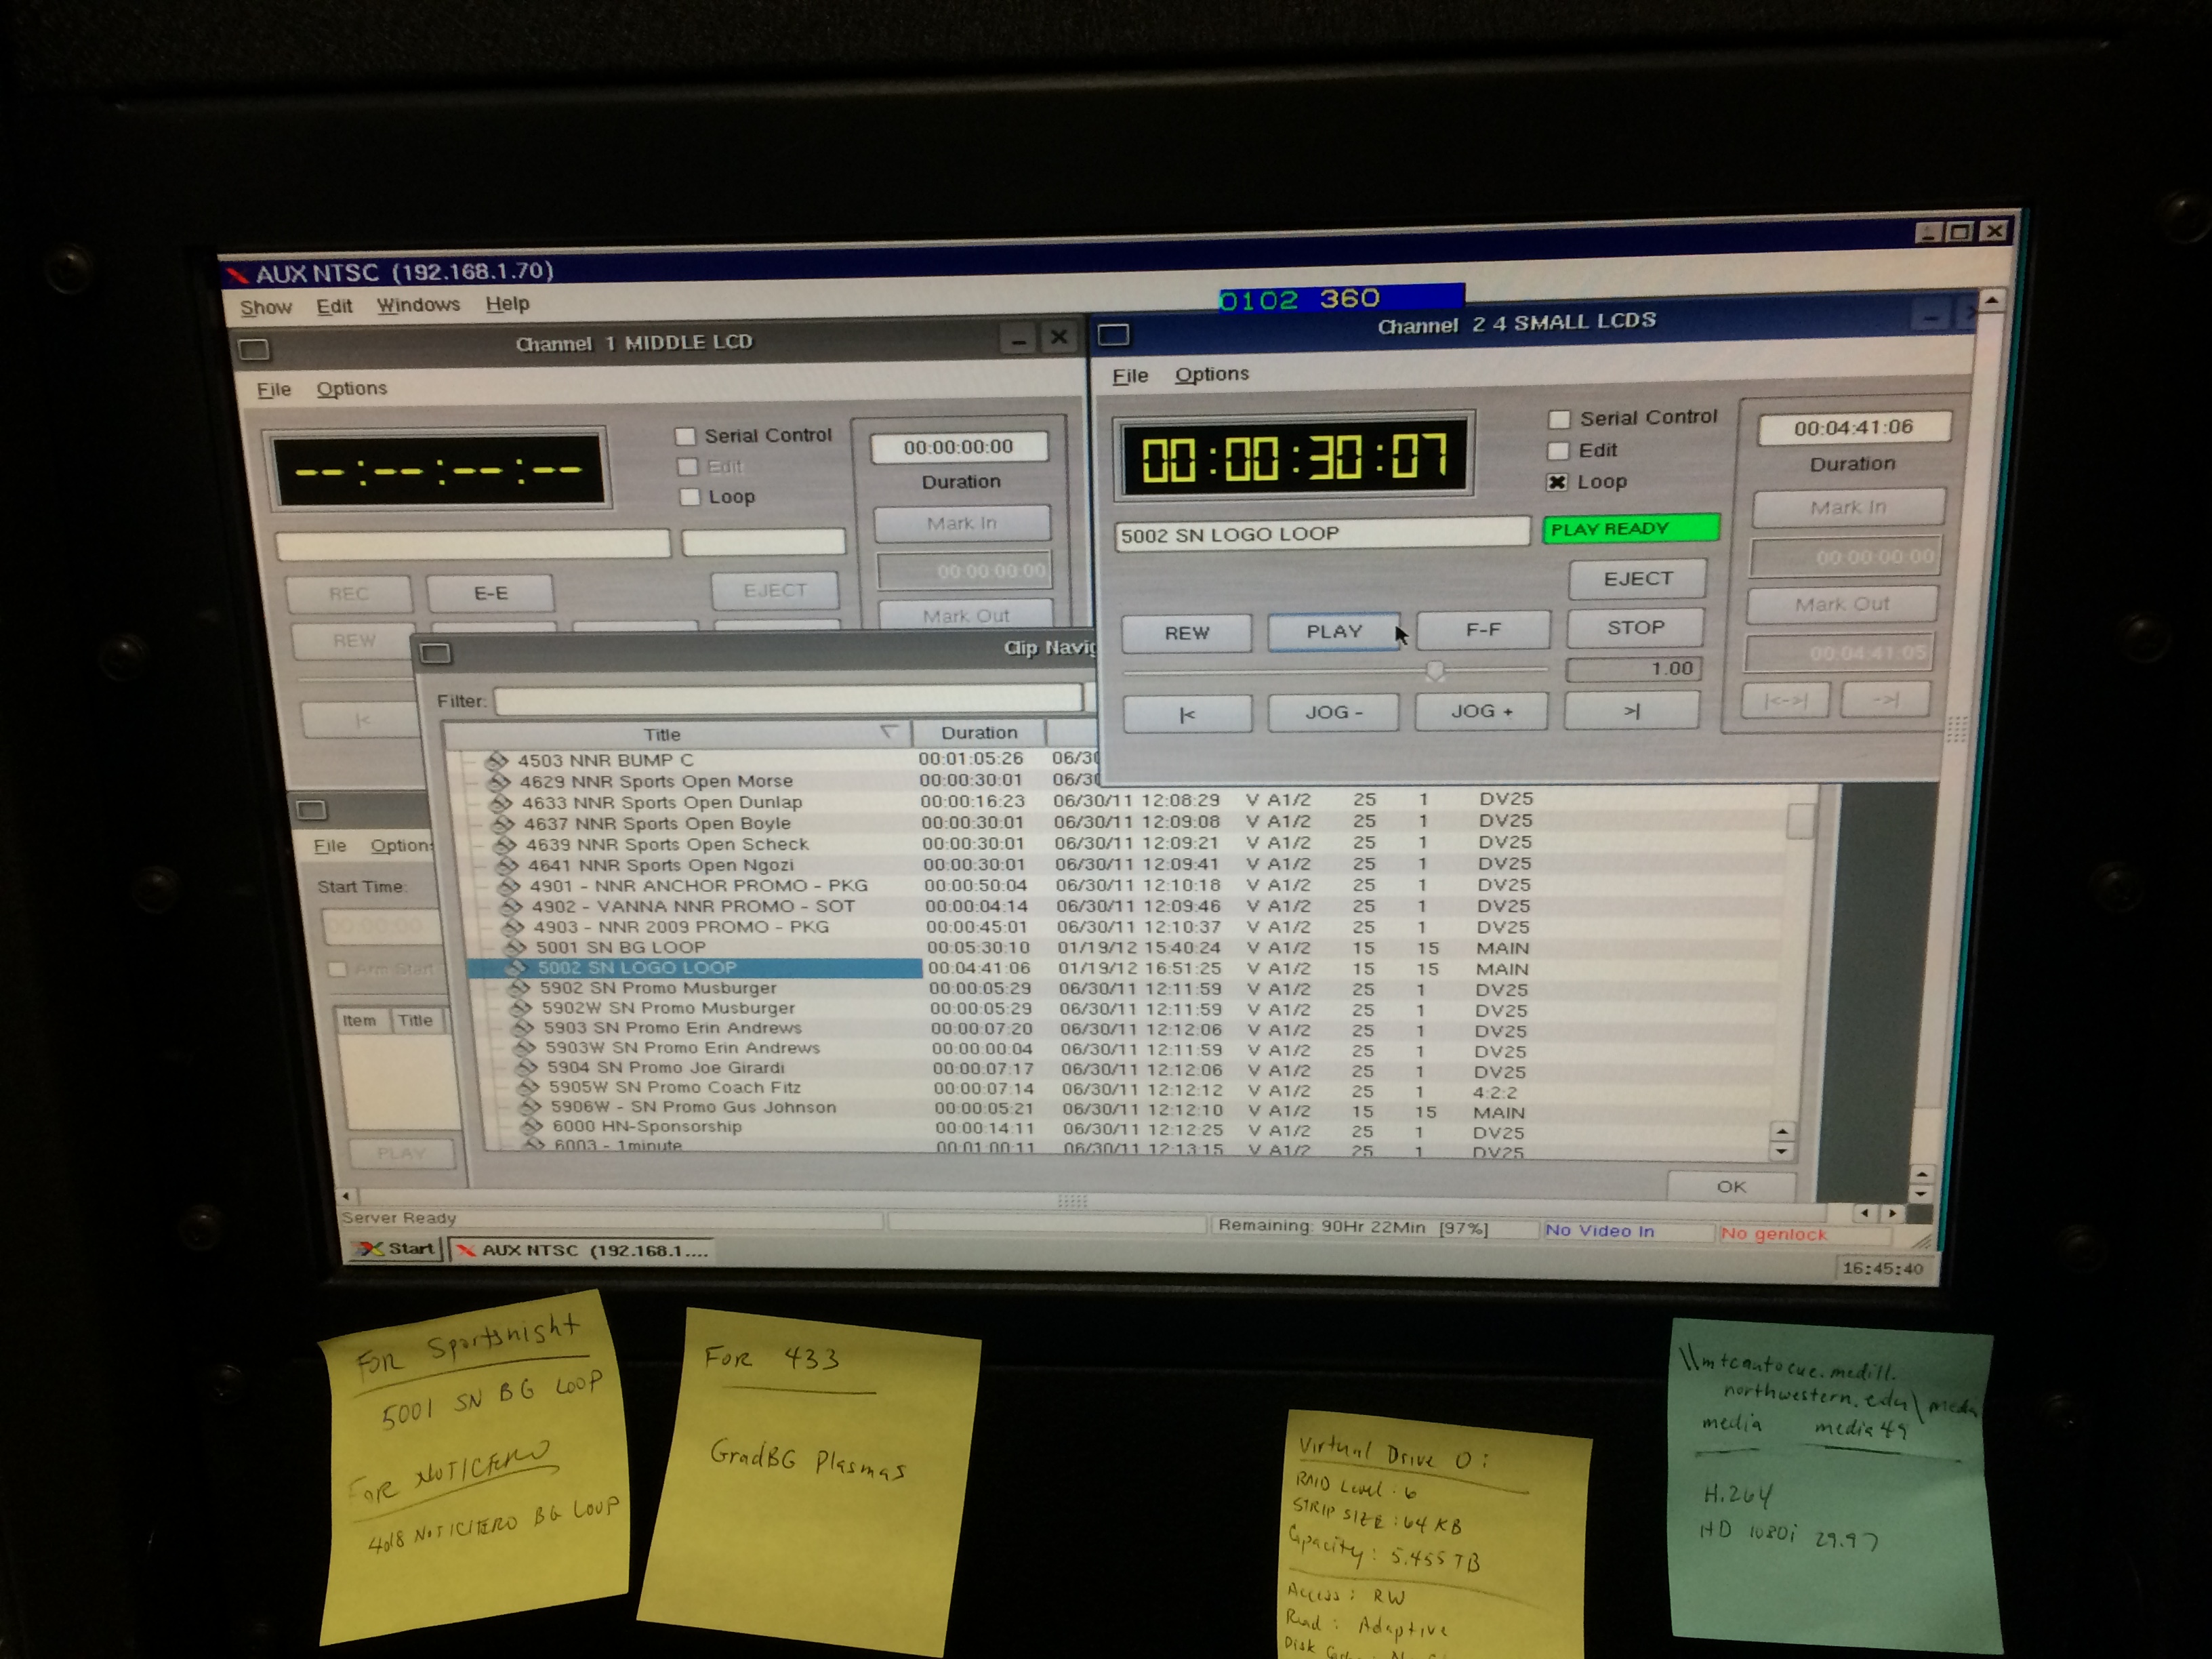
Find the clip you want in the list (you can search) and then drag to one channel and then hit play.
If the cameras aren’t on – here’s an on button.
This is used to adjust exposure, etc on the cameras. The black levers adjust the iris/aperture/exposure:

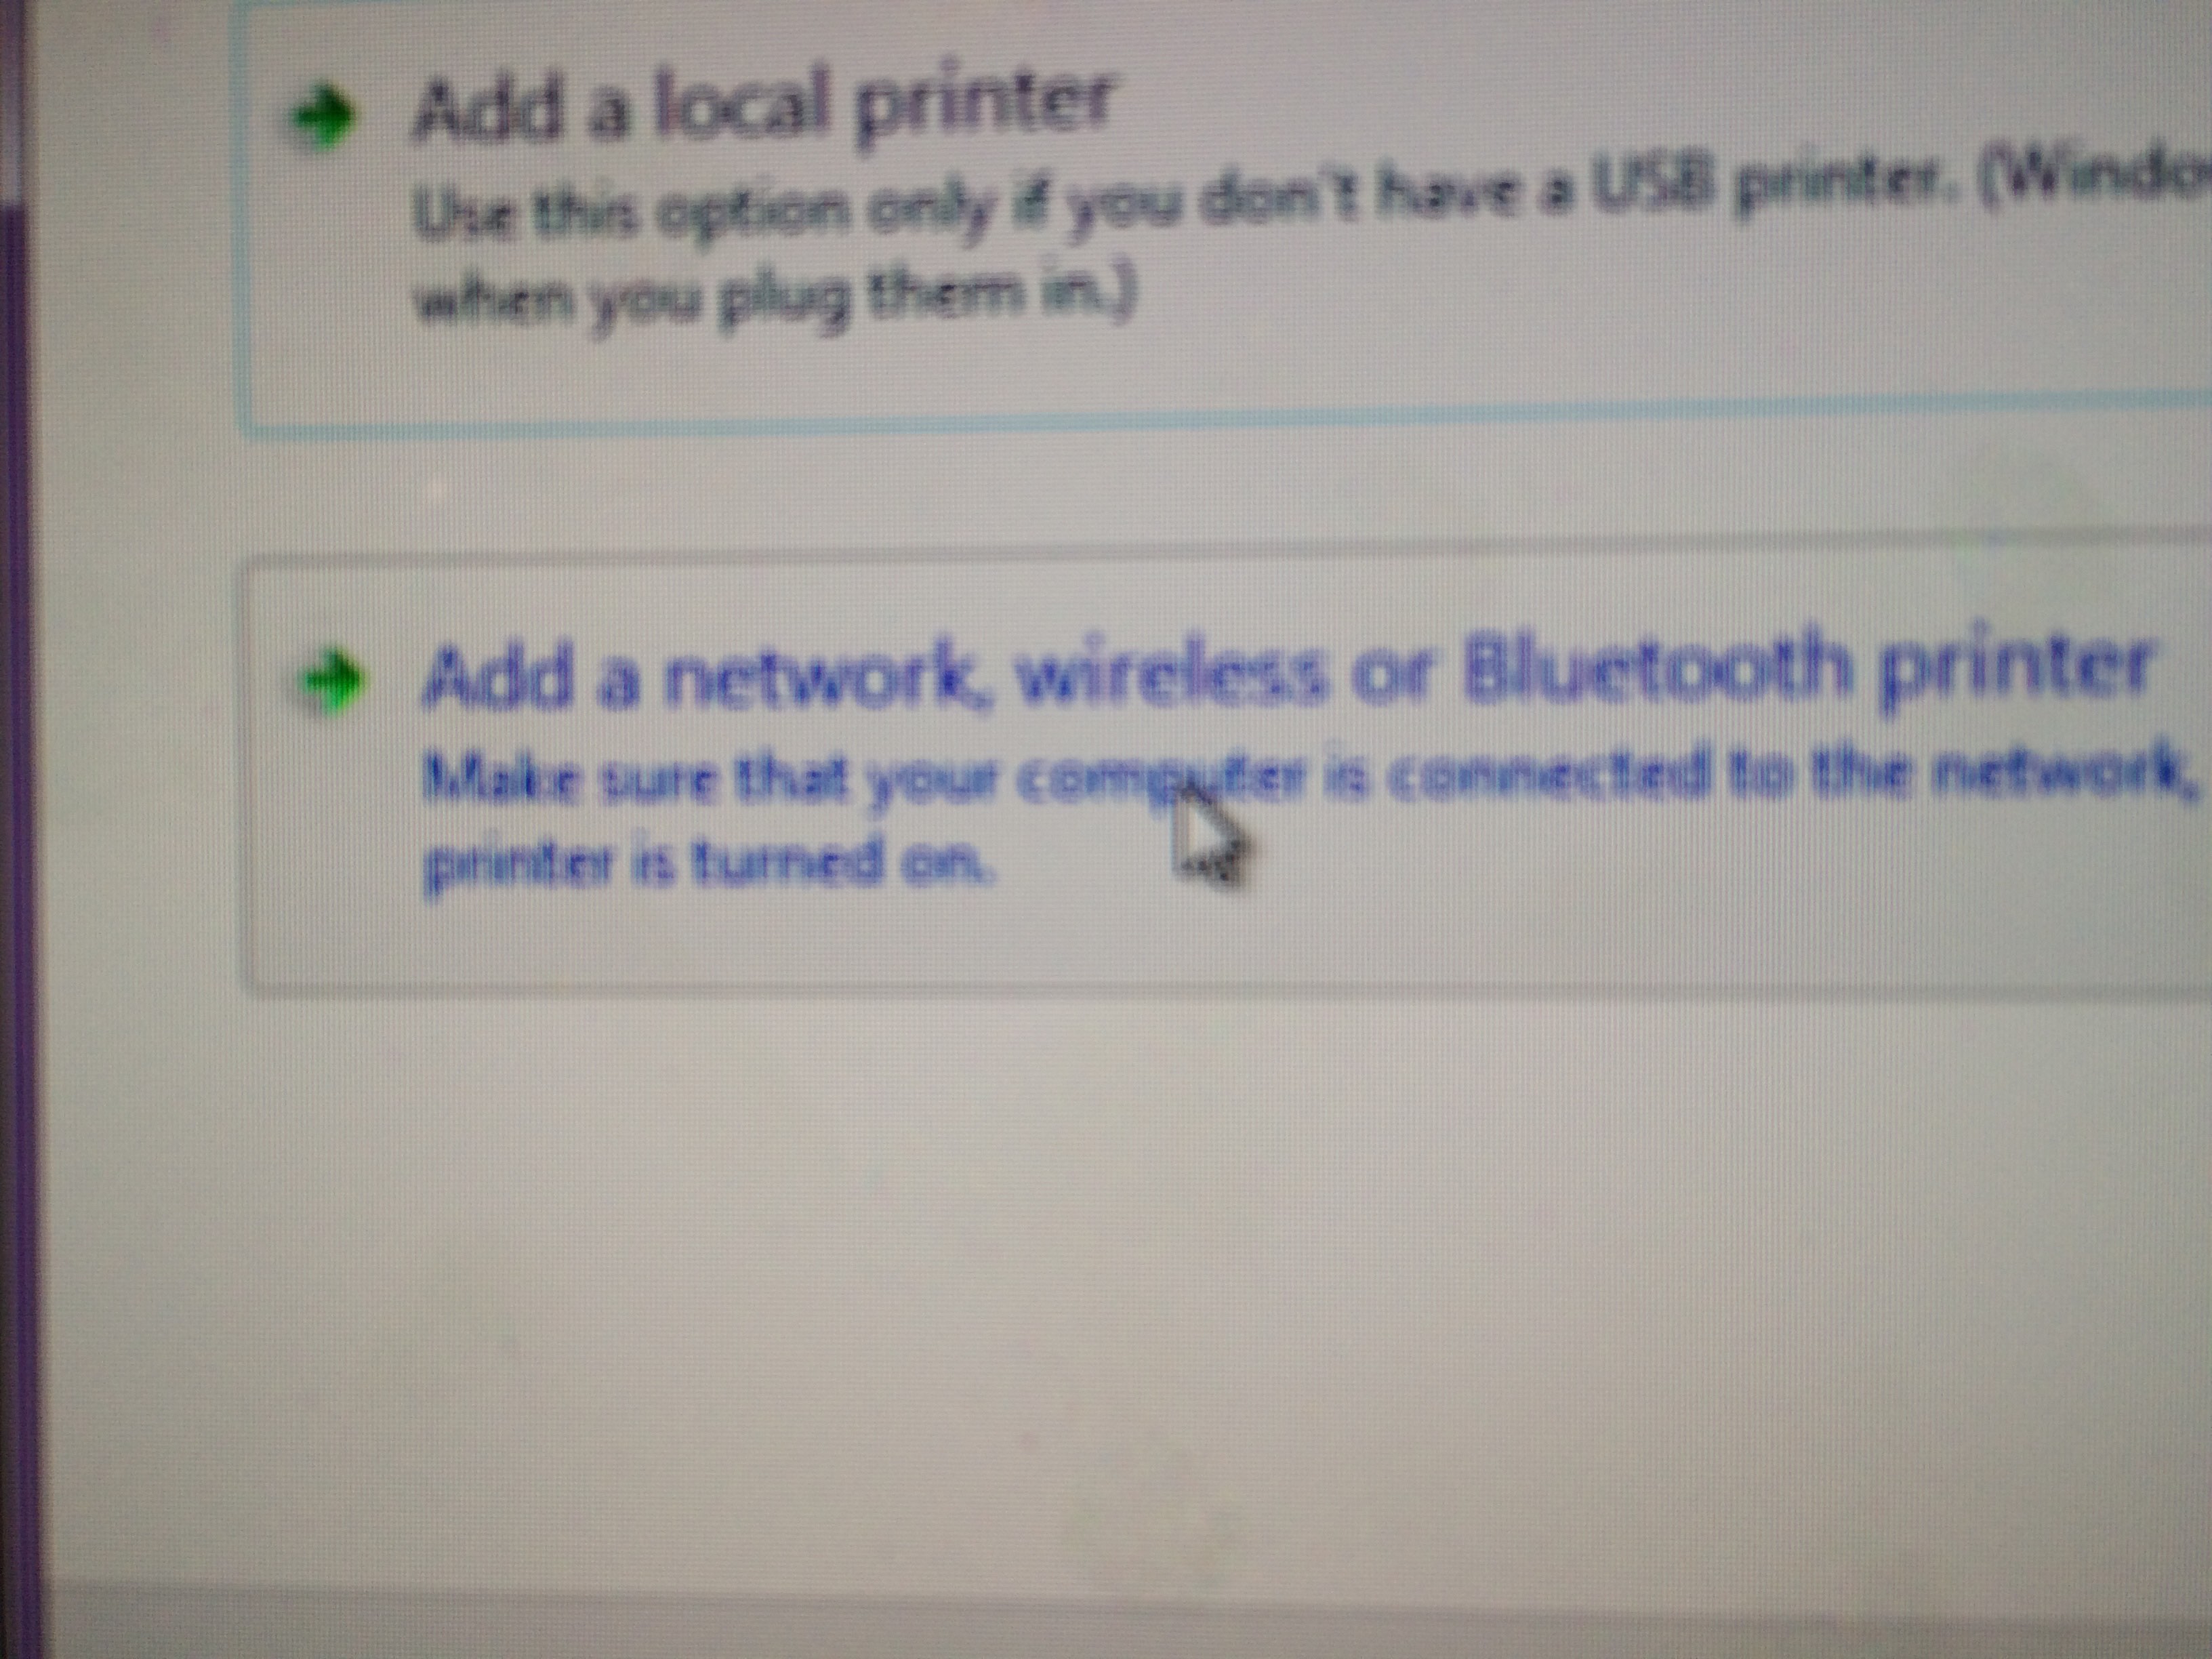
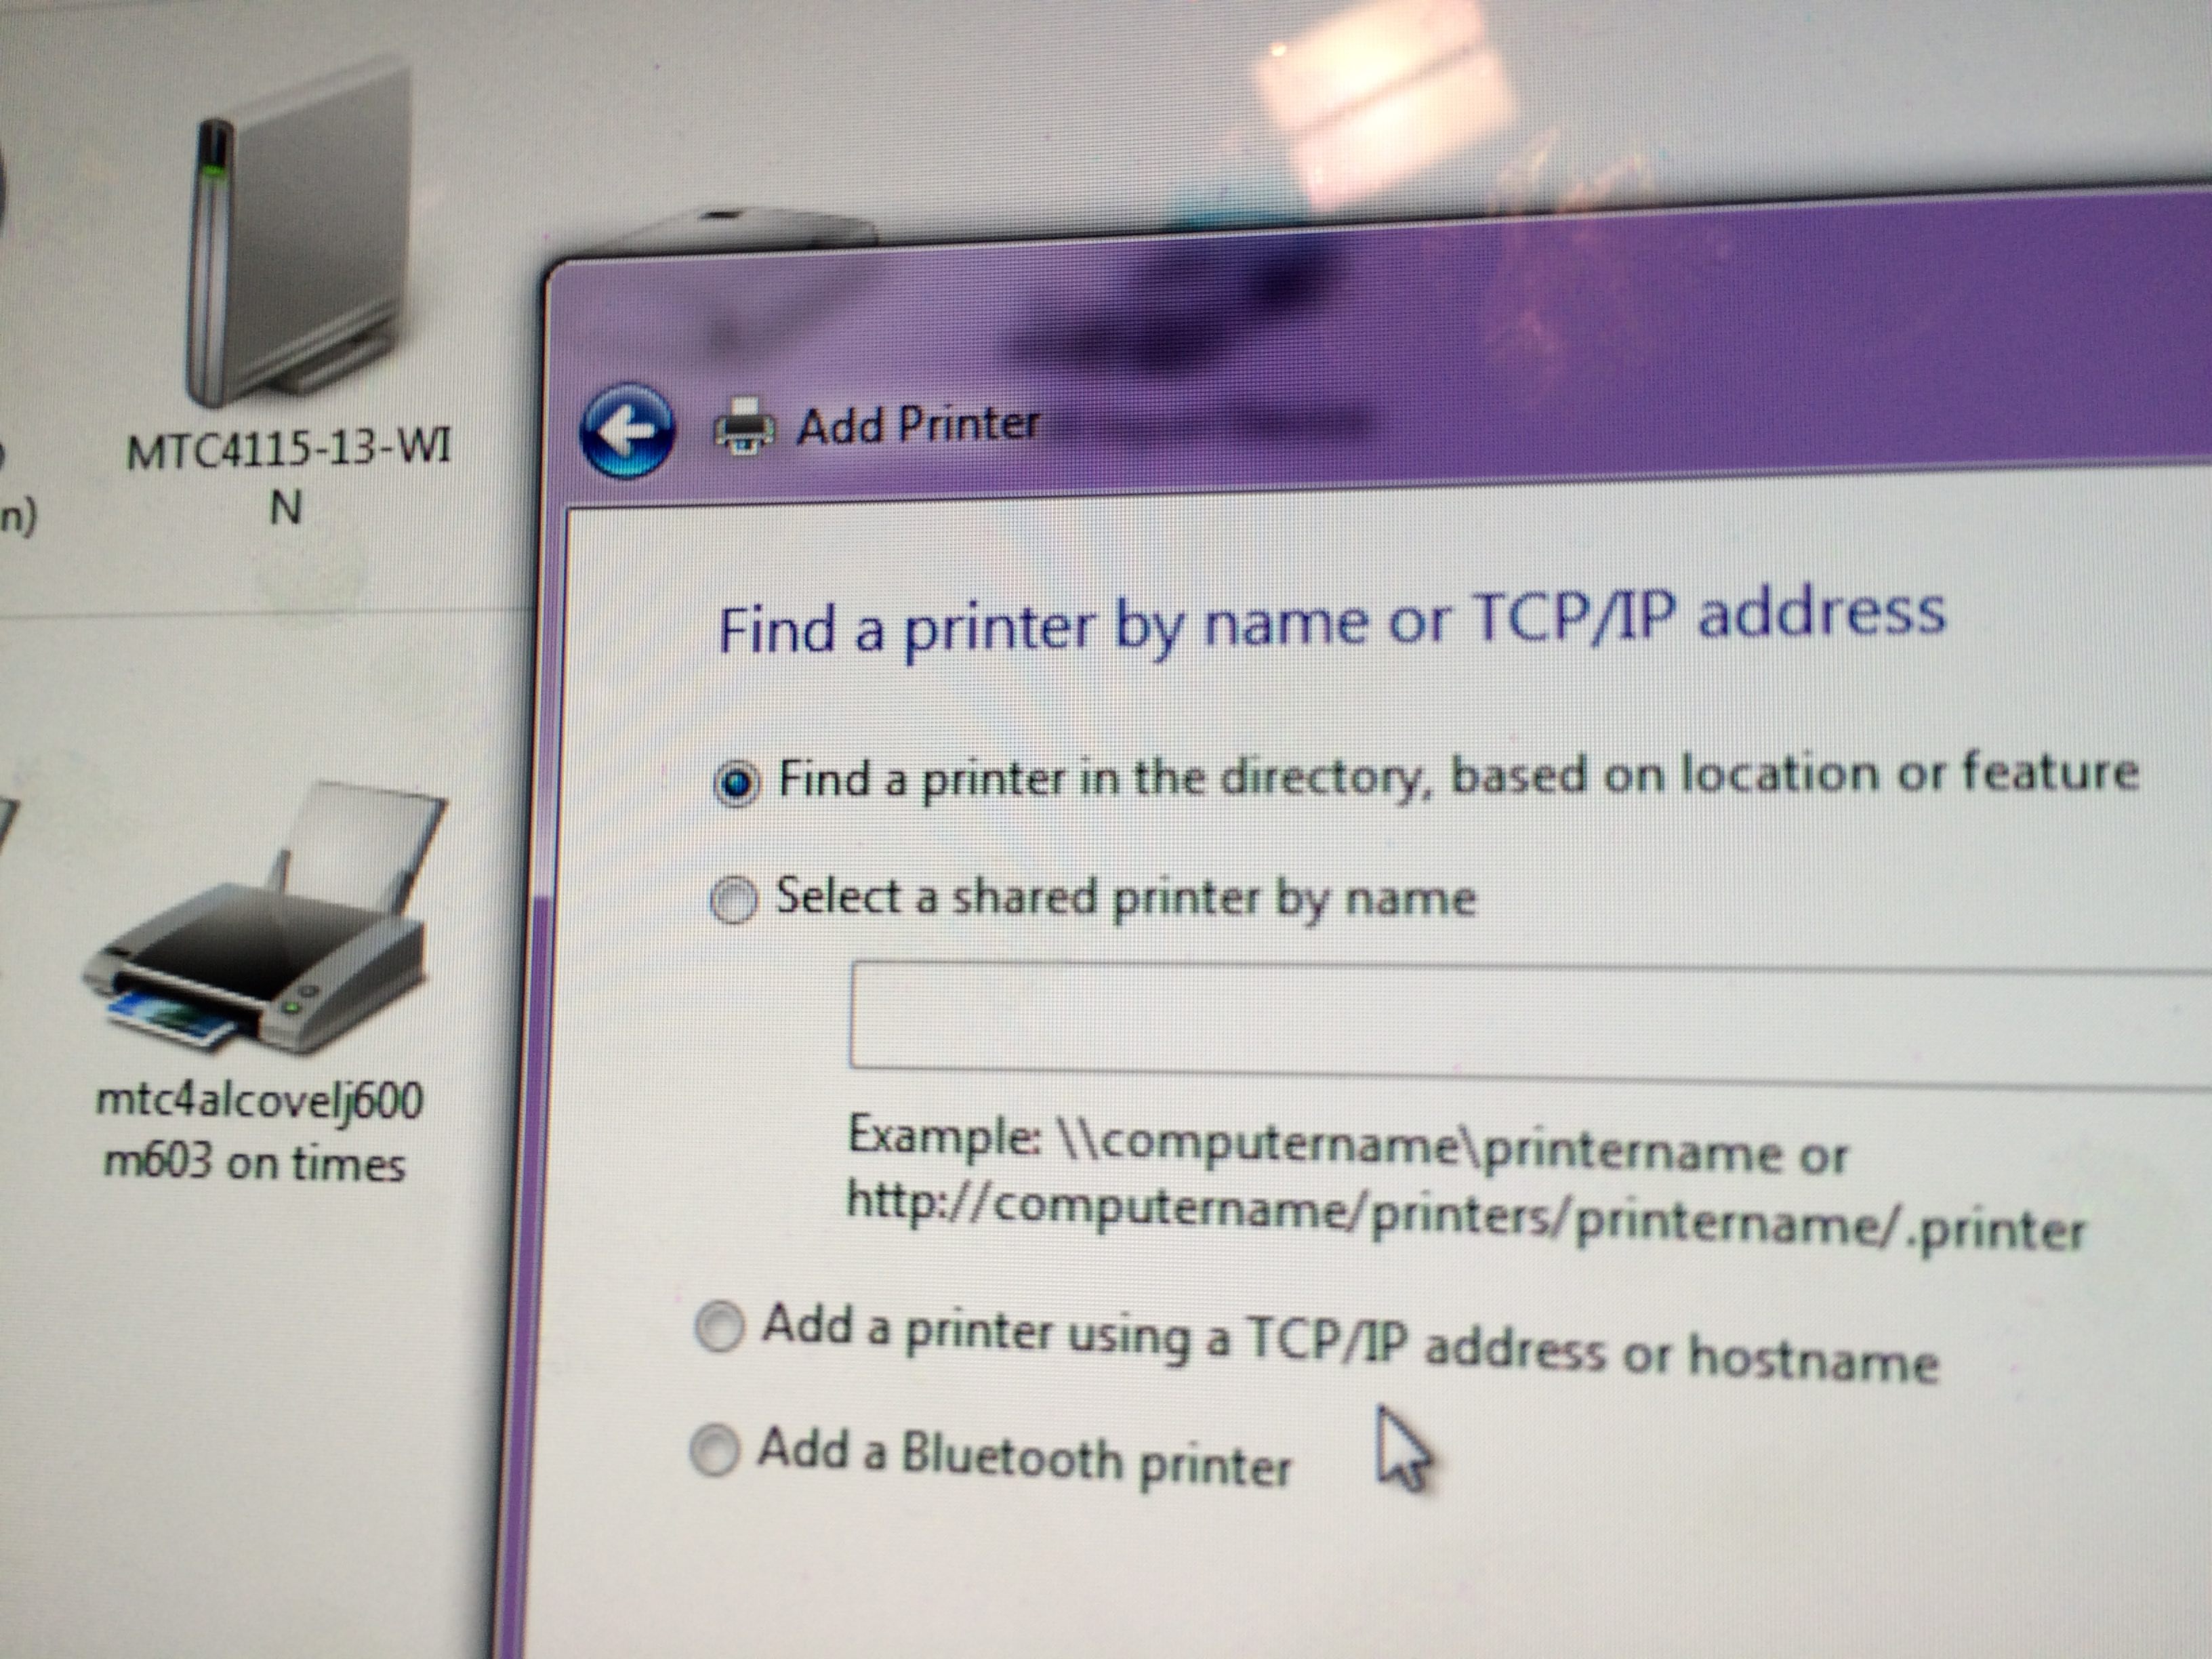
Printing to Alcove:


PRE-PRODUCTION
General:
1. Reserve studio space through Matt Schrock, Jeff Prah & Larry Stuelpnagel.
2. Get in touch with the tech crew currently headed by Max.
NNN:
Interviews (SOTs):
1. Focus: Make sure to use the manual focus so that the interview subject’s face is what’s in focus – not the background. To focus on your interviewee’s face, zoom all the way into his/her eyes and focus them, then zoom back out. And when it comes to backgrounds, please try to avoid doing the interview in front of a white or solid color wall. If you’re in a room with low light and the interview looks grainy and out of focus, ask the person to nicely step outside the building to do the interview.
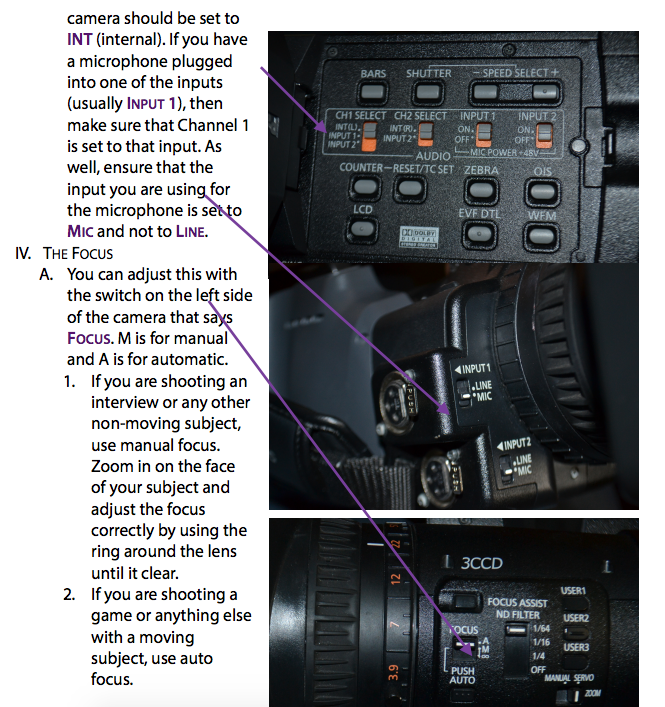
2. Audio Settings: Plug your microphone into either INPUT 1 or INPUT 2, and be sure to adjust the audio settings so that one of your channels is on that input. The other can stay on intr, which is the internal mic on the cam. Once you put the mic on your interviewee, be sure to hide the cord by asking the subject to put it under shirt or tucked into jacket.
3. First Question: Your first question once you’re recording should ALWAYS be please say and spell your name and state your title. It is essential to gather this information in interviews when it comes time to put together the lower third graphics that accompany the SOT.
4. Don’t look at the camera: Remind the interview subject to look at you off to the side of the camera. This prevents the person from looking straight at the camera and helps maintain the rule of thirds for interview framing.
5. Do not stand up while shooting an interview of someone sitting down or vice versa. Stay on the same level as your subject.
Shooting Video (Broll):
1. Tripod: The tripod is your friend and is essential when it comes to avoiding shaky video. Always use a tripod.
PLEASE BE CAREFUL WITH THE TRIPODS.
2. Variety of shots: Make sure to record a variety of wide, medium and tight shots. All your video in a VO shouldn’t be at the same depth because it’s hard on the viewer’s eye. The more variety of shots you get, the easier it is to edit.
3. Length of shots: Make sure to record AT LEAST 15-20 different shots for VOs (even more for packages). Hold each shot for at least 8-10 seconds so you’ll have enough of that shot to use when editing.
4. Filter and iris: Wherever you are filming, make sure to adjust the filter and iris (AKA exposure) so the video is neither too hot nor too dark. This becomes extremely important when shooting outside in very bright spots (especially on the Lakefill). Remember, the filter is the setting on the side that says ND with fractions like 1/16. To adjust iris, flip from focus to iris on the button on the side of the camera, and use the ring by the lens to adjust iris.
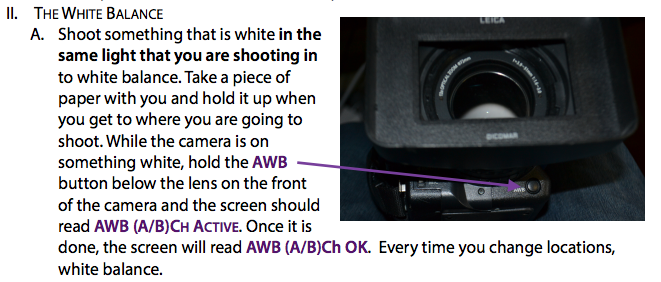
5. White Balance: Carry a white piece of paper with you at all times when filming so you have something to point the camera at for white balancing purposes.
Editing:
1. Settings: The settings for your sequences in Adobe Premiere should be AVCHD 1080i, then 60i. Please name your video in this format: DATE – TITLE – FORMAT. For example, 20141105 – QUINN – PKG
2. PAD (VERY IMPORTANT): Every SOT needs 20-25 frames of pad up front. What that means is that the video clip should play for that long (a little less than a second) without audio before the sound bite begins. SOTs also need at minimum 5 second of video on the end without audio. Pad at the beginning and end of SOTs are essential to help make the show as clean as possible technically. This rule also applies to packages.
3. Sequencing: When editing VOs, make sure to mix up your wide, medium and tight shots.
This is called sequencing. Also, if you’re VO script is slotted to run for 30 seconds, make sure the video you cut runs at least 10 seconds longer the time allotted for the VO in the rundown. EX: if the VO script is in for 30 seconds, the actual video you edit should be at least 40 seconds.
3.5. Lower thirds template (LINK TO DOWNLOAD).
Interview subject: first line mixed case name, bottom line all caps with title
4. Exporting: The settings are H.264, then 1080i 29.97. For YouTube, export with 1080p HD.
Writing:
1. When writing VO/SOTs, the last line of your VO script should lead into the sound bite.
This often times means referencing the person who appears in the SOT as a way of setting up what the person has to say.
2. When writing package scripts, try to identify a main character for your story. This starts during the reporting and interview process of starting to think in your mind who might be a good character to center the story around. Not all packages fall into this mold of requiring a main character, however, telling a story through the perspective of a main character usually enhances the quality of storytelling.
3. SOTs you use in packages should be no longer than 12 seconds (unless it is a breathtaking, emotional SOT that cannot be broken up).
SportsNight (PDF version)
I. The Cameras
We have two of them. We also have two tripods. You should take very good care of them because we’re a television show, didn’t think that needed to be explained. Why did you ask.
The camera should contain:
1. Camera
2. Lens Cap
3. Battery
4. Battery Charger
5. Lavalier/Lapel Microphone (in case)
6. XLR Cable
7. Stick Microphone
8. Microphone Flag
Let us know if it doesn’t have one of those above things. Please remember to charge the battery after you are done with the camera and before you hand it off to the next person. The lapel/lav microphone is the preferred manner of recording sound for interviews.
Definitely use it any time you are doing a sit-down or any one-on-one. If you are in a scrum, hold out the stick mic as close to the subject’s face as you can. It’s perfectly fine if the microphone shows up in the shot. Put the flag on it to show our swag.
Make sure you double-check that the battery is charged, the camera turns on, and the microphones work before you go out into the field.
REMEMBER TO BRING YOUR SD CARD.
There are four main things you need to keep track of to make sure that your video turns out stellar:

III. THE AUDIO
A. Ensure that the camera is picking up sound. You should be able to see levels jumping up and down at the bottom part of the screen. If you are shooting a game or practice and you want natural sound, both channels on the side of the
Editing
We use Adobe Premiere. It might be scary at first, but it isn’t too difficult once you get the hang of it. Here are some basic steps:
1. Open Premiere Pro, a new project, and save it as whatever you are working on.
2. Go to File -> New Sequence (Ctrl+N) (Cmd+N for Mac)
3. Then you get a list of folders. Click on AVCHD > 1080i > AVCHD 1080i30 (60i)
i. Name your sequence based on what you are cutting for the show. Name it “Page Number (found in ENPS) – STORY SLUG – STORY TYPE”. (ex. A5 – FOOTBALL – VO).
4. BEFORE you import your clips, go to Edit > Preferences > Audio (or Premiere Pro > Preferences > Audio for Mac) and change all of the “Default Audio Tracks” to mono so that you can import different audio levels separately.
5. Go to File > Import, find your videos, and open them. (If Adobe Premiere tells you your sequence settings are incorrect when you drag footage into your timeline, click on “Change Sequence Settings.”)
6. All your video transitions should be 10 frames. You can create a transition by right- clicking on the front or end of your video clip (depending when you want the transition) and choosing “Apply Default Transitions.” You can change the length by double-clicking the transition itself and by typing in 10. (You can also go to Edit > Preferences > General > Change “Video Transition Default Duration” to 10 to permanently make that change.)
a. The two transitions that we use are “Cross Dissolve” and “Slide.”“Slide” is for when you are going from SOT to SOT without any b-roll. “Cross Dissolve” is for basically anything else.
NOTES:
- – You need pad at both the beginning and end of your piece. Have around 1 second of pad at the beginning of your video because it will begin playing before it actually airs. If there is audio, unlink the audio and video by right- clicking on the clip and pressing “Unlink.” Then drag the video about one second before the audio starts.
- – You need AT LEAST five second of pad at the end of all video. Stretch the video as long as you can.
- – If you’re cutting highlights, one great way to get pad is to slow your final clip down to around 75%.
As a general rule, each package should be approximately 1:30 in length. It should include:
a. 2-3 interviews
b. A stand-up! You will be doing this professionally and it is a great way to get yourself on camera for the show. So try to film one while you’re at practice or after you’ve done interviews.
1. There are two main types of stand-ups that you’ll use: a close and a bridge. Only use a close (to finish your package) if you already know how you’re going to end your story). Use a bridge to connect one SOT to another. Typically, a bridge is easier.
c. Sign Off – Finish your package or stand-up with a sign off. This should be “Your name, NNN Sports.”
1. The exception is if you are doing an anchor package or if the reporter is on set for their story. Then no sign off is needed because they will be there to intro and close their story.
A VOSOT should include:
a. A VO
- A 30 second script in ENPS for the anchor to read
- 30 seconds of recent, related B Roll to go over the script (don’t forget pad)
b. A SOT
- A 15 second video sound-byte that is related to the story (don’t forget pad)
- A lower third identifying the speaker
III. The Exporting
Generally, every line on ENPS is its own file. That means you’ll be exporting each part of your story separately (VO should be one file, SOT another, PKG is all one thing).
1. Go to File->Export->Media (Ctrl+M).
2. On the top, right side, click the drop-down menu for Format and select H.264.
3. Change the Preset to HD 1080i 29.97 if exporting for the show. Use the YouTube 720p or 1080p option if it is only for the web.
4. Click on the Output Name
a. Make sure the file is being saved in the same format as earlier (“PAGE NUMBER – STORY SLUG – STORY TYPE”).
b. Confirm that it’s exporting to your hard drive.
5. Hit export!
6. While the file is exporting, find “Connect to Autocue” on the desktop.
a. Username: “media”; Password: “media49”
b. Go to SPORTSNIGHT->Show Day (i.e. 10 – 17 – 2013)
7. Drag all of the files for your story into the Autocue folder after they’re done exporting.
8. Make sure to change the estimated duration of whatever you just cut in ENPS to exactly how long it is so that the producer knows.
ENPS:
A complete run down is critical to a technically-flawless show. The entire crew depends on it, so make sure it includes production cues as well.
The director can work with you on audio (M1 is NNN Open; M3 is NNN Tease; M10 is NNN Close), but make sure graphics are included in the rundown.
Hit the green ball, add column if you don’t see a place to notate where graphics go. Write SUPERS (Lower thirds), FPSS (Full Screens), and OTS (Over the shoulders).
For OTSes, the camera needs to know to move, so we notate that like so:
1*